This blog post is part of the Blog Series: Power’ing up your Home Office Lights with Power Platform. See introduction post for links to the other articles in the series:
https://gotoguy.blog/2020/12/02/blog-series—powering-up-your-home-office-lights-using-power-platform—introduction/
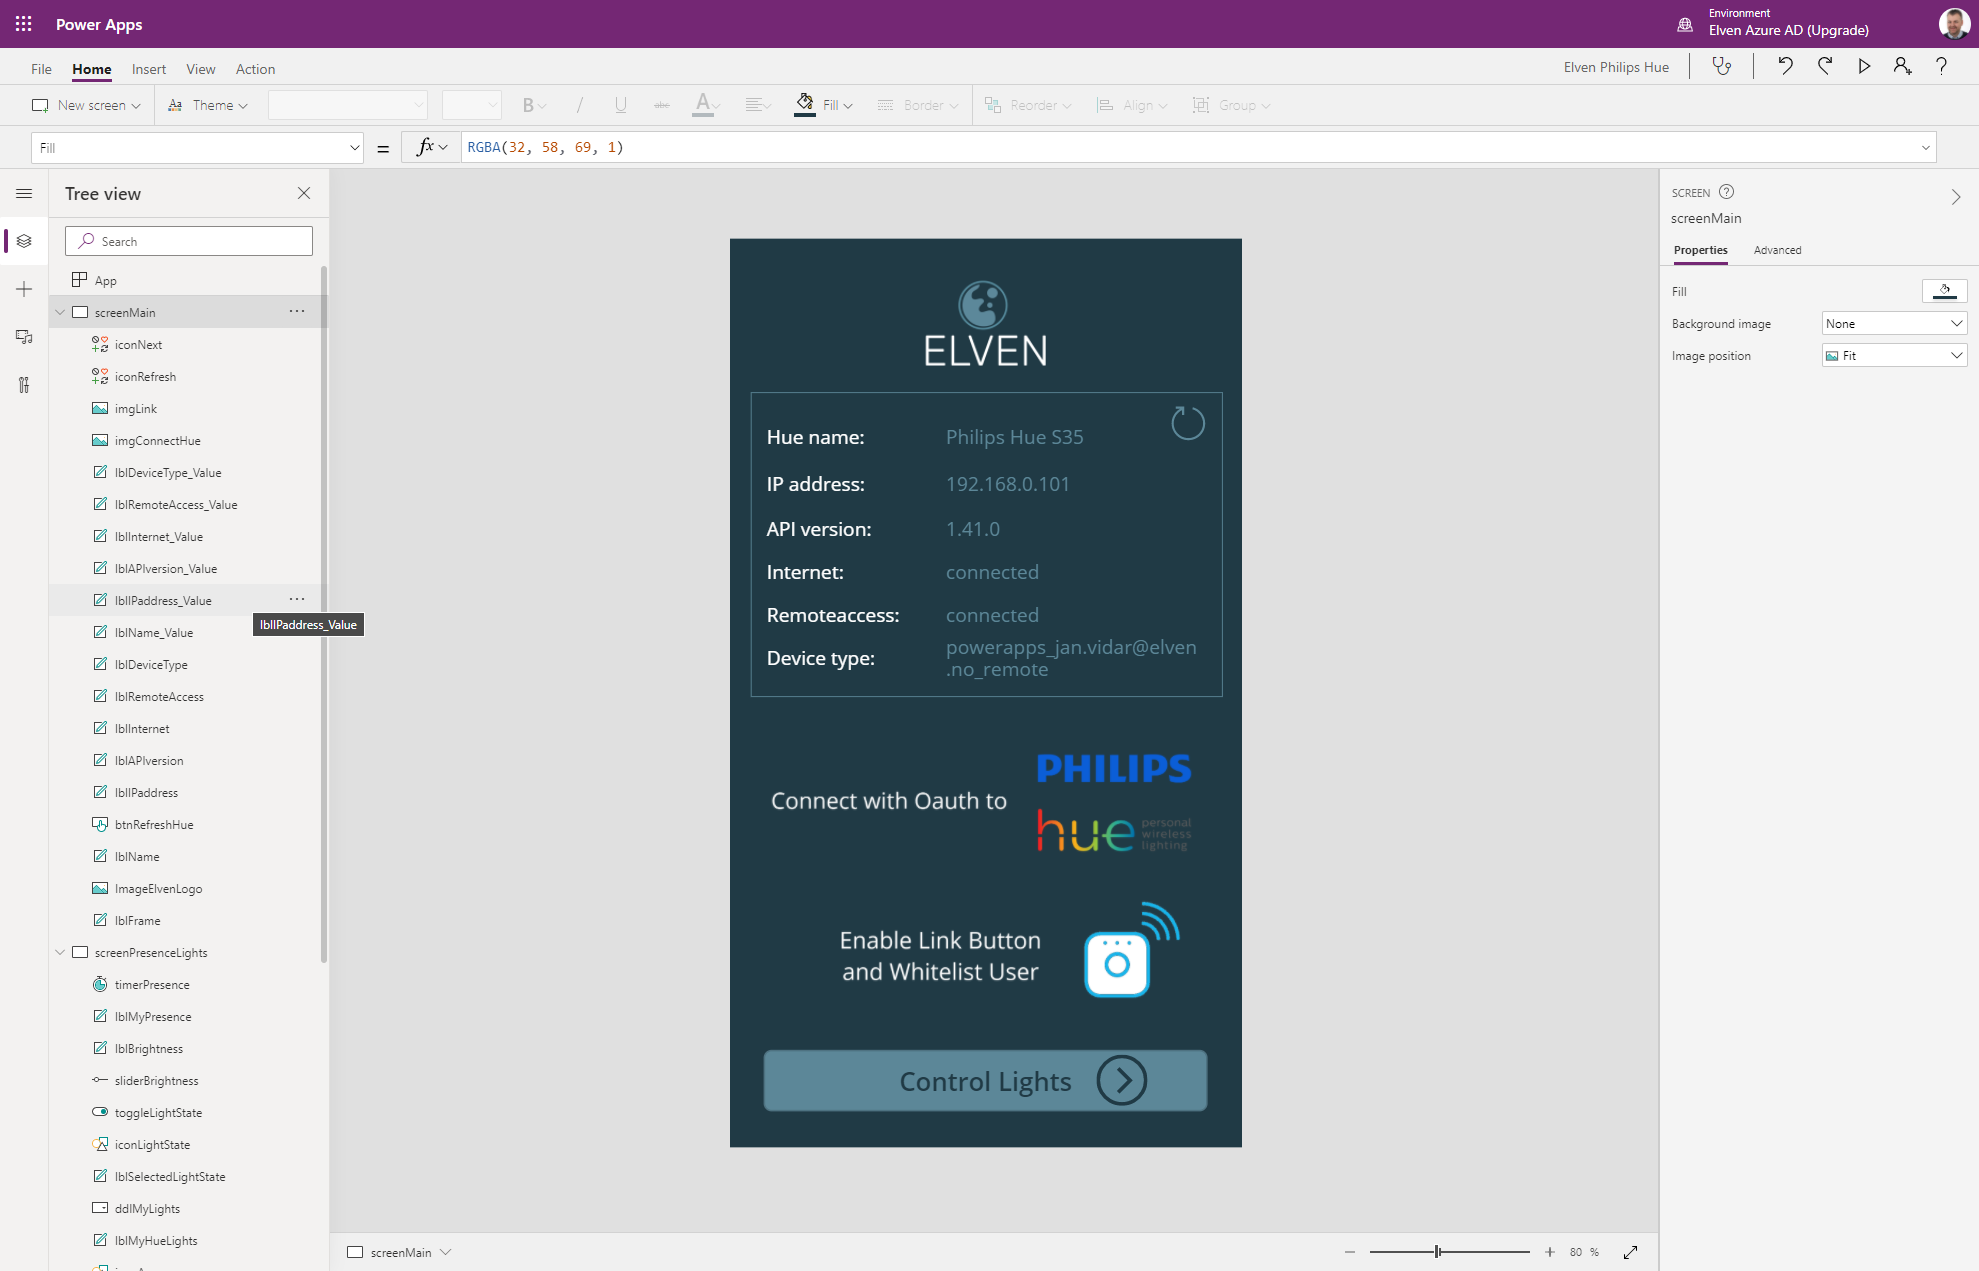
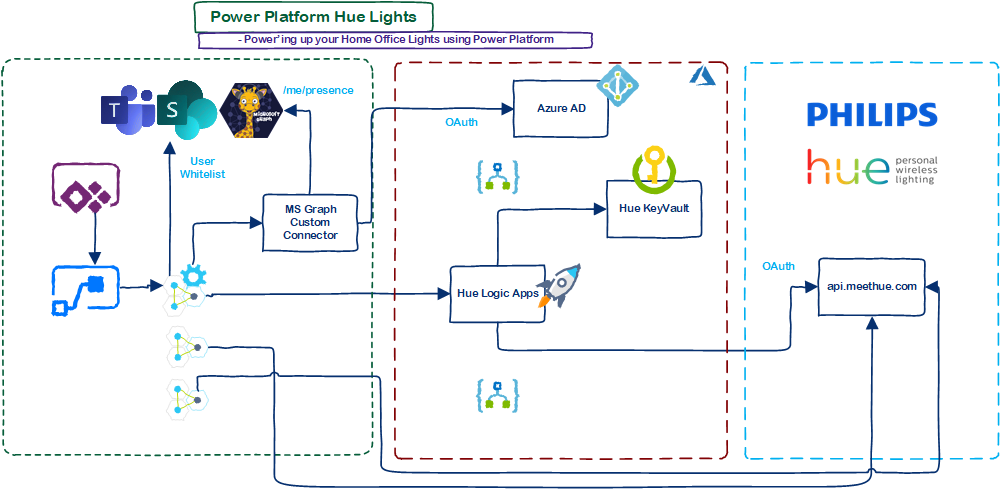
In Part 7 we built the main screen of the PowerApp, the topic for today is to build Flows and the PowerApp screen for controlling the Hue Lights:
If you want a quick summary of how this screen works, take a look at this video:
<YOUTUBE VIDEO PROCESSING, AVAILABLE SOON>
Building the Lights Control Screen
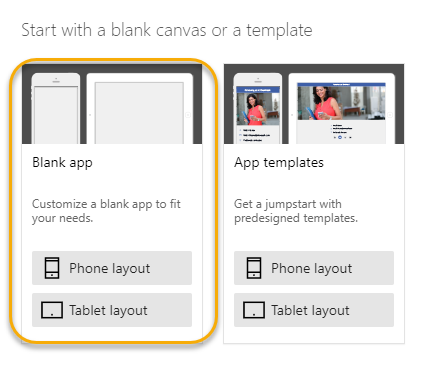
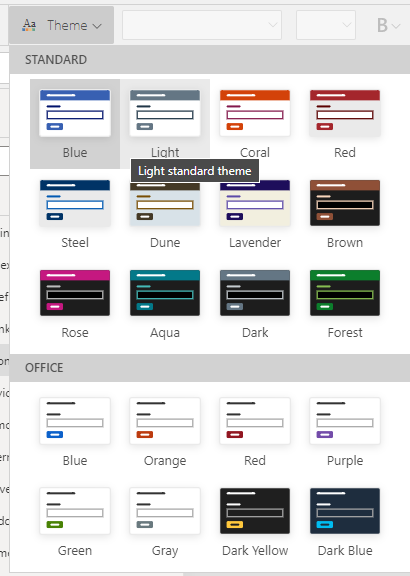
Start by adding another screen to the Hue PowerApp. If you have used a custom background color, logo and other graphical elements like I have you can do the same for this screen also. In addition to the label controls I’ve added for texts, I’ve added the following controls to my Hue PowerApp:
- Small circle icons/shapes to reflect color states.
- Toggle controls to set Light state On/Off and sync with Teams Presence On/Off.
- Dropdown list for listing the Hue Lights.
- Slider control for setting Brightness.
- I’ve also added a Timer control and set it to not visible.
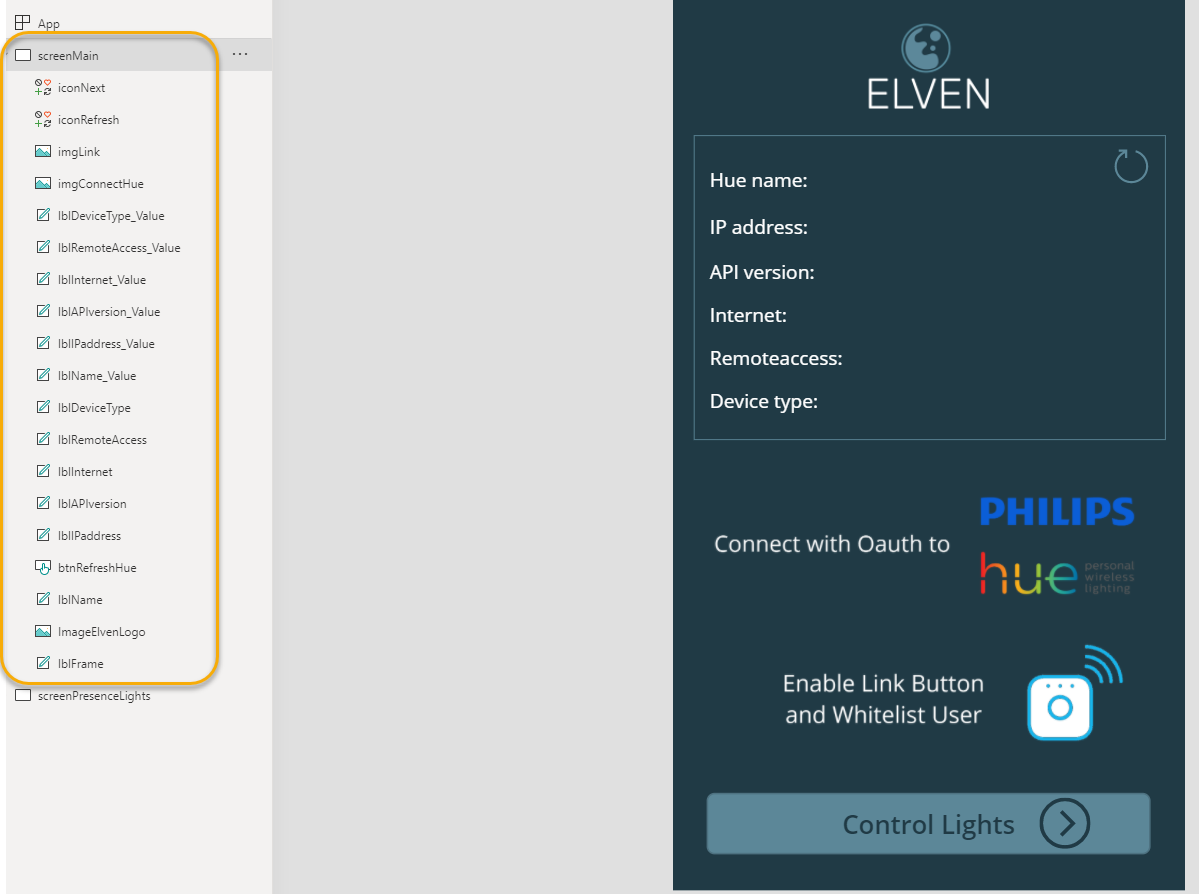
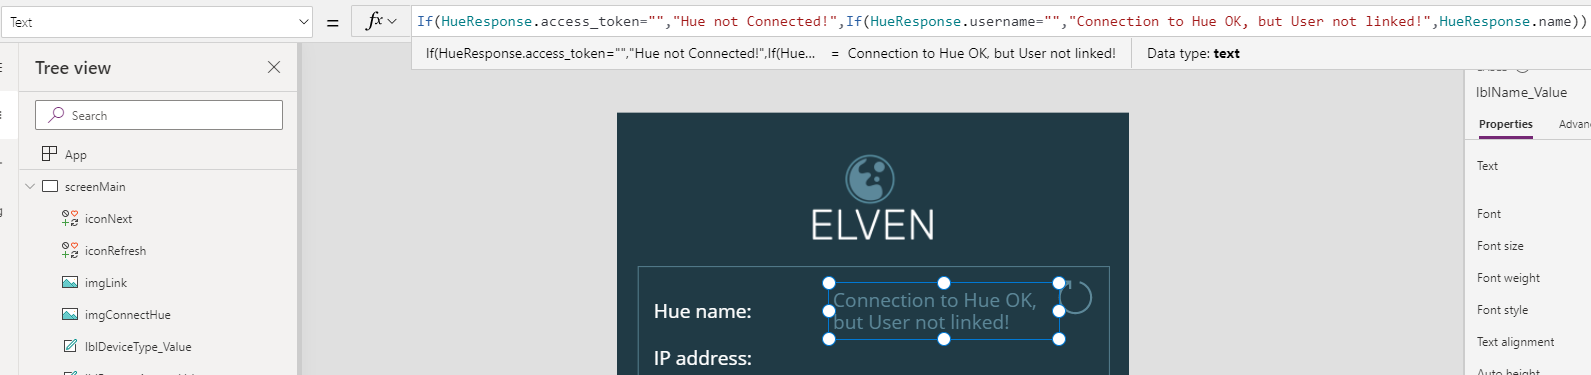
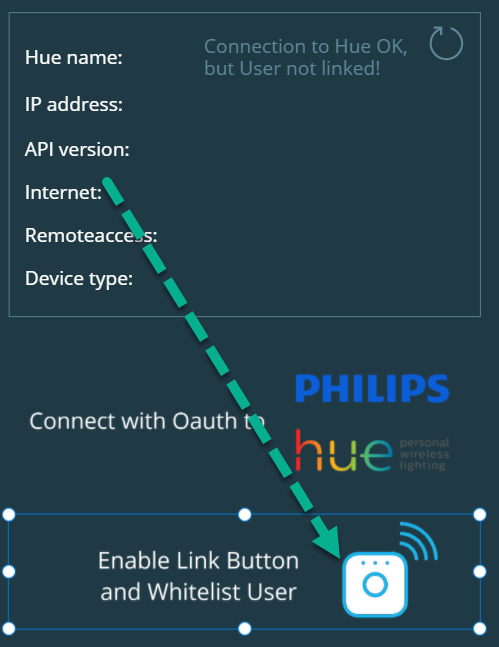
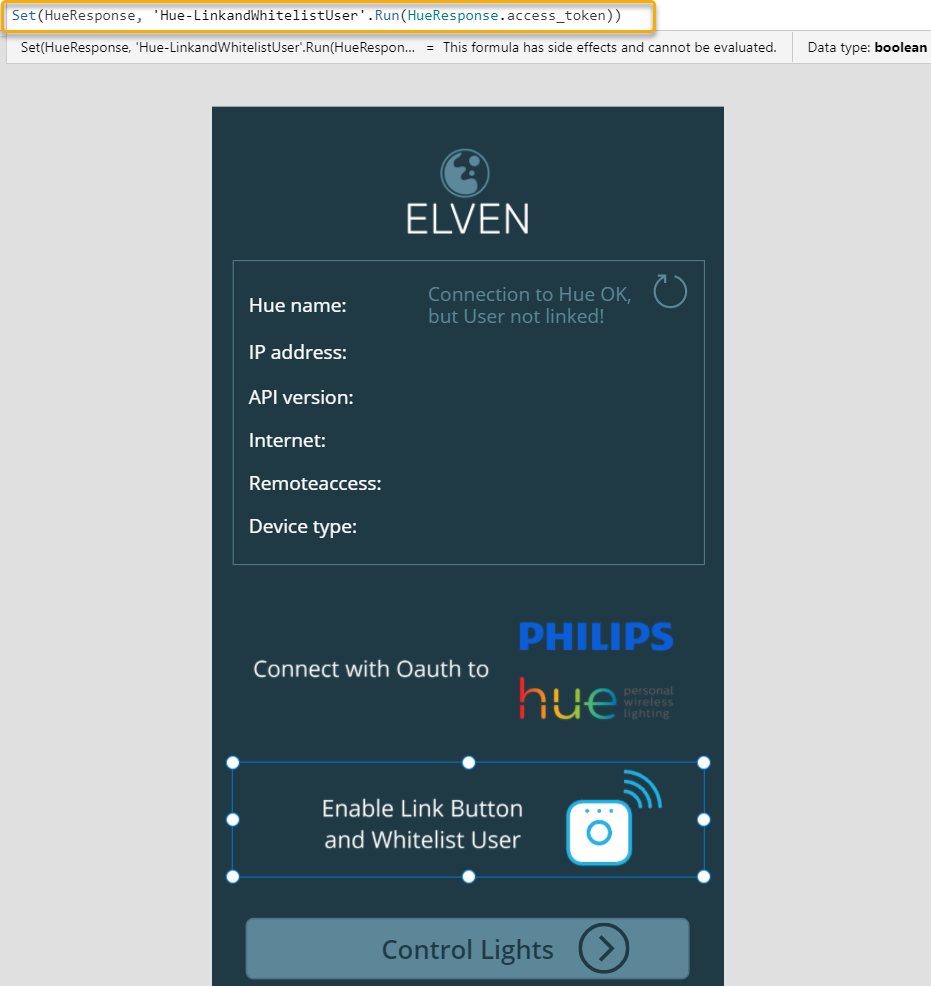
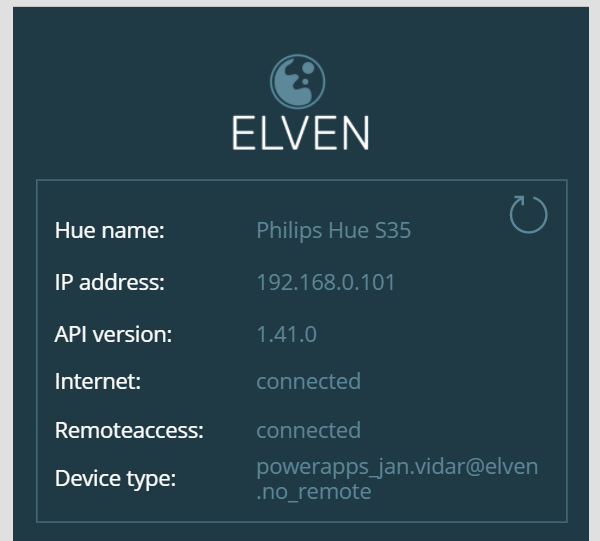
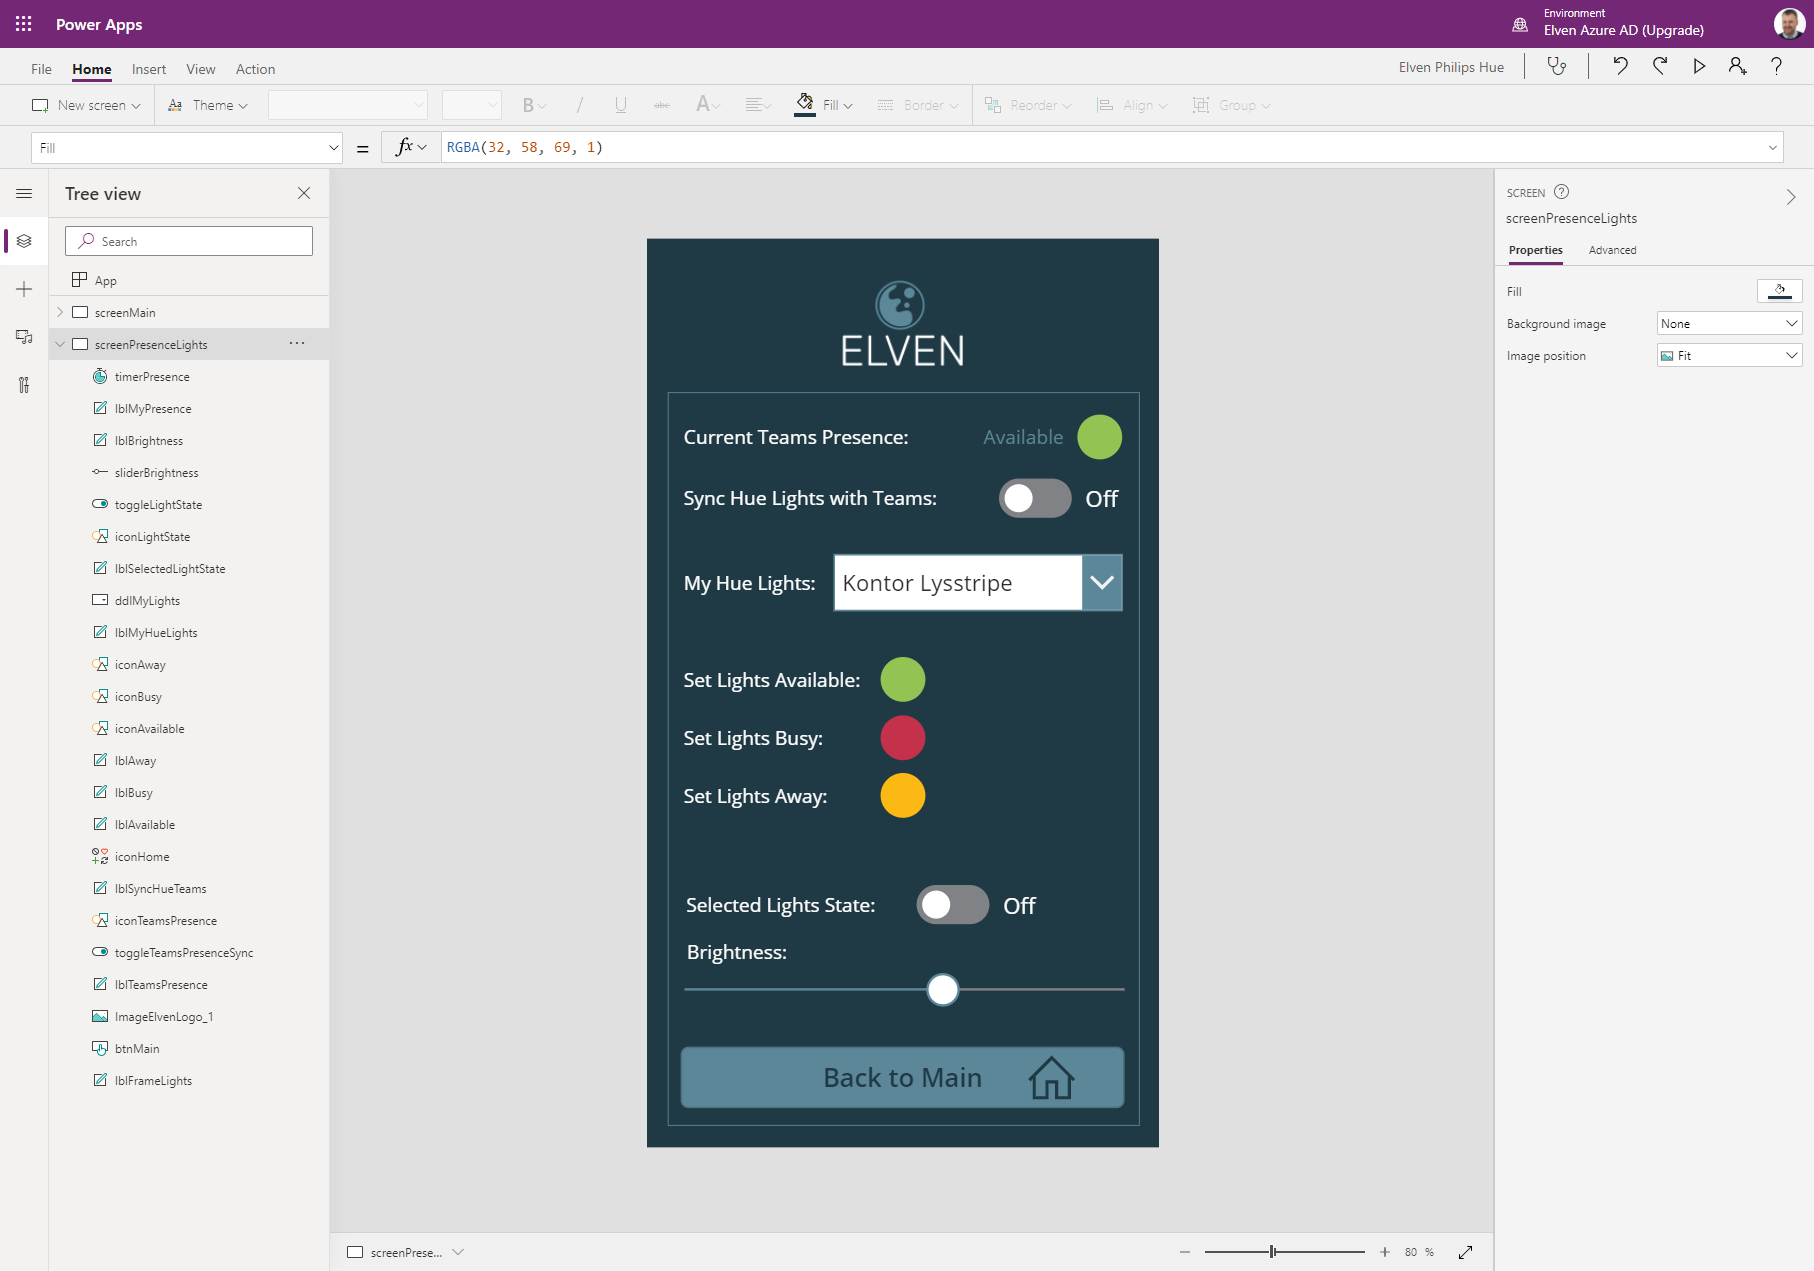
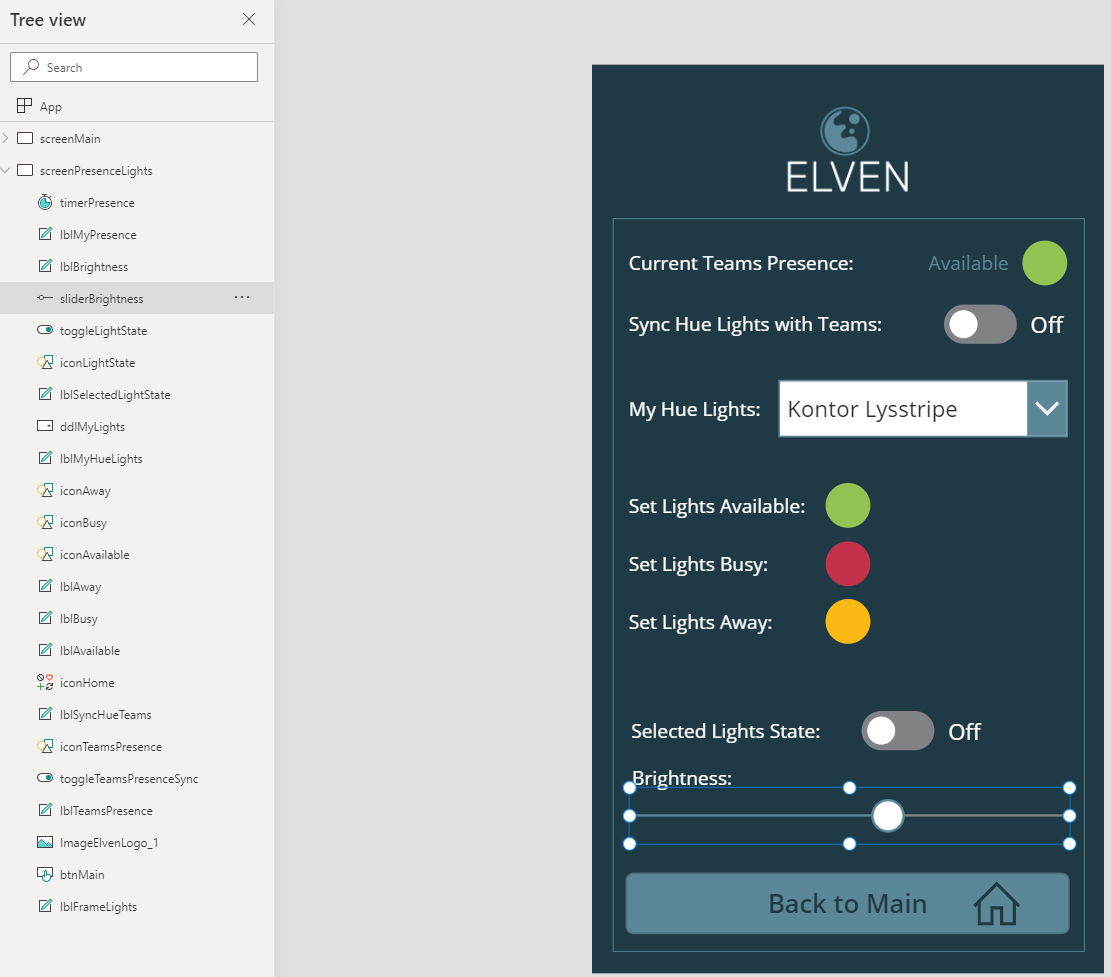
After adding and customizing the controls and named your controls after your chosen naming convention, your Hue PowerApp might look like the following:
Now we need to create a couple of Flows (as of today these are names Cloud Flows) for getting and setting Light State.
Creating Flow for Getting Lights and State
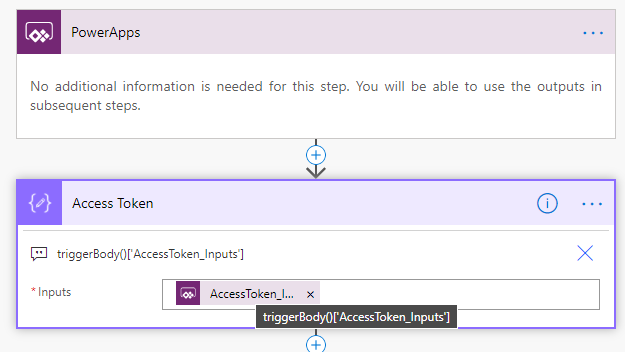
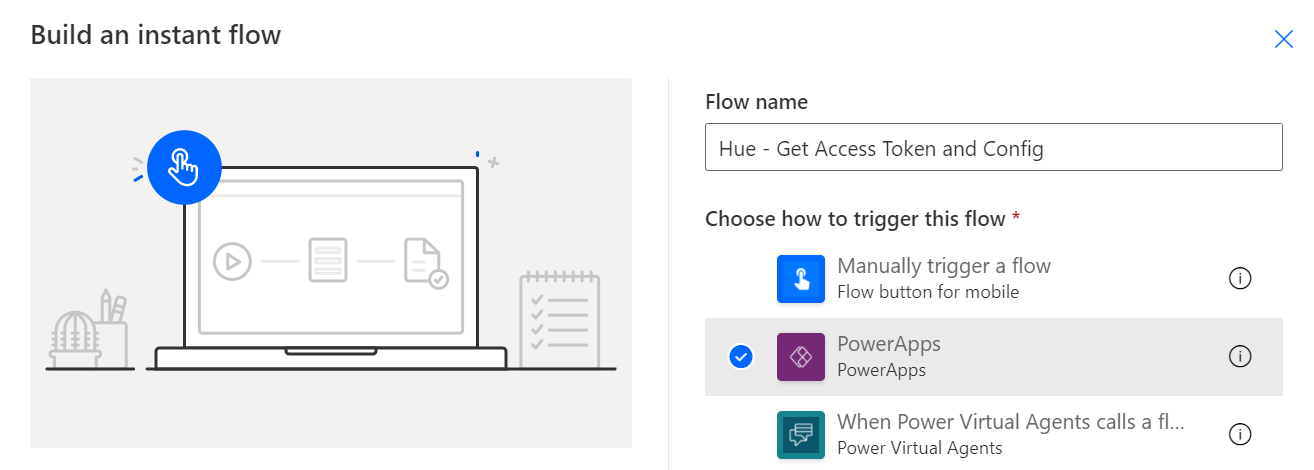
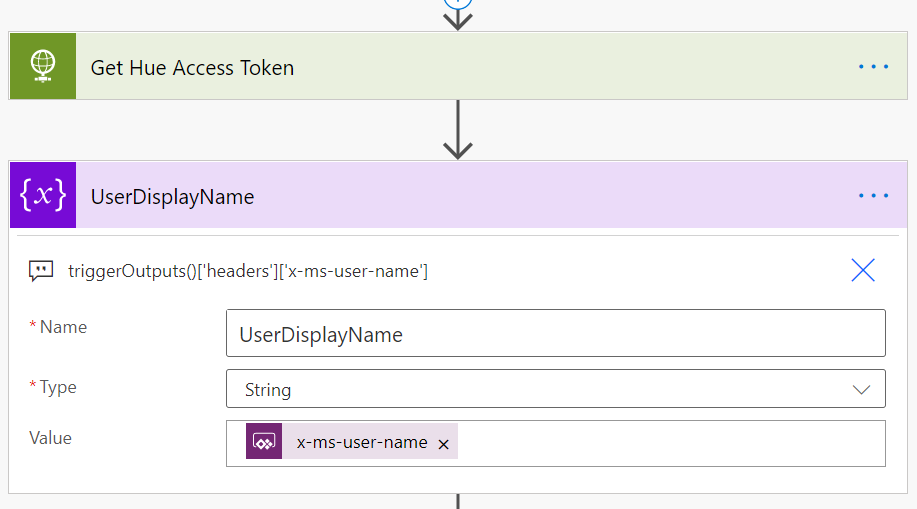
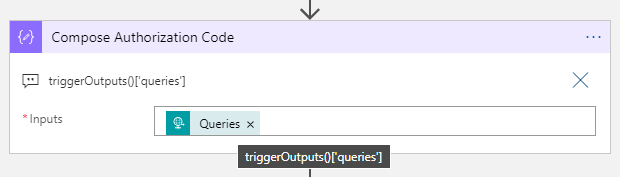
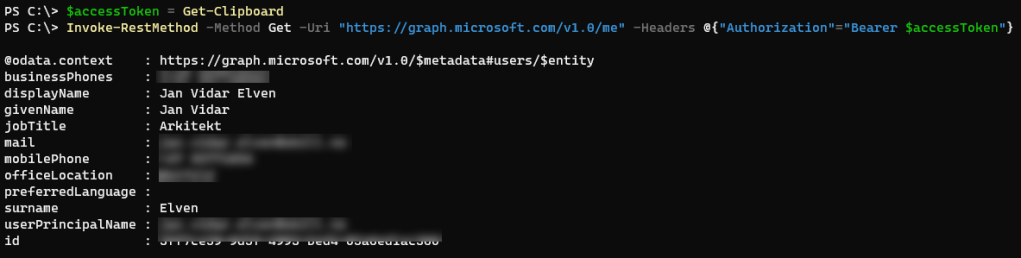
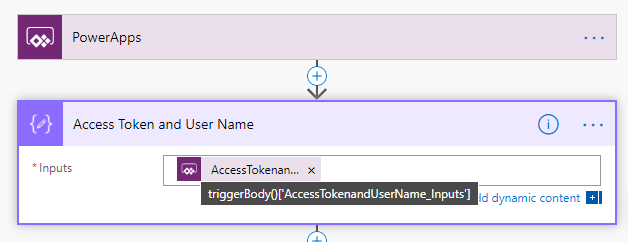
Create a new Instant Flow with PowerApps as Trigger. Name the Flow “Hue – Get Lights and State”. First add a Compose action, name the action “Access Token and User Name”, and select Ask in PowerApps under Dynamic Content:
Next, add a Parse JSON action below:
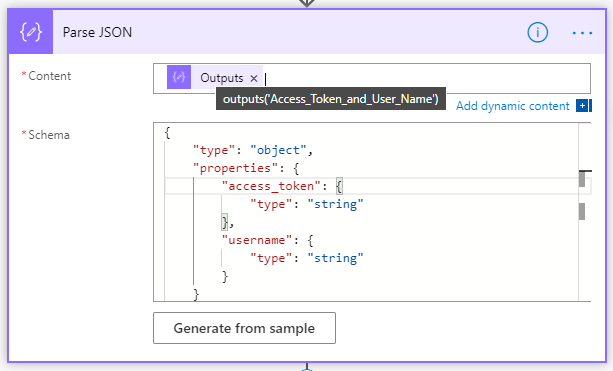
You can use the following schema:
{
"type": "object",
"properties": {
"access_token": {
"type": "string"
},
"username": {
"type": "string"
}
}
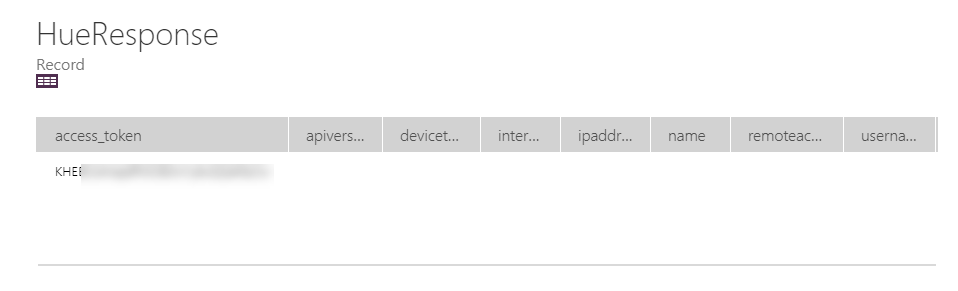
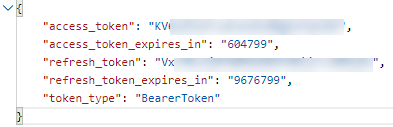
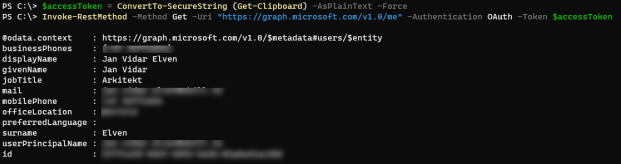
}We are now ready to query for the Lights for my Hue Remote API. But first it is helpful to understand a little about how the Hue Remote API returns lights. Earlier this year I published this blog post about exploring the Hue Remote API using Postman: Remote Authentication and Controlling Philips Hue API using Postman | GoToGuy Blog. For example when I query for all lights, https://api.meethue.com/bridge/{{username}}/lights/, I get a response similar to this:
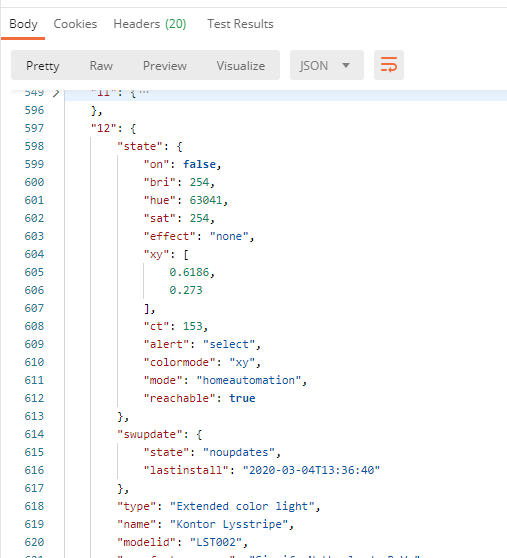
The special thing to note here is that Hue returns every light as a named object identified by a light number. This is not an Array, so you cannot loop through that as you would expect. So I needed to think a little different in my solution.
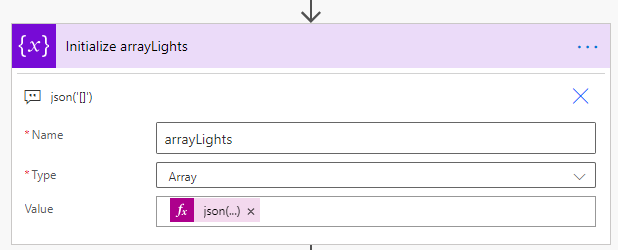
I decided to create my own Array, and get the Lights one-by-one. For this I needed to start at light number “1”, and then do until some maximum value. I have currently 13 lights, so I created a variable for “13”. It makes it a little static, but at least it works with as little hassle as possible.
First add an Initialize variable action, of type Array and name arrayLights, and using the expression json('[]') as an empty json array as value:
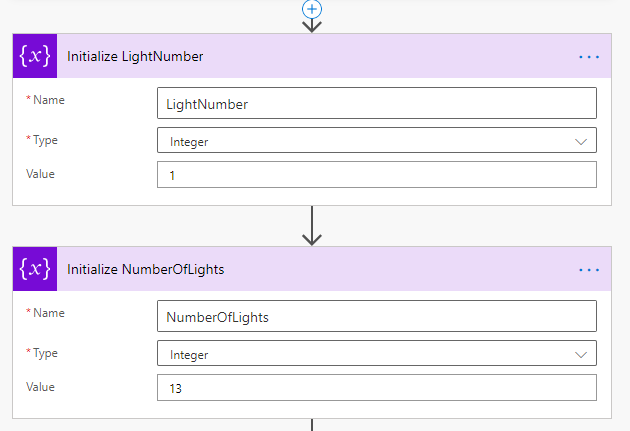
Next, add two more Initialize variables actions, both of type Integer and named LightNumber with value 1, and NumberOfLights with value 13 (or whatever number of lights you have!).
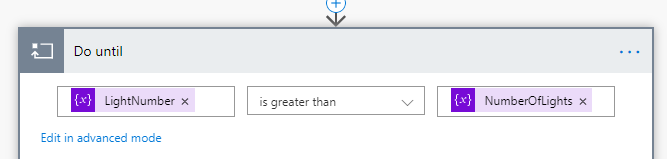
Now, add a “Do until” action, setting LightNumber is greater than NumberOfLights as loop control:
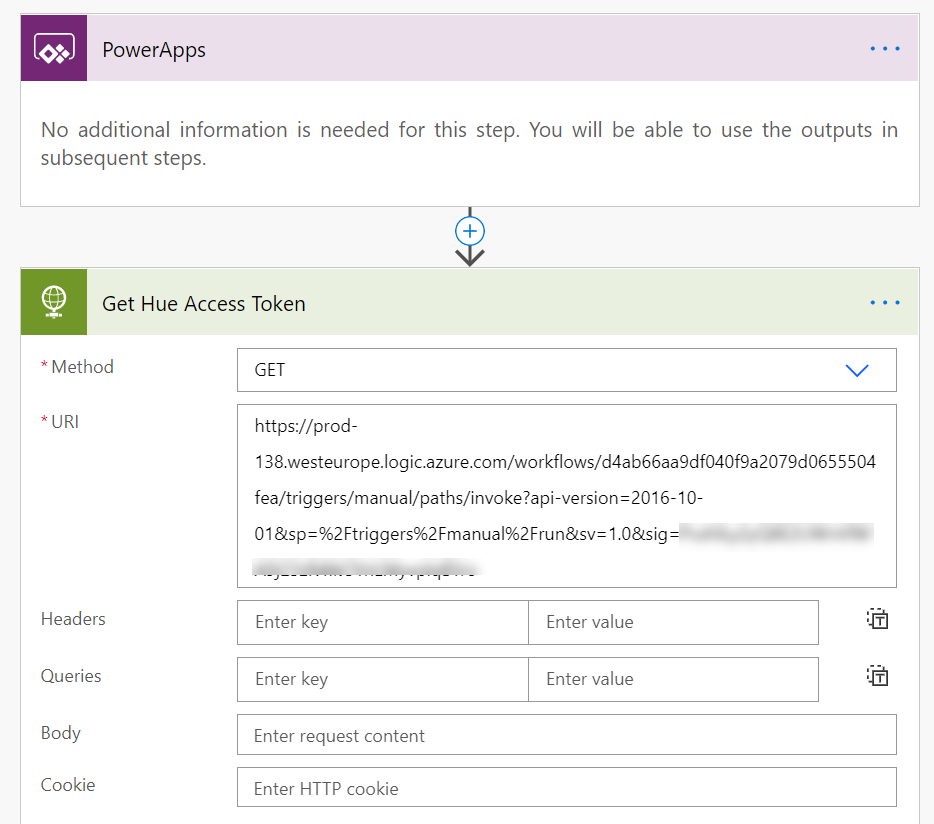
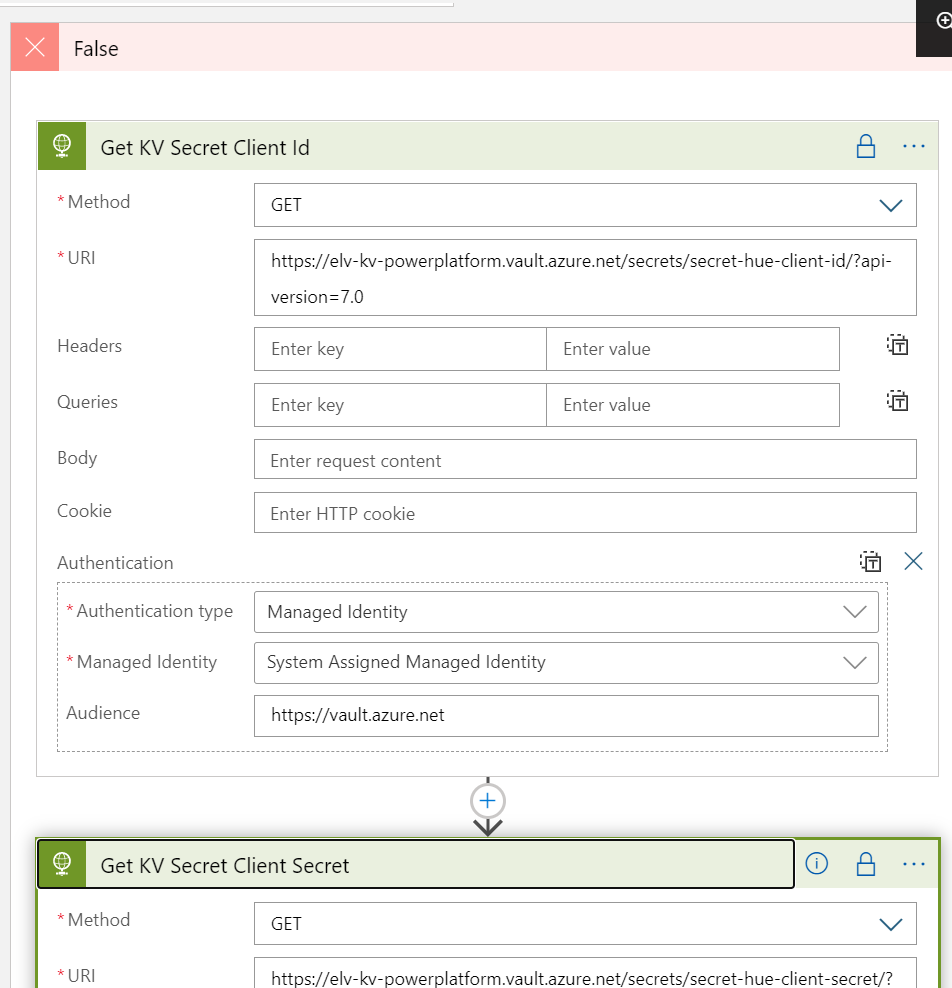
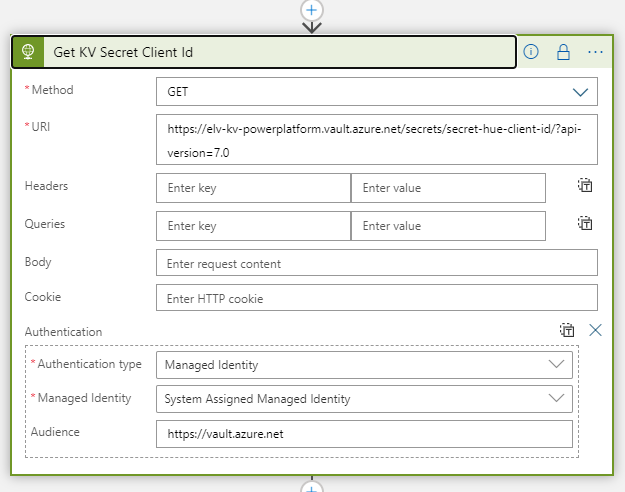
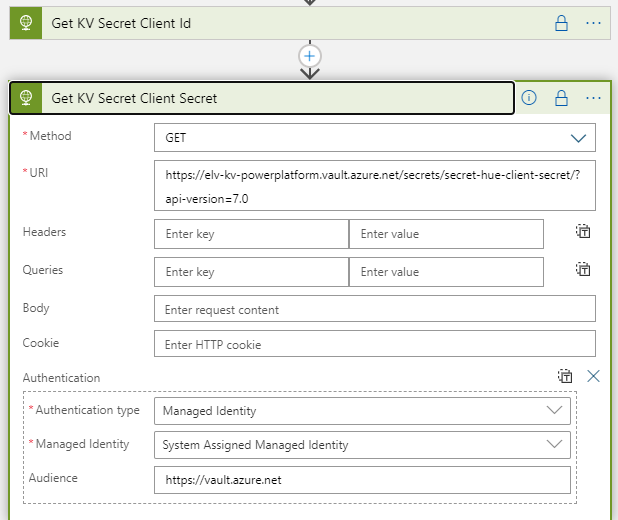
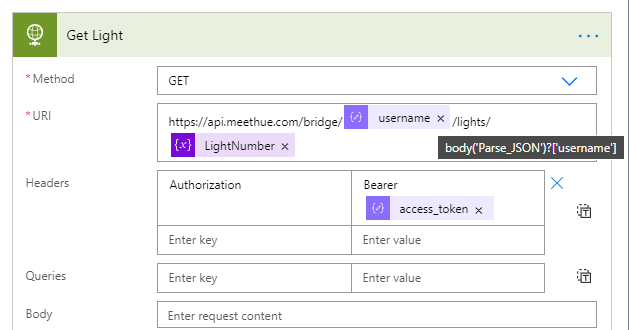
Inside the Do until-loop, add a HTTP action, where we will run a GET query against the https://api.meethue.com/bridge/<whitelist identifer>/lights/<lightnumber>, using the access_token as a Bearer token in the Authorization Header:
This will return the first light state. Add a Append to array variable action, selecting the “arrayLights”, and adding the value like following:
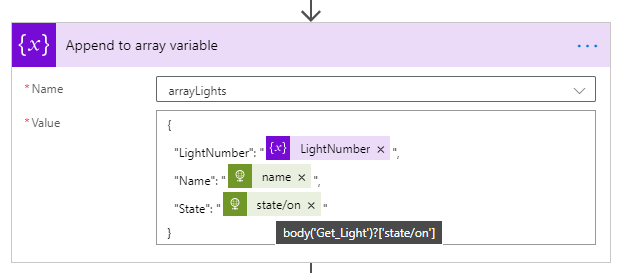
This will add the Light number, the name of the Light source (body('Get_Light')?['name']) and if state on is true or false (body('Get_Light')?['state/on']).
Next action is to add an Increment variable action to increase the LightNumber by 1:

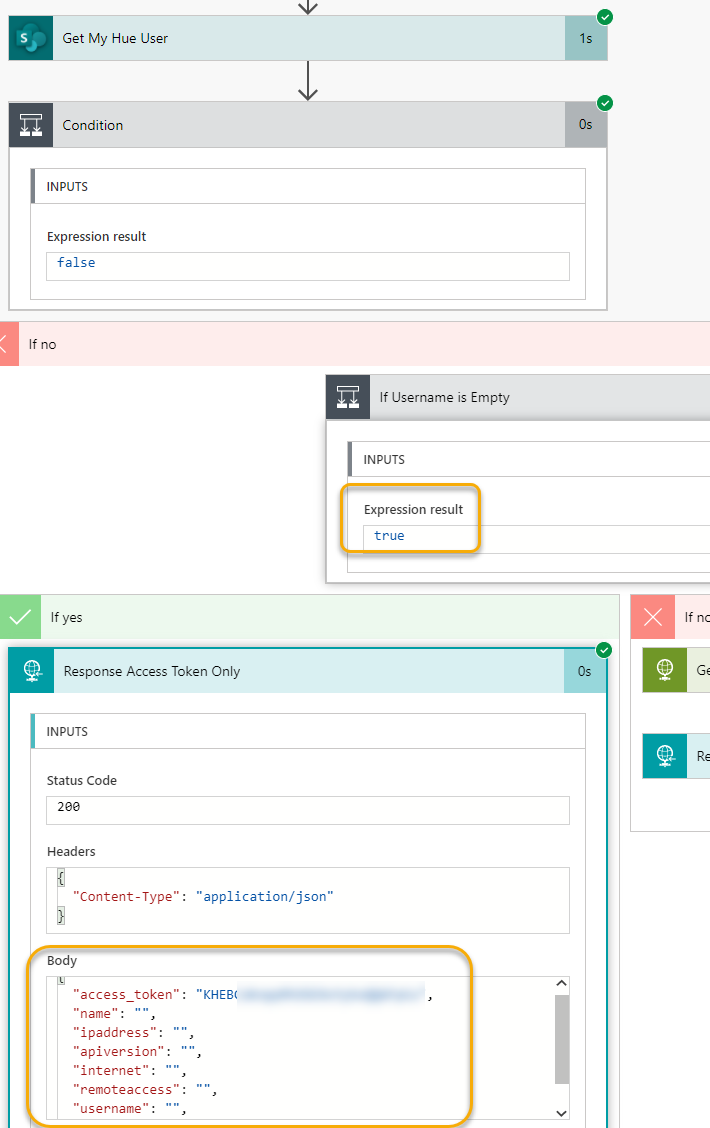
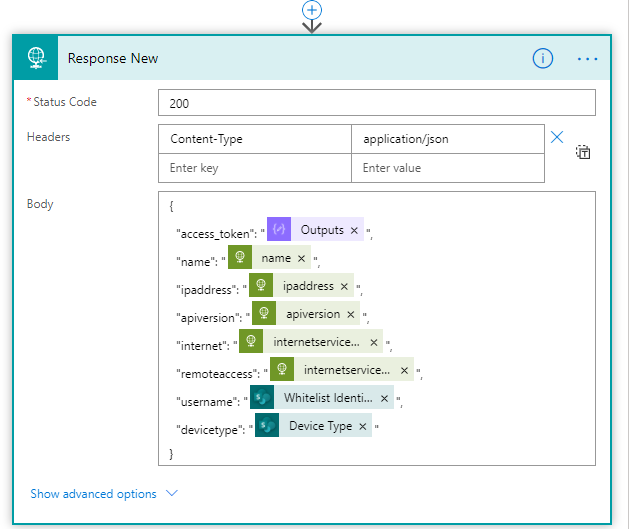
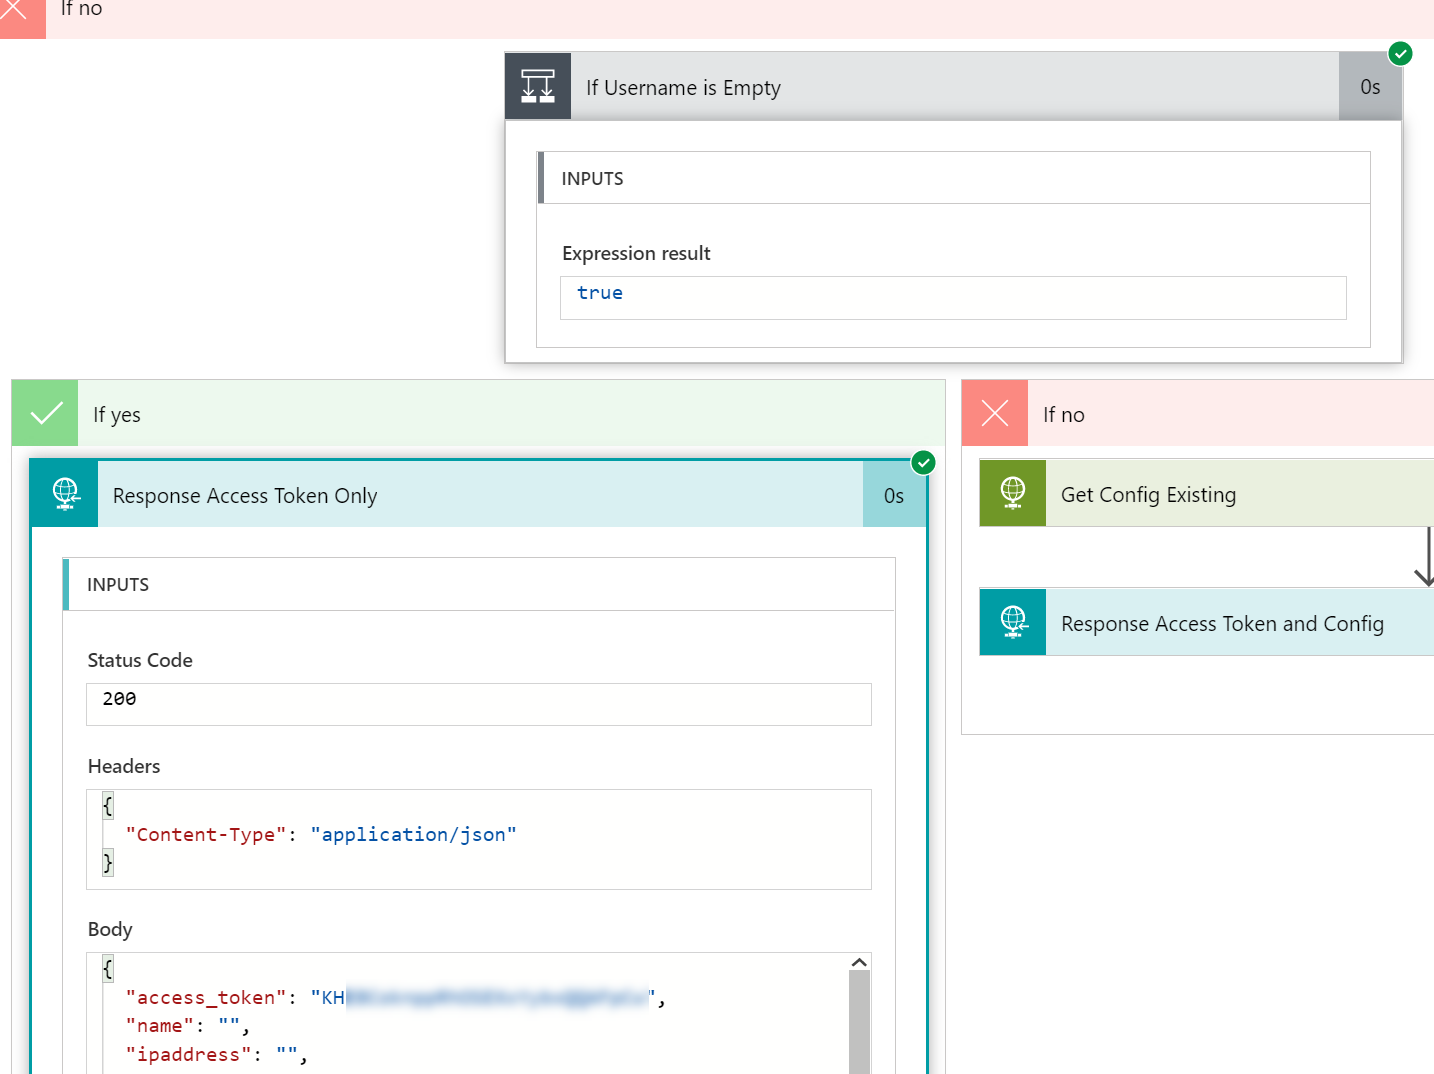
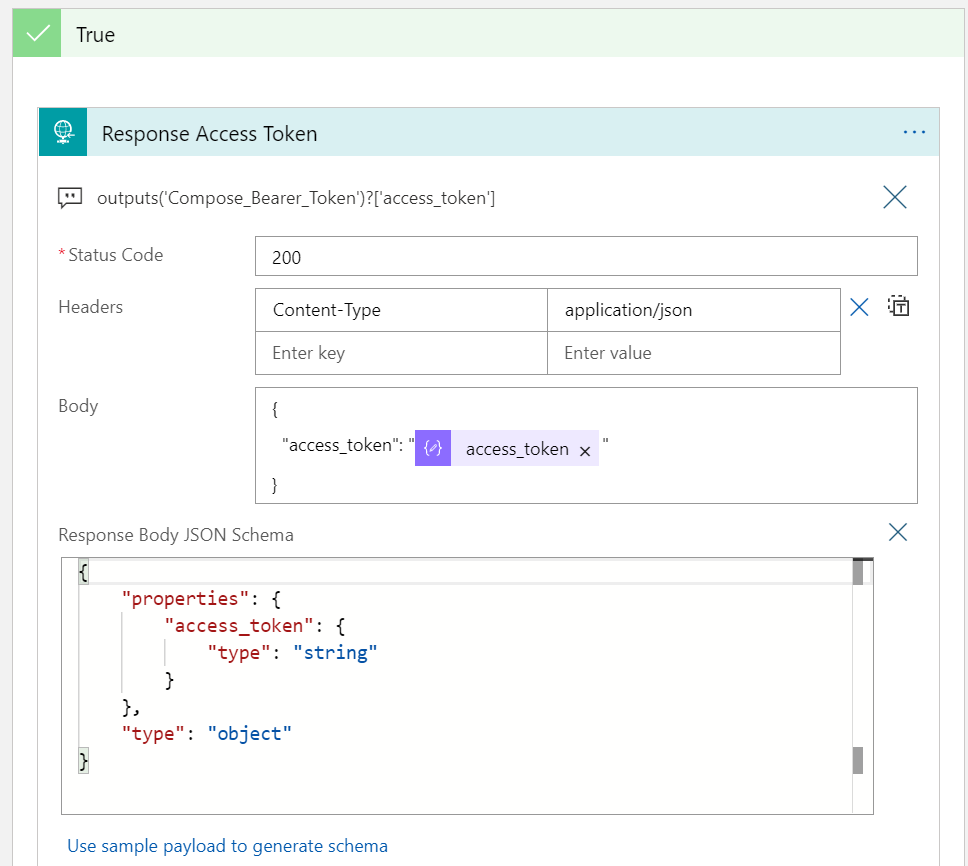
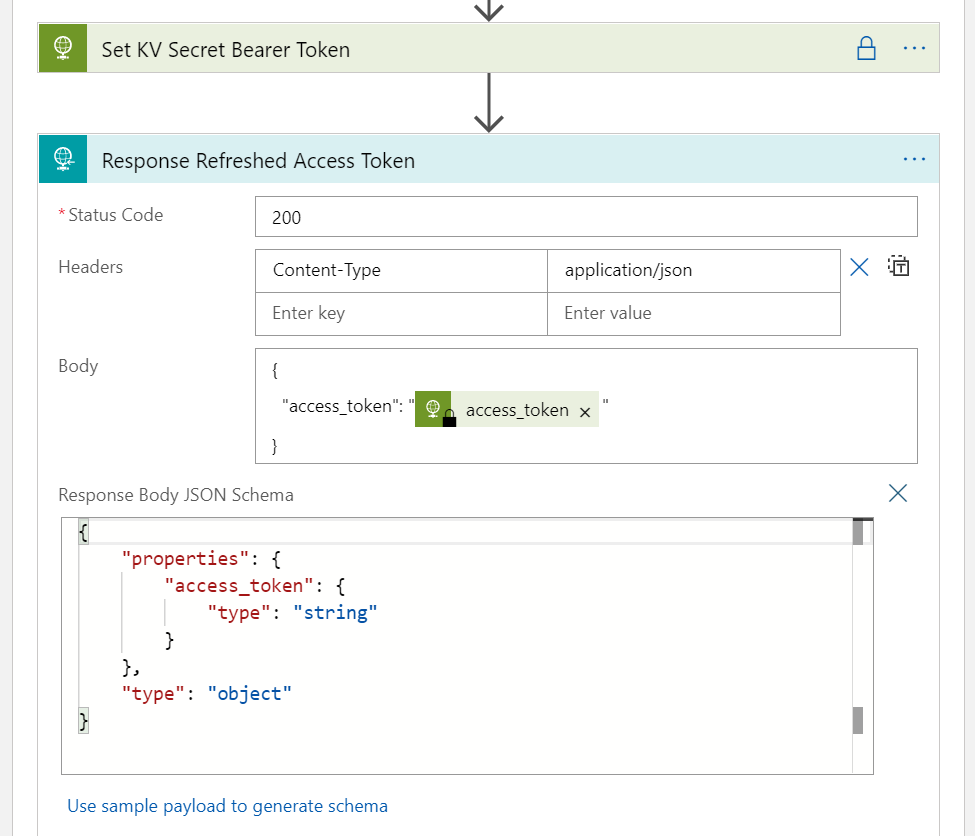
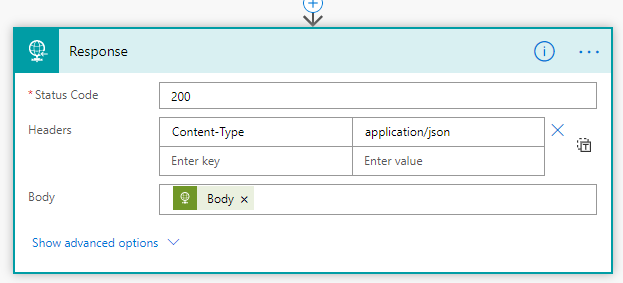
And last, outside the Do until, add a Response action so that we can return the data to the PowerApp. The important part here is to specify status code 200 and content-type application/json, and return the arrayLights variable as shown below:

Getting the Lights and State to the PowerApp
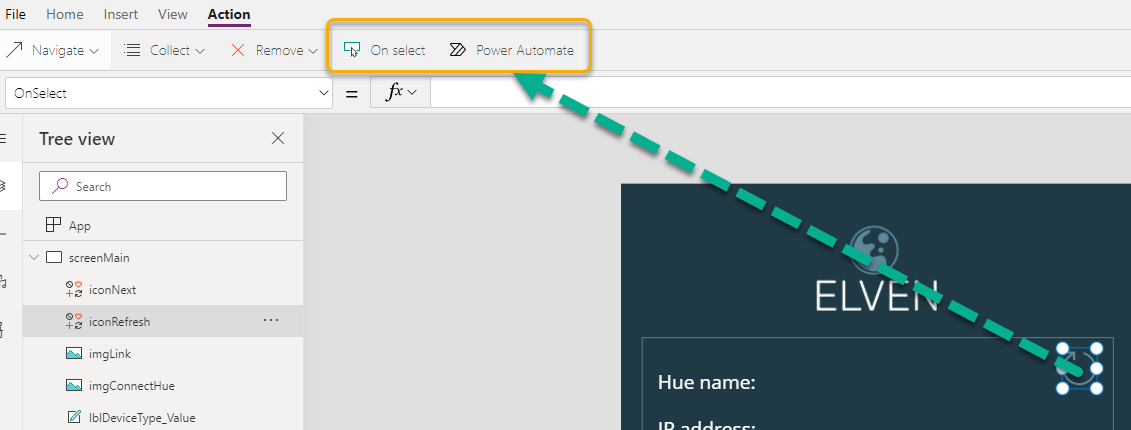
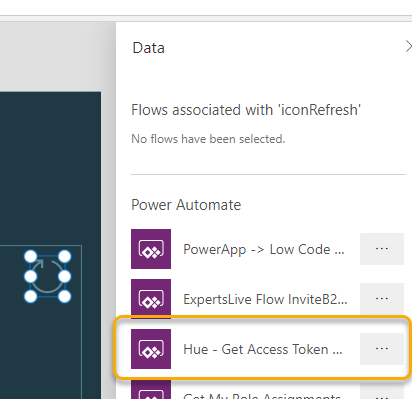
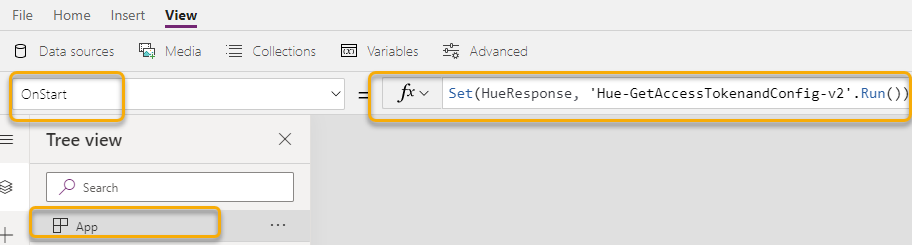
Now that we have to Flow for getting Lights and State, we can get that data into the PowerApp. Back in the PowerApp, select the Button control in the Main Screen with the name Control Lights. Click on the Action menu, and Power Automate to link the “Hue – Get Lights” and State Flow, and add the following lines to the OnSelect event:
Navigate(screenPresenceLights);
Set(wait,true);
ClearCollect(MyHueLights,'Hue-GetLightsandState'.Run(JSON(HueResponse)));
Set(wait,!true)

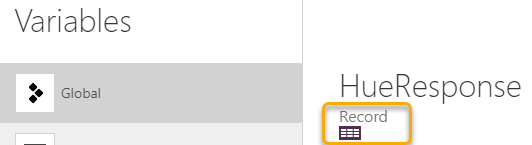
To explain, the Navigate(<screen>), is for changing to the other screen of course. I also use the Set(wait,true) and Set(wait,!true) on either side of the Flow run to make the PowerApp appear busy. And then, I save all the Lights and State back from the response from the Flow to a Collection, using ClearCollect and the Collection name “MyHueLights”. The Flow run expects that I supply the access_token and username, which I already has as a record variable in the shape of “HueResponse”. So, I’ll just add a JSON(..) function around that.
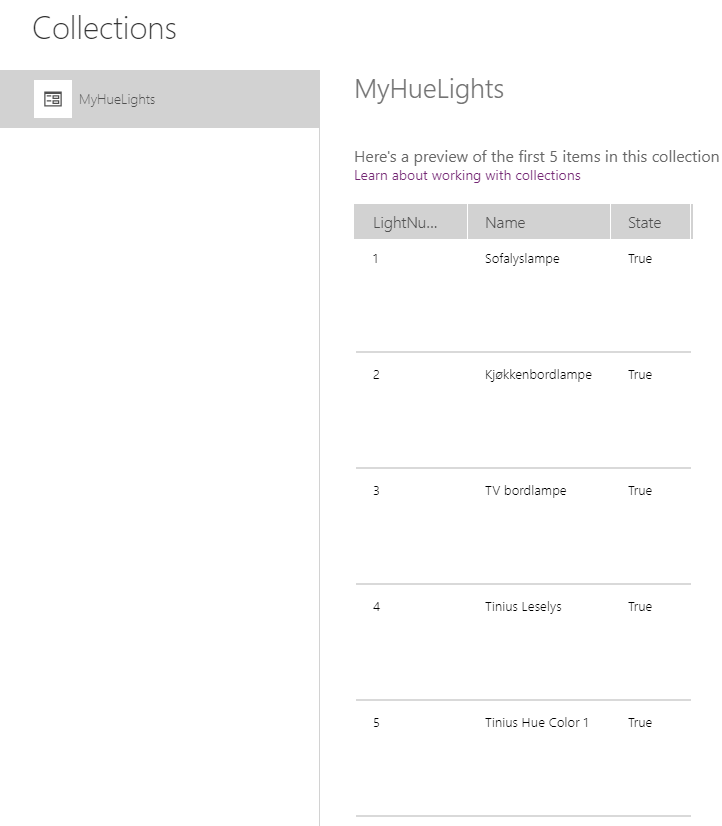
We can test. Hold down the “ALT” on your keyboard, and click on the “Control Lights” button. After this, go to the View menu and select Collections. You should see the “MyHueLights” collection, and a preview of the first 5 items:
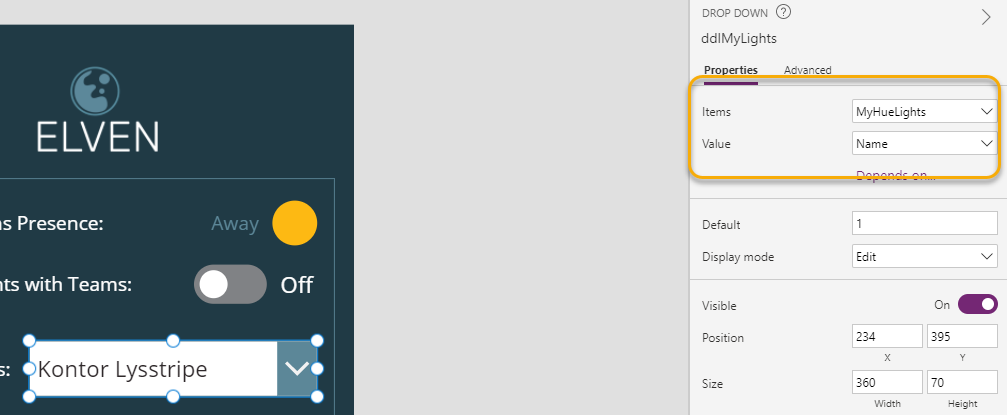
Now we can get that data in to the PowerApp controls. Select the Drop Down list control, and set the Items property to “MyHueLights” and the Value to “Name”:
This should fill the Drop Down with Light names. Next, for the Drop Down list OnChange event, add the following:
Set(SelectedLight,(ddlMyLights.SelectedText));
Set(CheckStatus,false);
If(SelectedLight.State="True",Set(CheckStatus,true);Set(LightState,true),
Set(CheckStatus,true);Set(LightState,false)
)
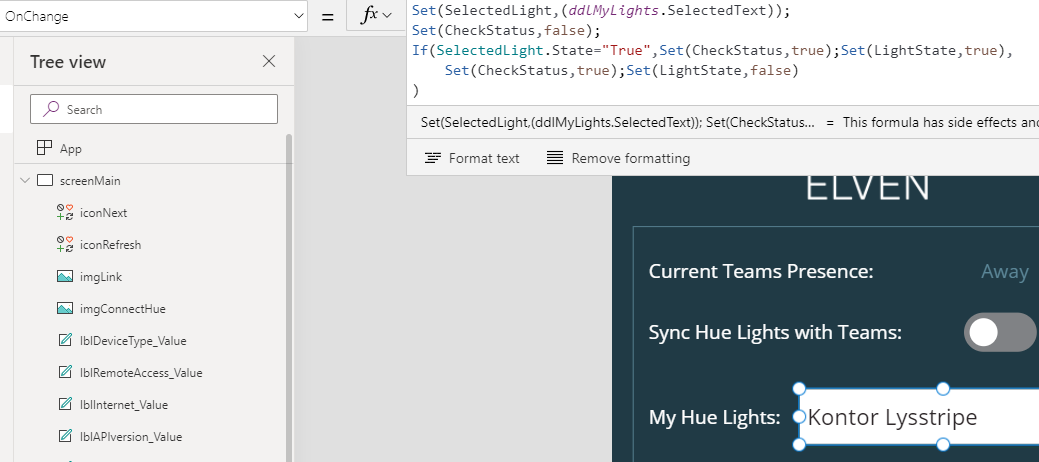
So in the above expression for the OnChange event, I set a variable “SelectedLight” to the selected text from the Drop Down, and then I’m manipulating another variable with set “CheckStatus” and set “LightState”, depending on if the state on is true or false.
Proceeed to select the toggleLightState control, and set the Default property to the variable “LightState” and Reset property to “CheckStatus”:

We now have what we need for getting the Lights and State into the PowerApp. The next thing we need to build is to actually set Light states and colors back to the Hue Remote API.
Creating Flow for Setting Lights and State
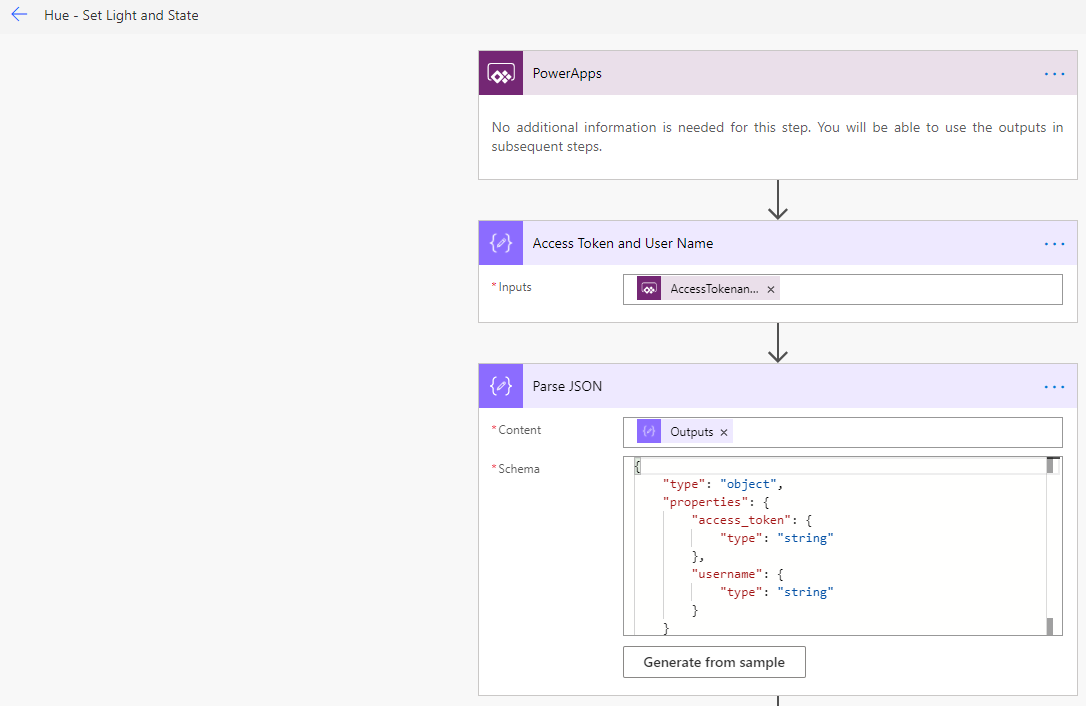
Create a new Instant Flow with PowerApps as trigger, and name it “Hue – Set Light and State”. Start by adding the same two Compose actions as the “Hue – Get Light and State” Flow:
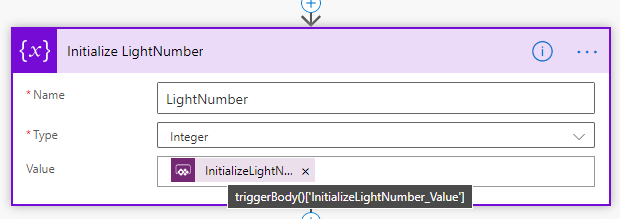
Next, add an Initialize variable action, with the name “Initialize LightNumber”, and select “Ask in PowerApps” under Dynamic content so that this input will be submitted from the PowerApp:
After that, add a Compose action. Name it “Body State”, and select “Ask in PowerApps” for input:
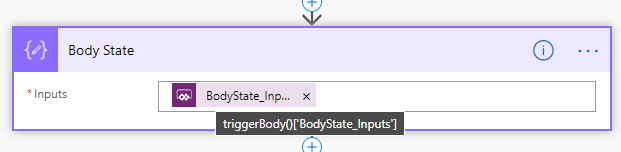
This input parameter is where we will supply the light state, colors etc.
Next add a Parse JSON action, using the outputs of the previous Body State input:
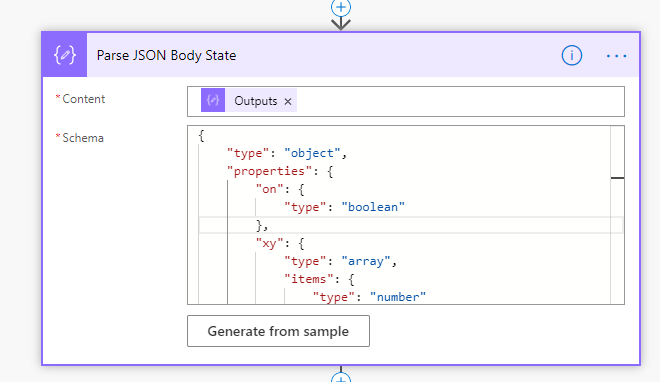
You can use the following schema:
{
"type": "object",
"properties": {
"on": {
"type": "boolean"
},
"xy": {
"type": "array",
"items": {
"type": "number"
}
},
"bri": {
"type": "integer"
}
}
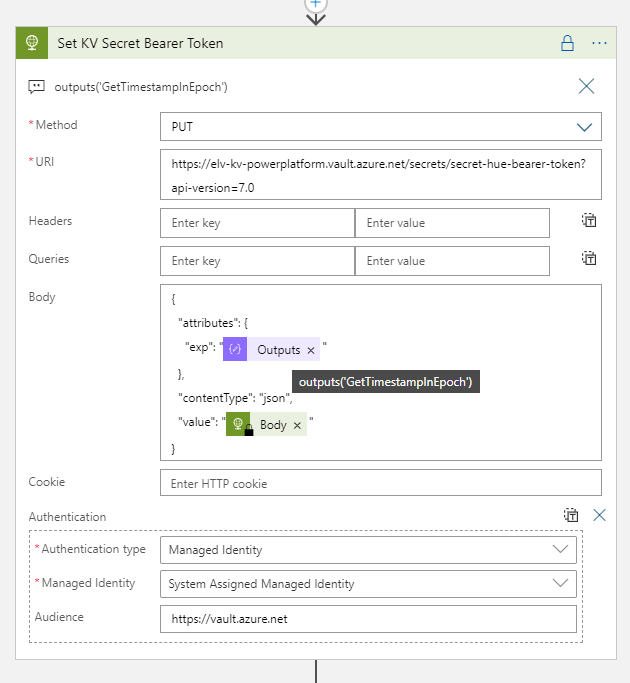
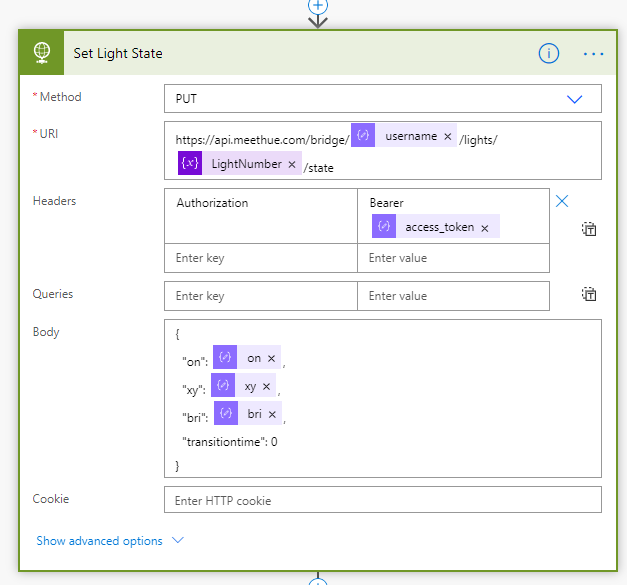
}After this, add an HTTP action, using method PUT, and the address https://api.meethue.com/bridge/<whitelist identifier>/lights/<lightnumber>/state, and including the access_token as a Bearer token in the Authorization Header. For Body, construct the following JSON body:
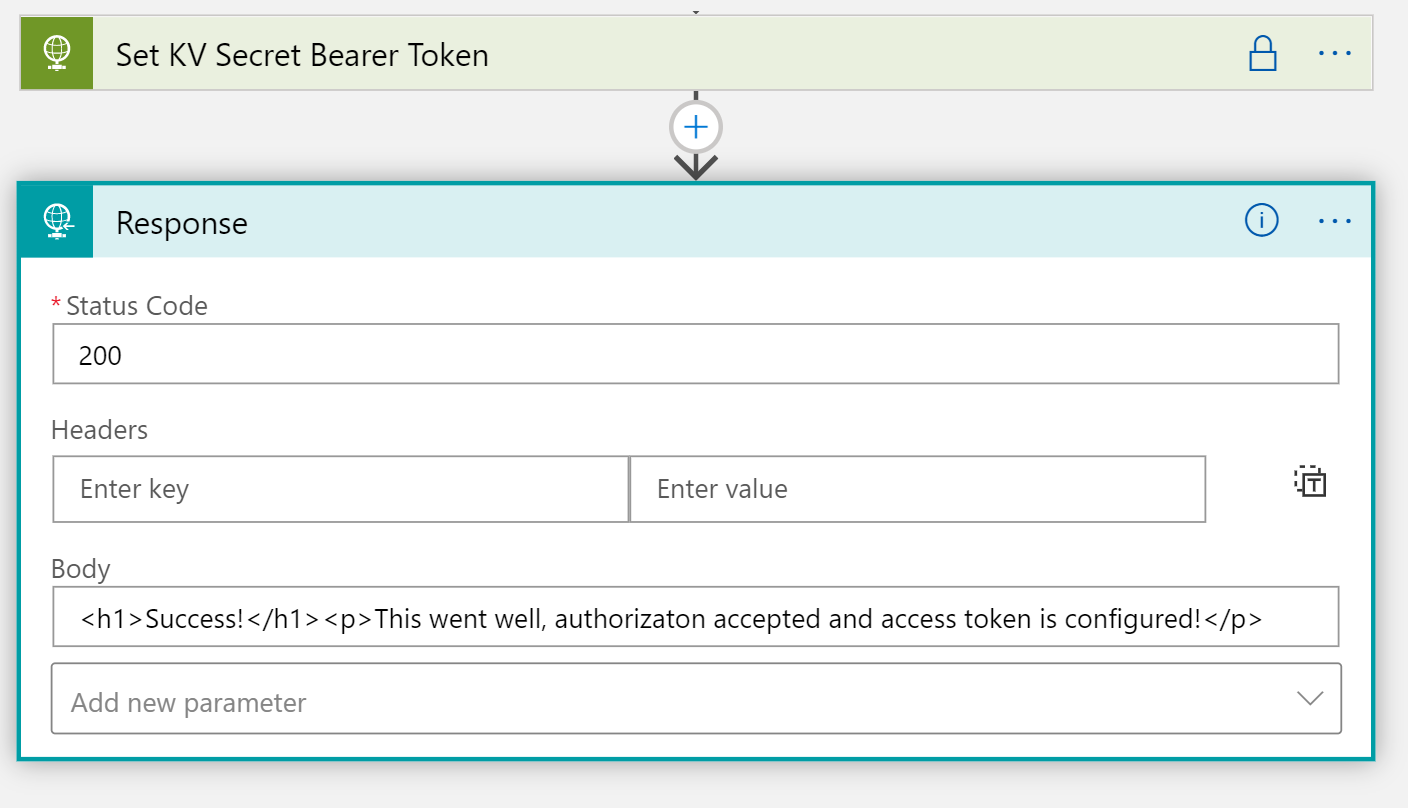
And last, add a Response action to return status code and body to the PowerApp:
We now have a Flow in which we can call to set the light states in the PowerApp.
Control Light States from PowerApp
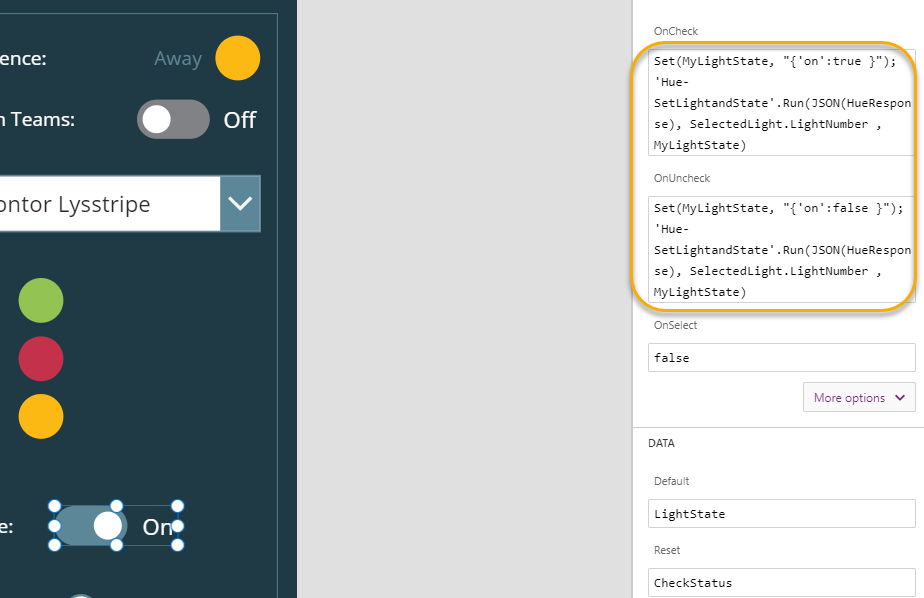
Lets start by turning selected Lights on and off. Select the Toggle control for Light State, and for the “OnCheck” event add the Power Automate Flow “Hue – Set Light and State” under the Action menu. For the OnCheck event add the following expression:
Set(MyLightState, "{'on':true }");
'Hue-SetLightandState'.Run(JSON(HueResponse), SelectedLight.LightNumber , MyLightState)
And for the UnCheck event:
Set(MyLightState, "{'on':false }");
'Hue-SetLightandState'.Run(JSON(HueResponse), SelectedLight.LightNumber , MyLightState)
So as you can see above, I’m using a variable named “MyLightState”, for dynamically storing the different light states I want to set and submit to the Flow. The ‘Hue-SetLightandState.Run’ takes three inputs in the form of access_token and username (via HueResponse variable), then selected LightNumber, and the MyLightState variable.
Next, lets go to the Slider control for setting Brightness. On the OnChange event, add the following expression:
Set(MyLightState, "{'bri': " & sliderBrightness.Value & " }");
'Hue-SetLightandState'.Run(JSON(HueResponse), SelectedLight.LightNumber , MyLightState)
Here I’m changing the state via the ‘bri’ value, and the sliderBrightness.Value. Btw, the Slider is set to minimum 2 and max 254, to support the values expected by the Hue API for ‘bri’.

And then finally we can set the color states for the three icons I have prepared. I have created pre-defined colors reflecting my presence status, green for available, red for busy and yellow for away.
For each of these, change the “OnSelect” event to the following:
Green (Available):
Set(MyLightState, "{'on':true, 'xy': [ 0.358189, 0.556853 ], 'bri':" & sliderBrightness.Value & " }");
 'Hue-SetLightandState'.Run(JSON(HueResponse), SelectedLight.LightNumber , MyLightState)
Red (Busy):
Set(MyLightState, "{'on':true, 'xy': [ 0.626564, 0.256591 ], 'bri':" & sliderBrightness.Value & " }");
 'Hue-SetLightandState'.Run(JSON(HueResponse), SelectedLight.LightNumber , MyLightState)
Yellow (Away):
Set(MyLightState, "{'on':true, 'xy': [ 0.517102, 0.474840 ], 'bri':" & sliderBrightness.Value & " }");
 'Hue-SetLightandState'.Run(JSON(HueResponse), SelectedLight.LightNumber , MyLightState)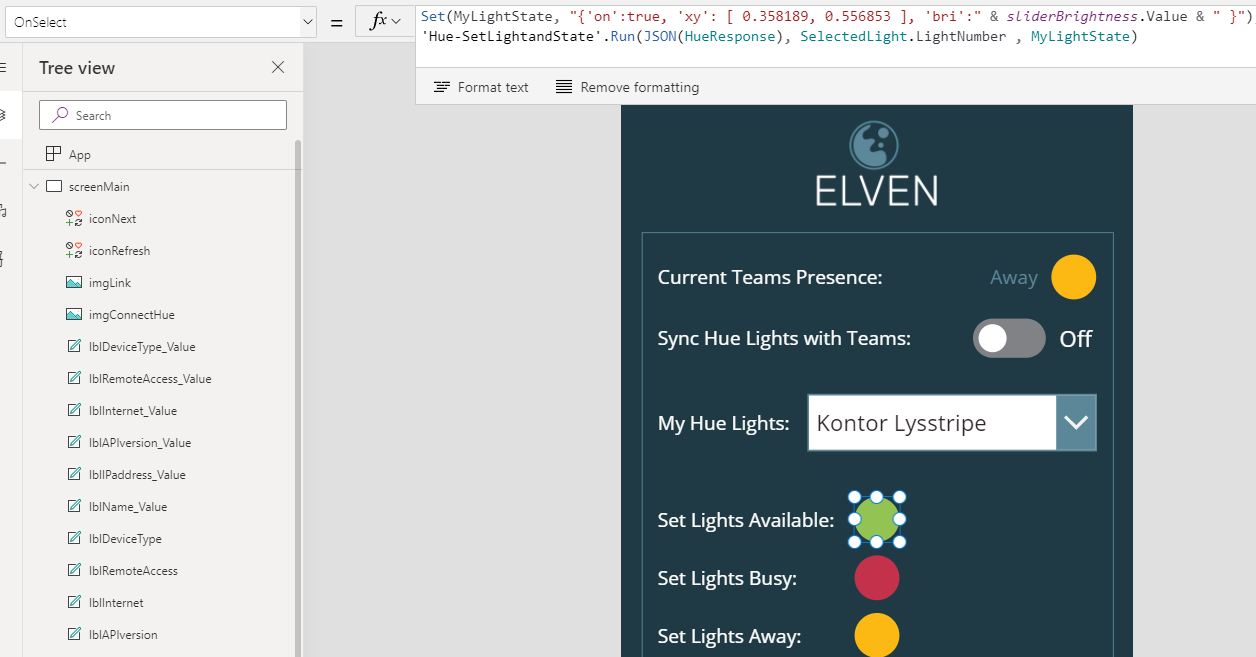
A few words about the colors, this is something that could be a little difficult to get a grasp on. Hue has an explanation on the CIE color space and the “xy” resource here: Core Concepts – Philips Hue Developer Program (meethue.com).
You can also see some conversion functions here: Color Conversion Formulas RGB to XY and back – Philips Hue Developer Program (meethue.com)
Basically I’ve tested and learned. A good tip is to set the color you like using the official Hue Mobile App, and then read the state for the light.
Summary and Next Steps
The Hue PowerApp has now a working solution for getting Lights and State, as well as manually controlling colors, toggle on and off, and setting brightness.
In the next part of this blog post series, we will look into getting the presence status from Teams and show that in the Power App.
Thanks for reading!