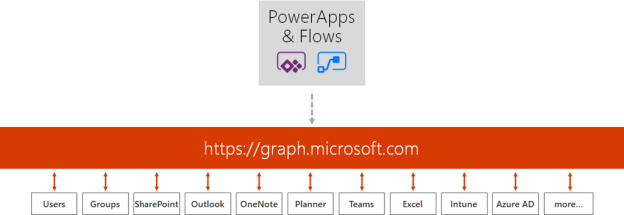
A while back I wrote a blog post on how you could access Microsoft Graph API using a custom connector in PowerApps and Flows: https://gotoguy.blog/2017/12/17/access-microsoft-graph-api-using-custom-connector-in-powerapps-and-flows/.
In this blog article I will build on that blog post to provide a practical example of using Microsoft Graph, and create an Azure AD PIM (Privileged Identity Management) App for activating any eligible admin roles for the logged on user.
First lets look into some of the documentation and what we need to prepare.
Microsoft Graph API for Azure AD PIM
Azure AD Privileged Identity Management provides you a way to enable on-demand time limited access for administrative roles. Microsoft Graph API for Azure AD PIM is currently available under the Beta endpoint, and documented here: https://developer.microsoft.com/en-us/graph/docs/api-reference/beta/resources/privilegedidentitymanagement_root.
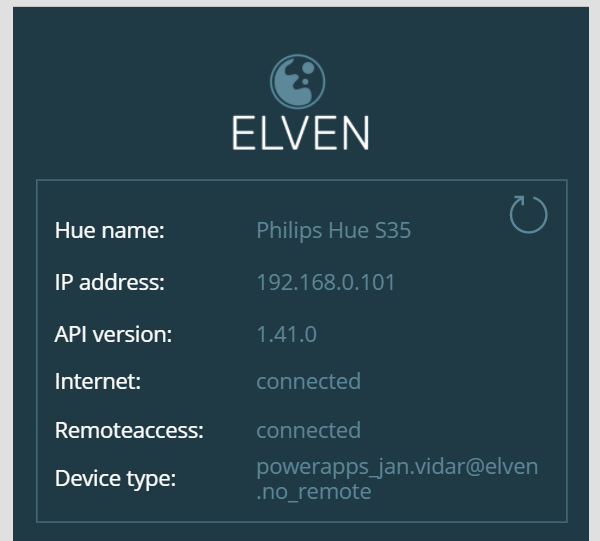
If a user that has been assigned admin roles using Azure AD PIM, wants to activate any of the eligible role assignments, the user can navigate to the Azure AD PIM blade or just use this short url: https://aka.ms/myroles. In this blog post I will use my demo user account as an example, and this user has these roles assigned currently:

If I want to access my roles using Graph API I can use the privilegedRoleAssignment: my method (https://developer.microsoft.com/en-us/graph/docs/api-reference/beta/api/privilegedroleassignment_my).
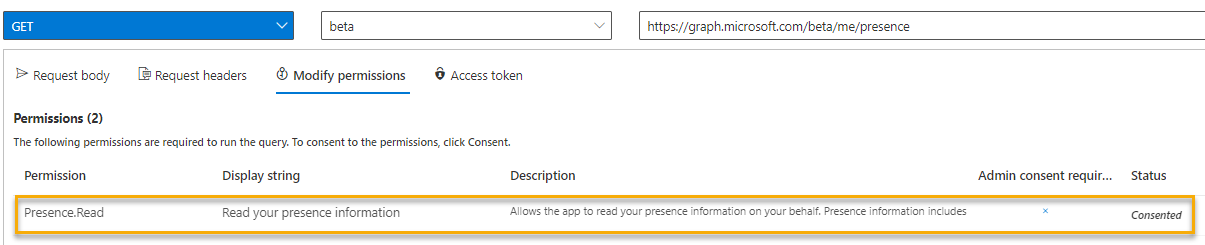
Let’s try to do that using the Graph Explorer! (https://aka.ms/GE). Make sure you are signed in using your work account (normal user account), as I have in the screenshot below, and the run the GET command as shown below (https://graph.microsoft.com/beta/privilegedRoleAssignments/my):

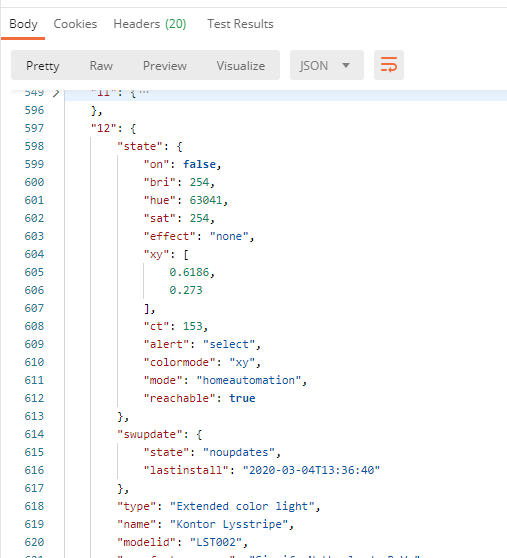
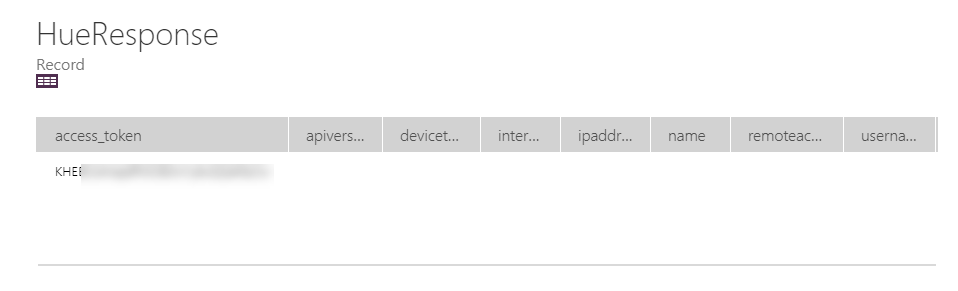
In my case this returns the following (I have blurred out my userid for privacy):

Note that the response also shows if I have a current activation of any roles, and if so when that will expire. Roles that have isElevated set to “true”, and without an expirationDateTime are roles that are permanently assigned. If I want to query on that I can run the following GET command:

When my role assignments are returned I only get roleId’s though, so lets look at how I can get the displaynames of those roles.
For example, I see from the response above that one of the roleId’s returned is 29232cdf-9323-42fd-ade2-1d097af3e4de. In the Graph API for Azure AD PIM there is a method to list privilegedRoles (https://developer.microsoft.com/en-us/graph/docs/api-reference/beta/api/privilegedrole_list), so if I run the following in Graph Explorer: https://graph.microsoft.com/beta/privilegedroles/29232cdf-9323-42fd-ade2-1d097af3e4de, I should get more role information right?
No, I don’t have permission to do that:

Lets look at the documentation, and it clearly states that for the requestor (my normal user account) to be able to list privilegedRoles I need to be either a Global Administrator, PIM Administrator, Security Administrator or Security Reader:

So that won’t work for me, as I want to let normal user accounts to be able to use my Graph API commands.
However, one thing that normal users do have access to, is listing of directoryRoles (https://developer.microsoft.com/en-us/graph/docs/api-reference/beta/api/directoryrole_list). So if I run that, I will get all directory roles with their id and a roleTemplateId, and I have highlighted below the id I was looking for above, which turns out to be the Exchange Administrator role:

So, to get the displayName of the role I can run the following GET request: https://graph.microsoft.com/beta/directoryroles/?$filter=roleTemplateId eq ‘29232cdf-9323-42fd-ade2-1d097af3e4de’:

Ok, so now I have a way to query for my role assignments, and also a way to query for the display names of any roles. Now I need to see how I can activate (or deactivate) my role assignments.
I will use these methods: privilegedRole: selfActivate and privilegedRole: selfDeactivate, they are documented at https://developer.microsoft.com/en-us/graph/docs/api-reference/beta/api/privilegedrole_selfactivate / https://developer.microsoft.com/en-us/graph/docs/api-reference/beta/api/privilegedrole_selfdeactivate.
When I do a POST /privilegedRoles/{id}/selfActivate, I need to specify the role id in the request uri and and a request body:
{
  "reason": "reason-value",
  "duration": "duration-value",
  "ticketNumber": "ticketNumber-value",
  "ticketSystem": "ticketSystem-value"
}
For example I can try to activate the Exchange Administrator role by POST to: https://graph.microsoft.com/beta/privilegedRoles/5cfc2572-33b1-4839-8774-2bae31da1a29/selfActivate, and specify a request body like shown below. Note that all properties in the request body are optional, I can just leave them blank or provide default values:

Currently there is an error in the Graph Beta API for PIM that won’t let me activate roles that require MFA, so I’ll just accept this error and move on for now:

Before I deactivate a role I need to have it to be active, so for now I will go to https://aka.ms/myroles, and activate the Exchange Administrator role manually, promptly requiring MFA verification first:

And after that I can activate the role:

To deactivate the Exchange Administrator role via Graph API I’ll just do a POST to /privilegedRoles/{id}/selfDeactivate, specifying the role id like this: https://graph.microsoft.com/beta/privilegedRoles/29232cdf-9323-42fd-ade2-1d097af3e4de/selfDeactivate
No request body is needed, and this time I get a successful response:

I think these 4 methods will do for now, there are a lot of other methods for managing PIM roles and settings as well, but we are now ready to start working with our PowerApps and Flow Custom Connector.
Add Microsoft Graph Permissions to App Registration
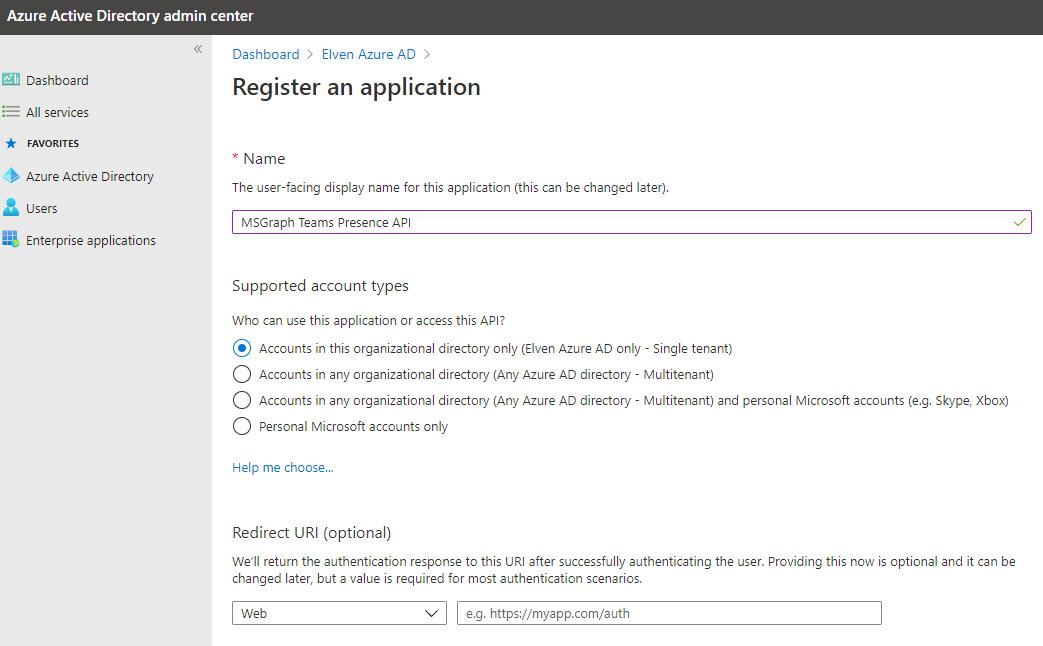
As I mentioned in the beginning of this blog post, I previously wrote a blog post on how to set up an App Registration for a custom connector for PowerApps and Flows. I will now build on this, so if you want to follow the steps I do here, please set up the prerequisites as described in the blog post: https://gotoguy.blog/2017/12/17/access-microsoft-graph-api-using-custom-connector-in-powerapps-and-flows/.
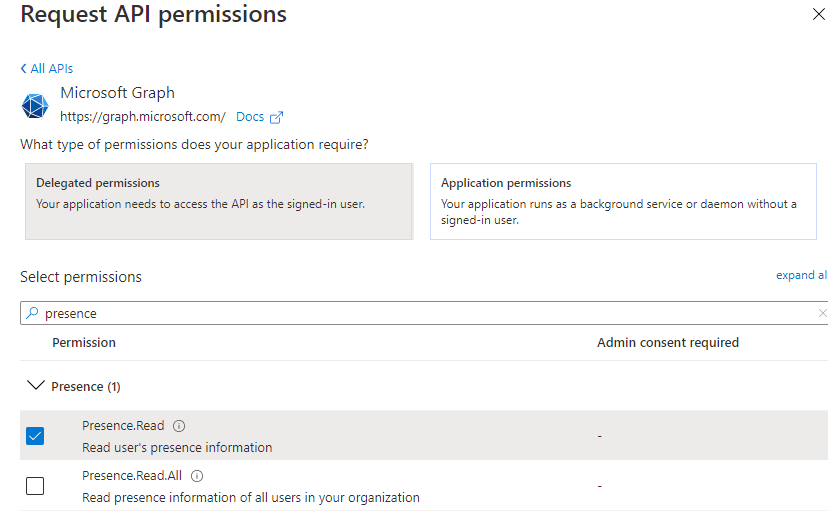
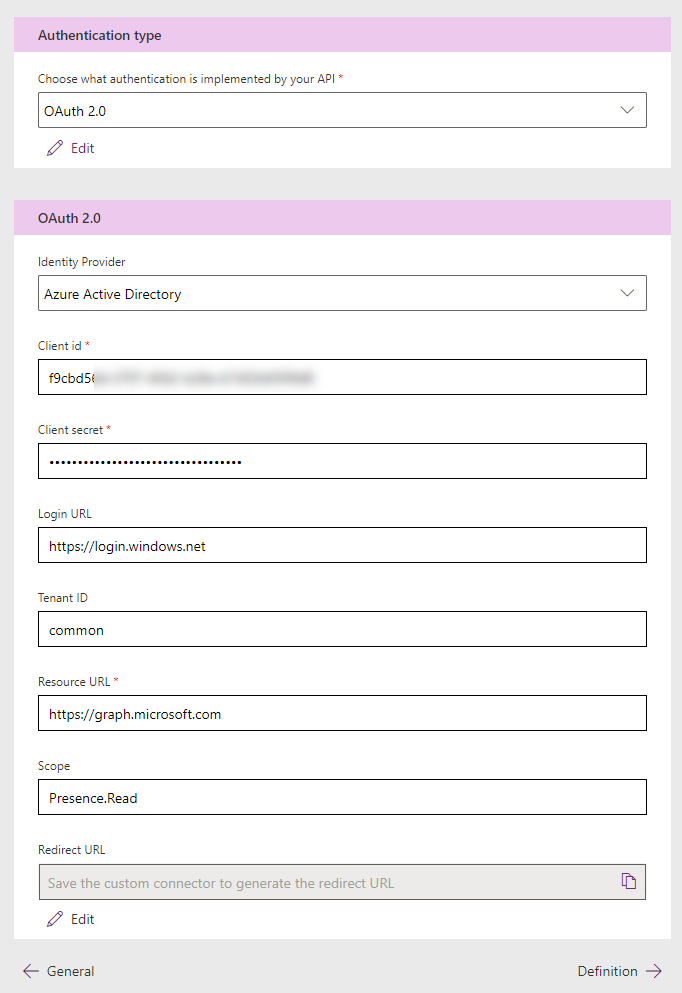
Looking at the documentation I see that I need to add Delegated Permissions for Directory.AccessAsUser.All to be able to list my assignments:

Similarly, if I check the documentation for the other methods from above, I will need also Directory.AccessAsUser.All:


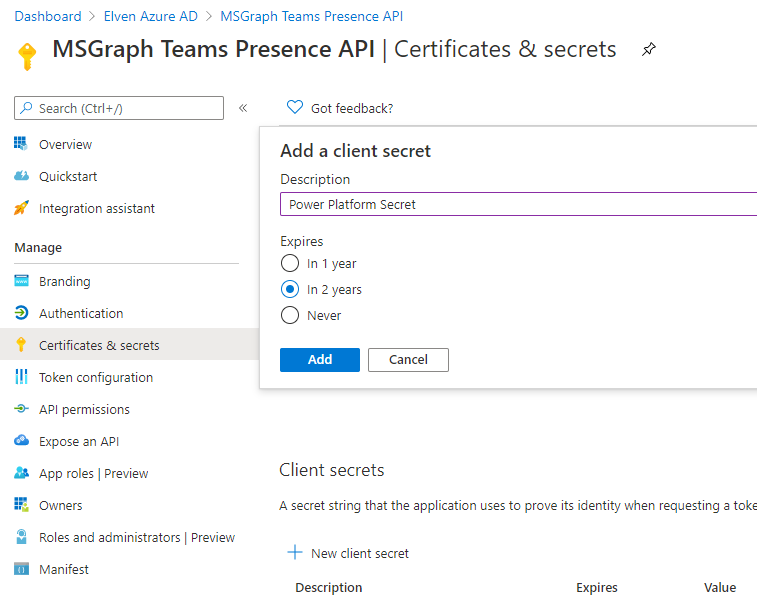
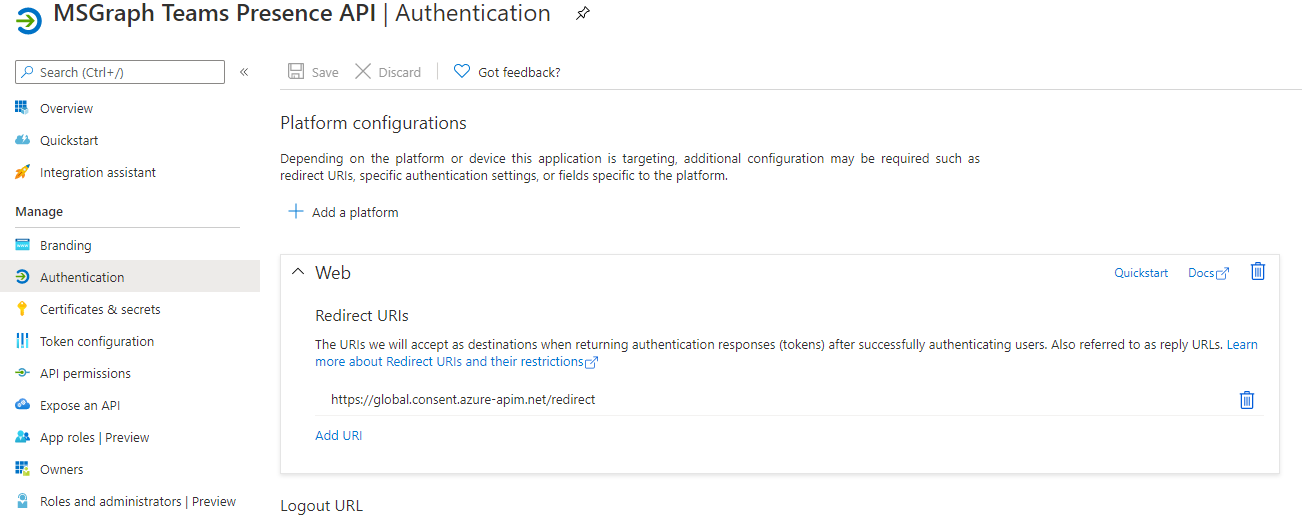
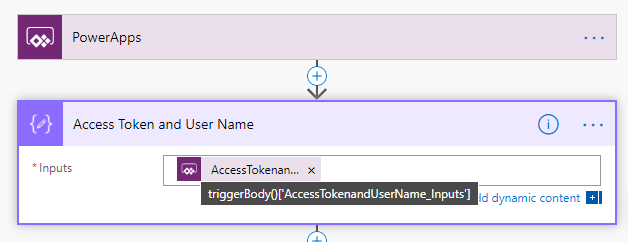
So I will go ahead and add that permission to my App Registration from before. Logged in as a Global Admin find the App Registration, go to Settings and Permissions, and add the following delegated permission for Microsoft Graph:

Note that it requires an admin to consent, so remember to click on Grant permissions:

Now we are ready to add the PIM API methods to the Custom Connector.
Adding PIM API’s to Custom Connector Operations
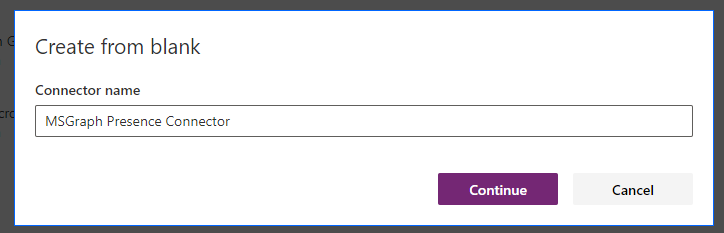
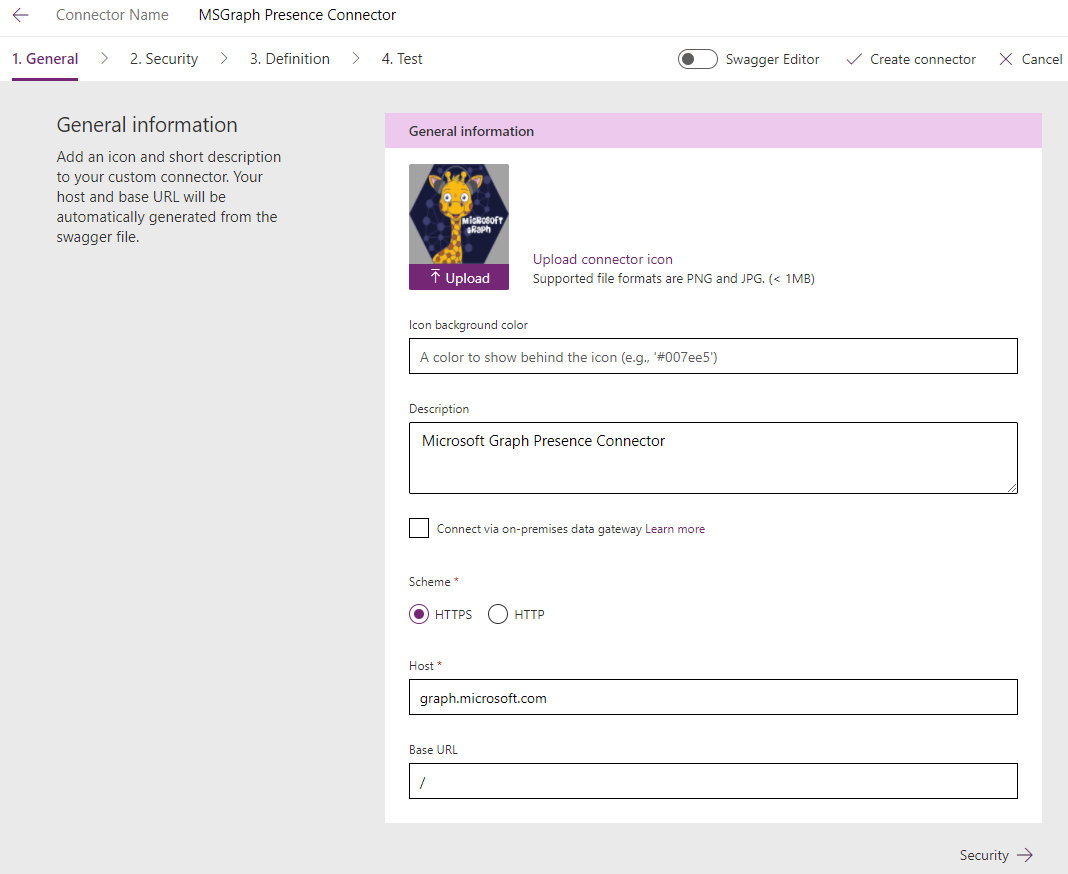
Again building on my linked blog post, you should now be able to log on to PowerApps, and find your PowerApps Microsoft Graph connector:

If you don’t have it, just follow the steps in the linked post to create it.
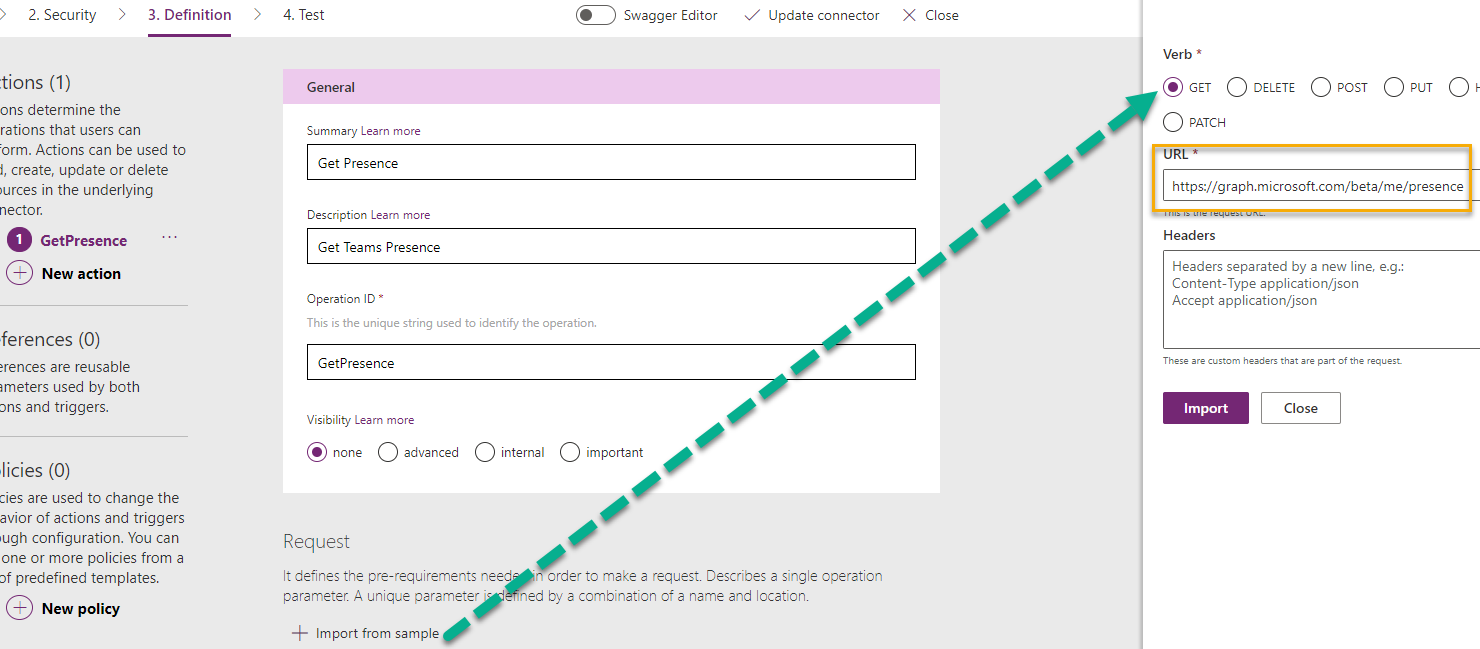
Select to edit, and go to step 3. Definition and add a new action. Lets first create a new action for getting my role assignments:

Scroll down to Request, this is where we will provide the details for our query. The best way to do this is to select to Import from sample. I specify the Method to be GET, and then the query like this, which is the same query I ran in the Graph Explorer earlier:

I don’t need to specify any Header or Body for this query, so I just press Import. Now my action looks like this:

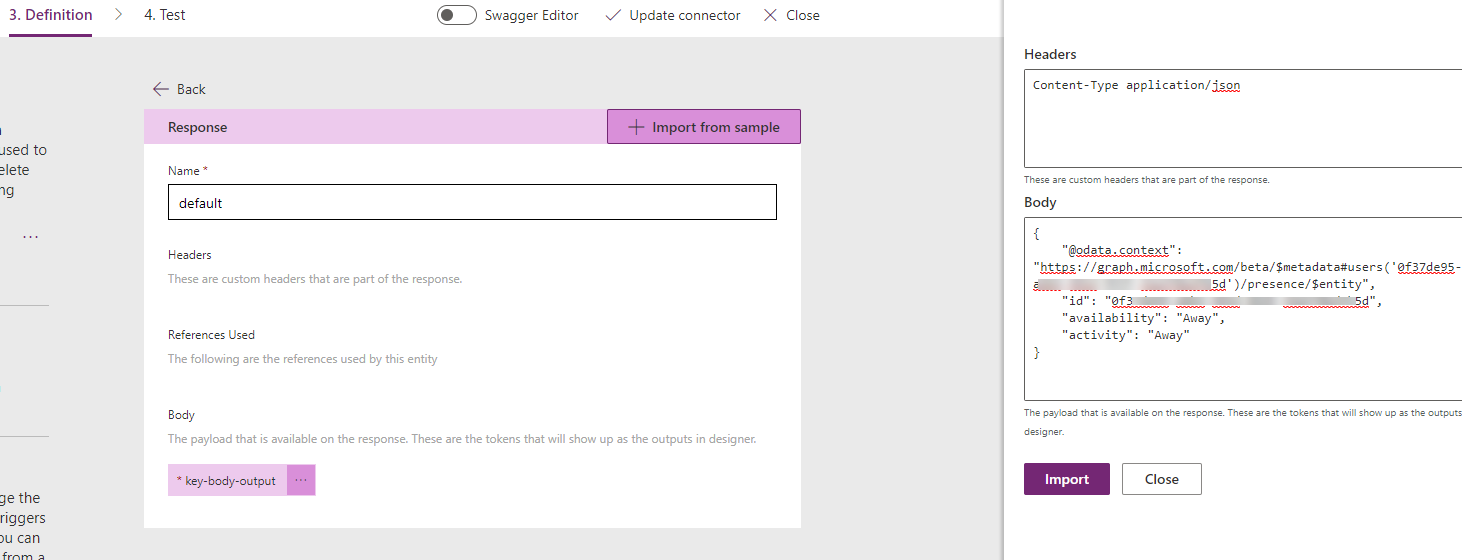
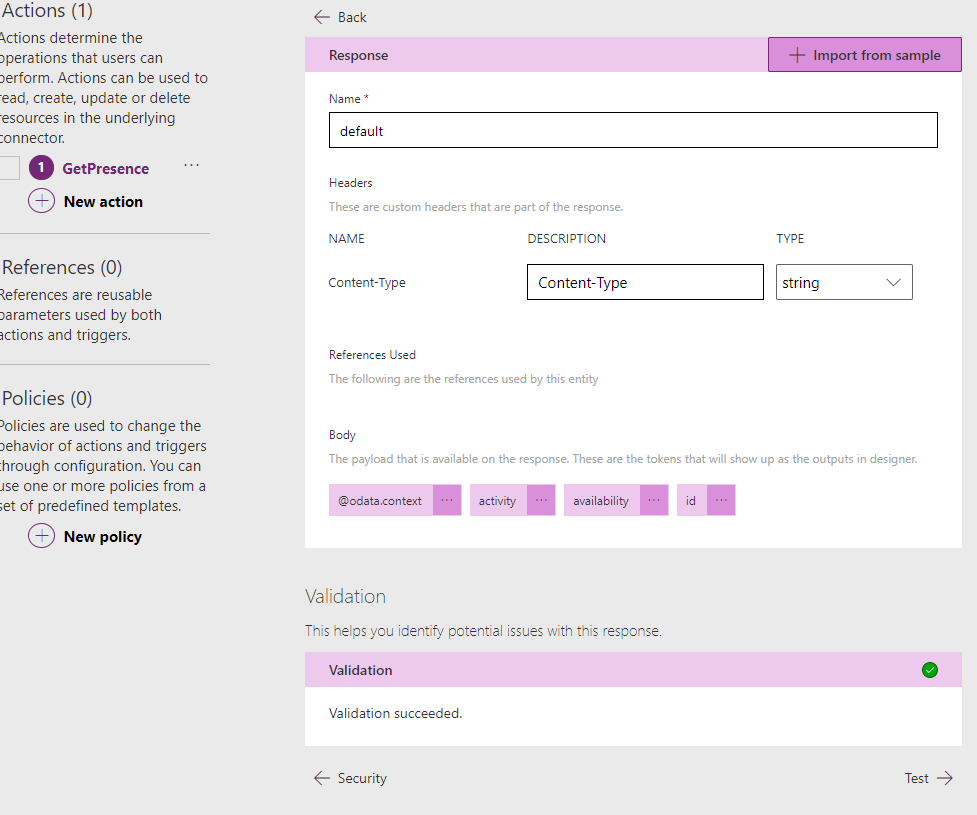
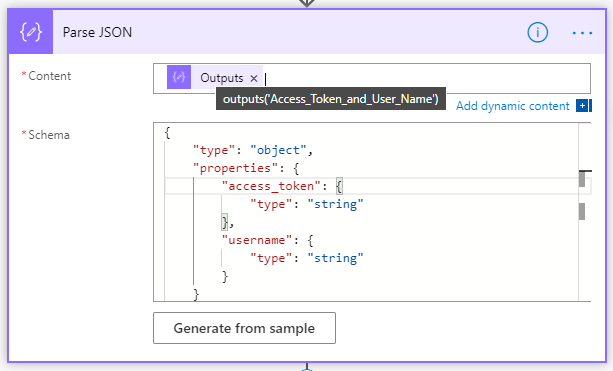
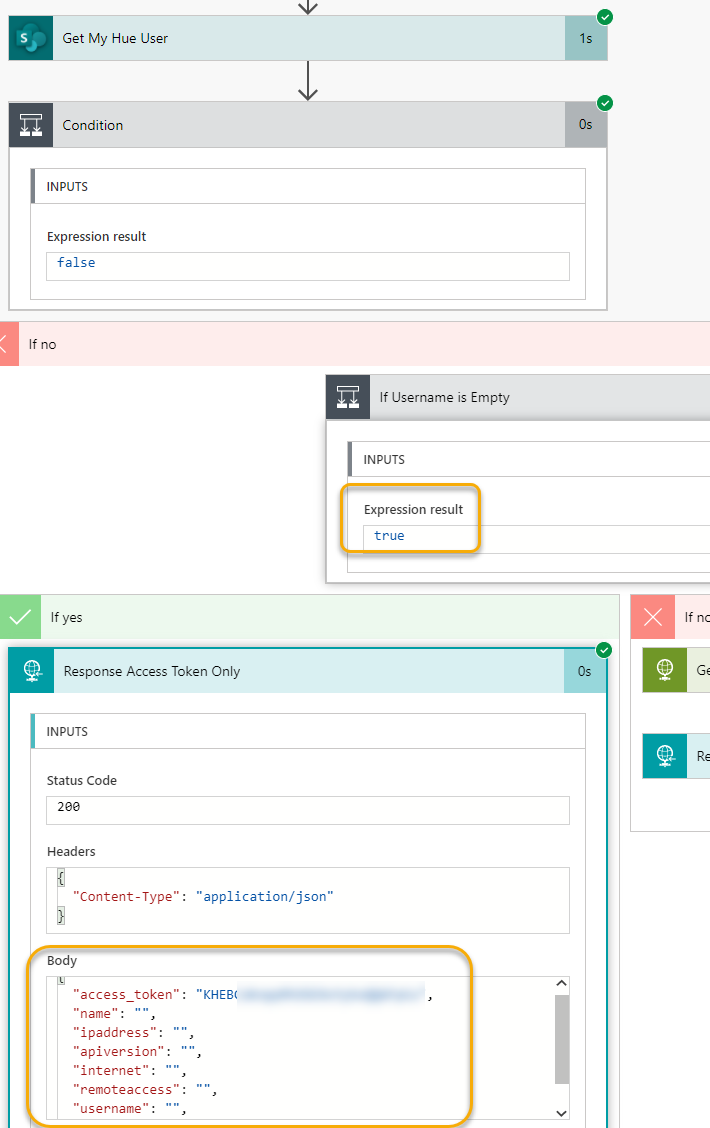
Scroll down to the Response section, and then click on the default response. Click on Import from sample, and this time you paste in the response body from the previous Graph Explorer query:

This response will help the custom connector operation so that we can get the right output values mapped in our PowerApp later. Select Import.
The response now looks like this:

We can also validate that the response looks ok:

Click on Update connector to save this operation, do not select to Test at this point. We have more to do..
Next I want to create another action for List directoryRoles. I’ll create a new Action:

Request and Import from sample:

Note that the Request now will have a $filter parameter:

Default Response and Import from sample:

Check validation and the Update Connector:

Next I want to create another action for
privilegedRole: selfActivate. I’ll create a new Action:

Request and Import from sample, this time note the POST verb, and specifying {id} in URL, as well as the request body as shown below:

Note now that the request will have an id parameter in the path as well as a body parameter:

Default Response and Import from sample (response body is copied from documentation):

The response looks like this now and we can check validation:

Click Update Connector to save our progress so far. Now we can add the last action for privilegedRole: selfDeactivate :

Request and Import from sample, specifying verb POST and again using {id} in URL:

The request will look like this now:

Default Response and Import from sample:

And we can validate the response:

Click on Update Connector to save. We should now have 4 actions successfully configured, in addition to the ones we had from before:

Now we can do some testing, close the connector for now. Under Data, find Connections. If you previously had any connections to the “PowerApps Microsoft Graph” connector, like I have here, delete the connection:

After clearing any existing connections, select New connection at the top and find the PowerApps Microsoft Graph connector:

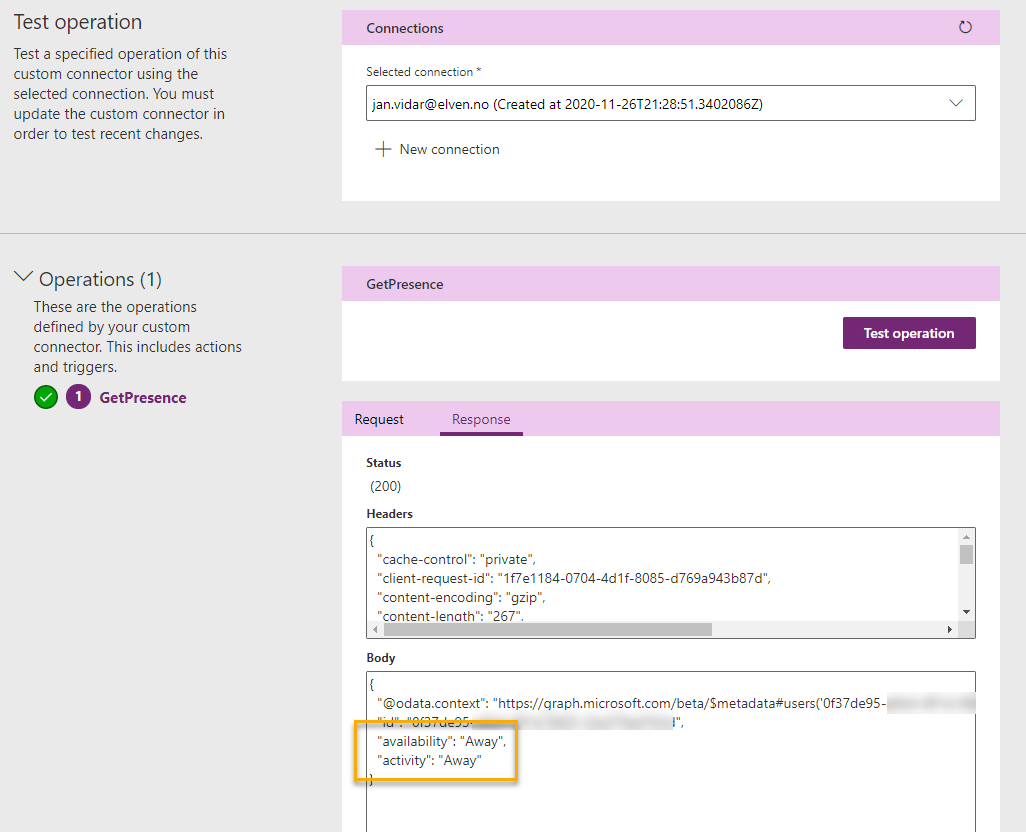
Click create and the log in with your current user to create the connection. Now you can go back to the custom connector, click Edit and then go to Test section. Select the current connection, and select the action to test. Then click Test operation:

The test should complete successfully and return my role assignments:

Lets test the list directory roles, this time I need to specify the $filter:

Testing selfActivate will fail as it did with testing with Graph Explorer because of the MFA requirement: (we will explore that later)


Last test is for selfDeactivate, which willl have an empty response because the role is not active:

Starting with the PowerApp
Now that we have the Custom Connector Operations ready, we can proceed to create the PowerApp. We’ll begin with an empty app, create some controls and layouts before we get into the Flows needed.
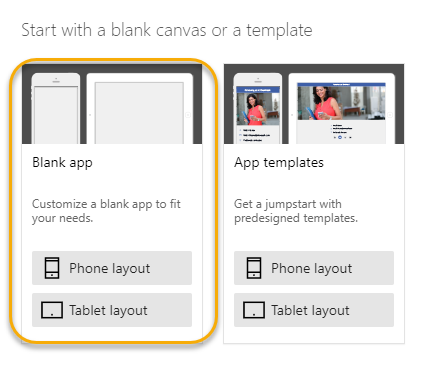
Start by Create an app:

Then select a blank canvas, and phone layout:

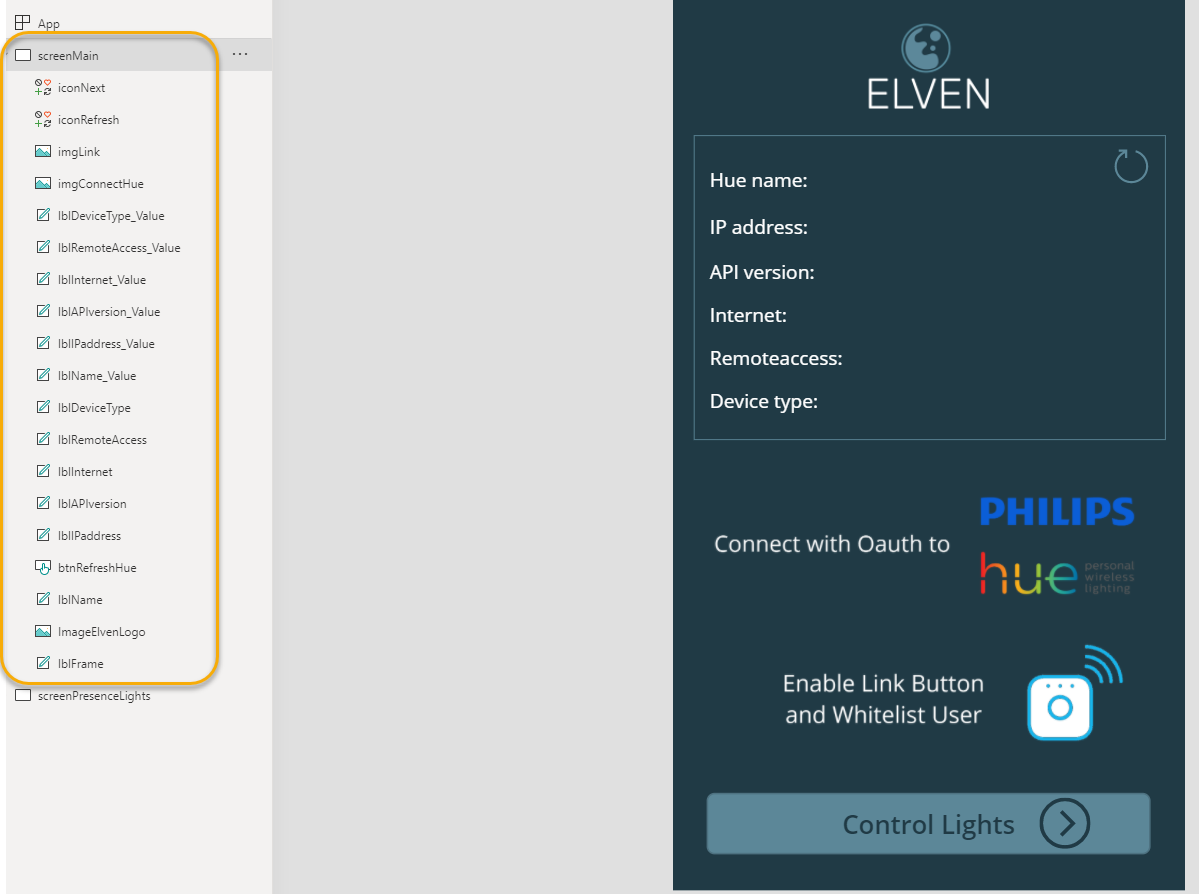
You should now have an empty app like this:

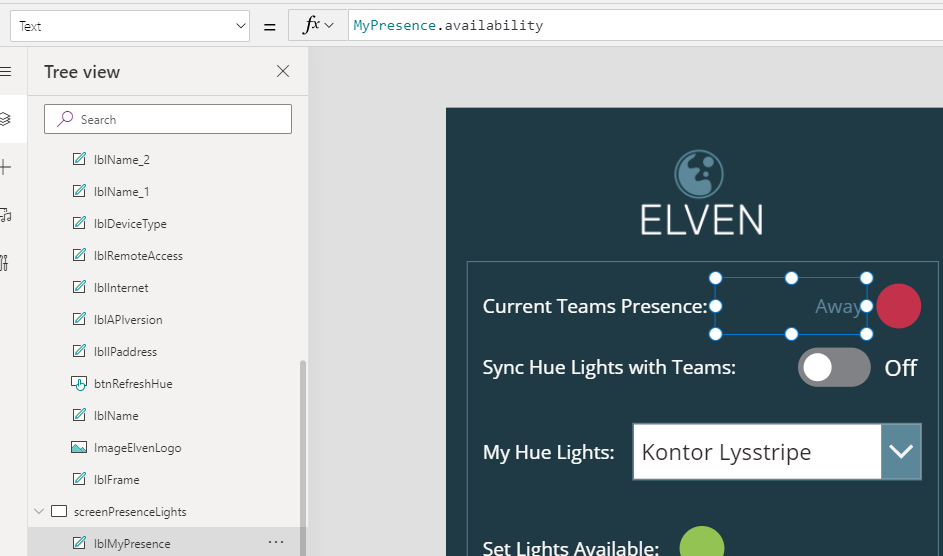
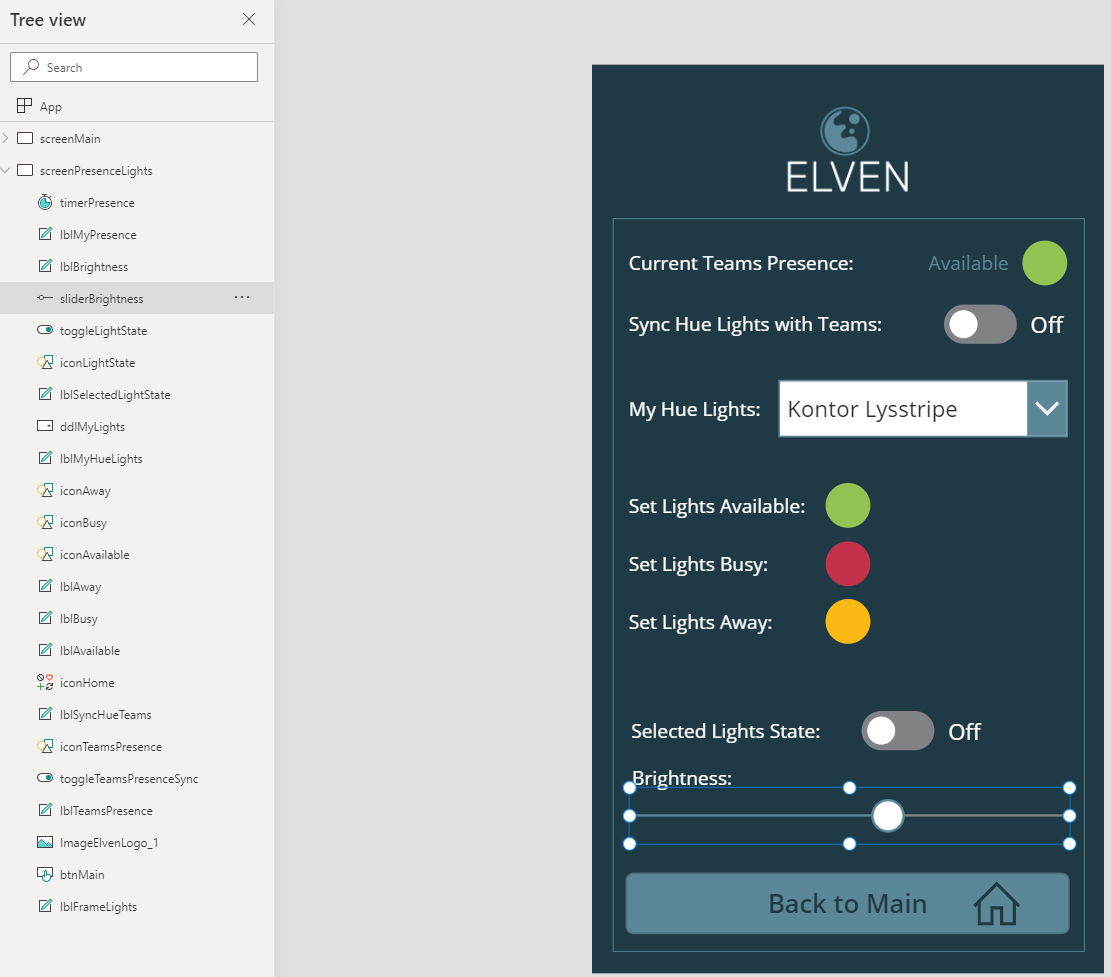
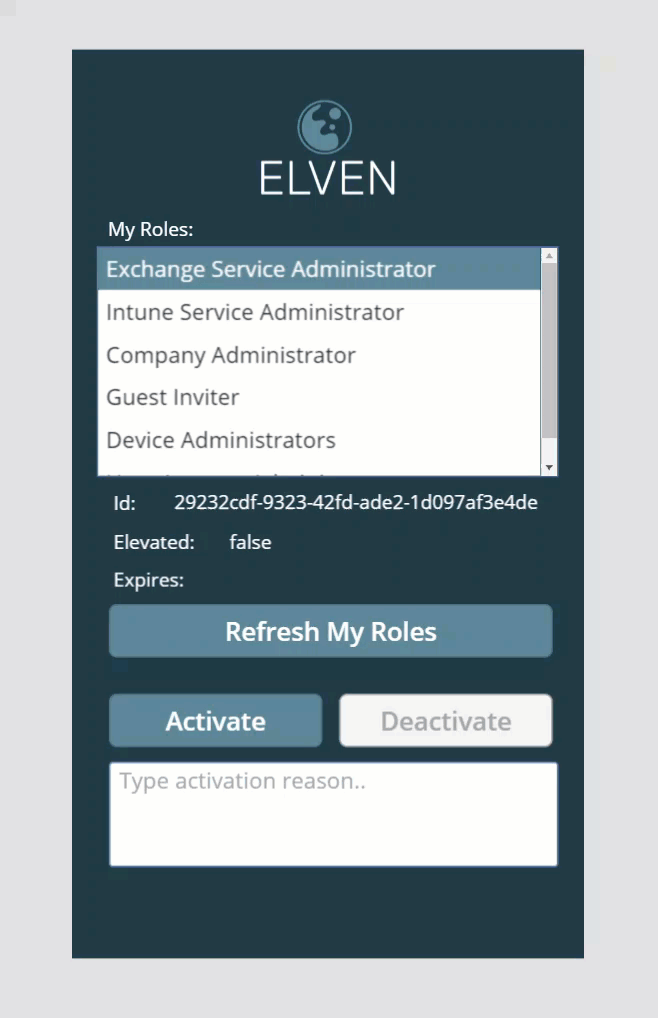
Fast forward, and I’ll assume you have some basic PowerApps skills, add some controls, layout and image after your liking, ending up with something similar like this:

A quick summary of the above:
- In addition to my selected logo and background, I’ve added labels for listing my roles and selected role details.
- I’ve added three buttons, one for refreshing my roles, and one for activate and deactivate any roles.
- I also have a text box to provide an activation reason, as well as a message label to show/hide any error message if I try to activate without a reason. We’ll get to that later.
Now we have an empty powerapp with some layouts and controls. It’s time to get into the Flows that will trigger the Microsoft Graph operations. First go to App Settings and specify an App name and choose a descriptive icon and color:

And then save the App:

Creating the Flow for Getting My Role Assignments
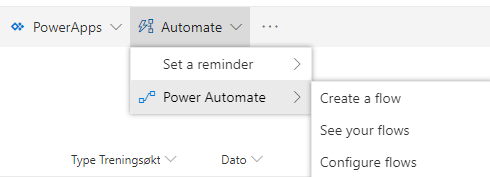
In the PowerApps main menu, find the link to Flows, and the select to create a Flow from blank:

After creating a blank Flow from here there will already be a step for input from PowerApps as shown below:

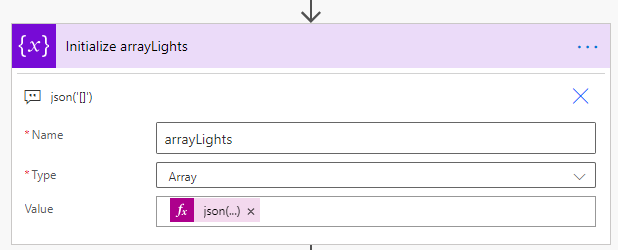
Click New step, add an action, and search for variables, and select the Variables – Initialize variable action:

Type the name MyRolesArray and select Type Array:

Add a new step of type action, and this time we will search for the custom connector “powerapps microsoft graph”, and that will list any operations we defined earlier. We will now select the operation for “My Privileged Role Assignments”:

Our Flow should look like this now:

When we tested via Graph Explorer earlier in this blog post, PIM role assignments returned with only role id’s, so we had to do an additional call to list directoryroles to get the displaynames of the roles. We will now implement some logic in the Flow to achieve this.
Add a new step, this time selecting More and Add an apply to each:

In the Apply to each, select “value” as output from the previous step as shown below:

It’s also a good idea to rename the step, like I have done below before you proceed:

Inside the For Each loop, add a new action, searching for the PowerApps Microsoft Graph connector again, this time selecting the List directoryRoles operation:

We need to provide a value for the $filter parameter, this is done by typing the filter definition and selecting the roleId from the dynamic content provided by previous step:

I also rename the step before I proceed:

Next, add another Apply to each section, using the value output from the List directoryRoles to get DisplayName:

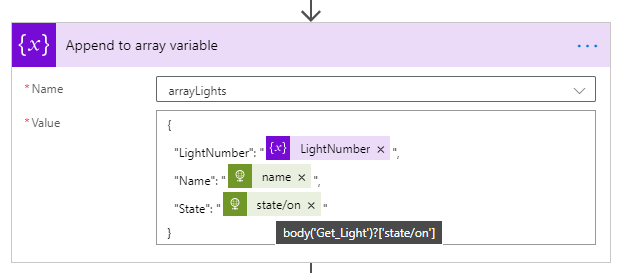
Next add an action and search for append to array, and select that:

Now comes the most important part. I want to use the array variable I initialized in the beginning of the Flow, and build a custom JSON object array which integrates my role assignments as well as the displaynames in one single output. So in the following I select the array variable name, and for value I create my own custom JSON as shown below. In addition I use the dynamic content to search for the values I want to add:

At the end of the Flow, outside of the two nested Apply to each loops, add a Request – Response action:

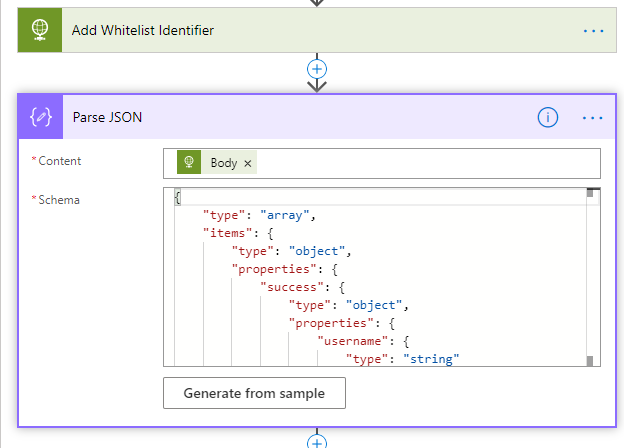
In the Response, specify the MyRolesArray as Body, and provide a Response Body JSON Schema. The best way to get a JSON schema is to Save and Test the Flow, and look at the default Response. This is how it looks in my definition:

This is the JSON schema I used:
{
"type": "array",
"items": {
"type": "object",
"properties": {
"roleId": {
"type": "string"
},
"displayName": {
"type": "string"
},
"isElevated": {
"type": "boolean"
},
"expirationDateTime": {
"type": "string"
}
},
"required": [
"roleId",
"displayName",
"isElevated",
"expirationDateTime"
]
}
}
Next, Save and Test the Flow. Look for the Test button, and select like below:

Follow the on-screen instructions for choosing test connection, and then start the Flow. Click the link to see the Flow run activity, and you should be able to see that the Flow executed successfully and you can look at the details on each step. I’m mostly interested in the Response output at the end, and it looks like this:

If I scroll down I can see that the output contains all my roles, and have the display name included in the output. This is the output I eventually will work with in my PowerApp.
Remember to give the Flow a describing name, and Save it before you proceed to the next section.

Creating the Flows for Self Activate and Deactivate Roles
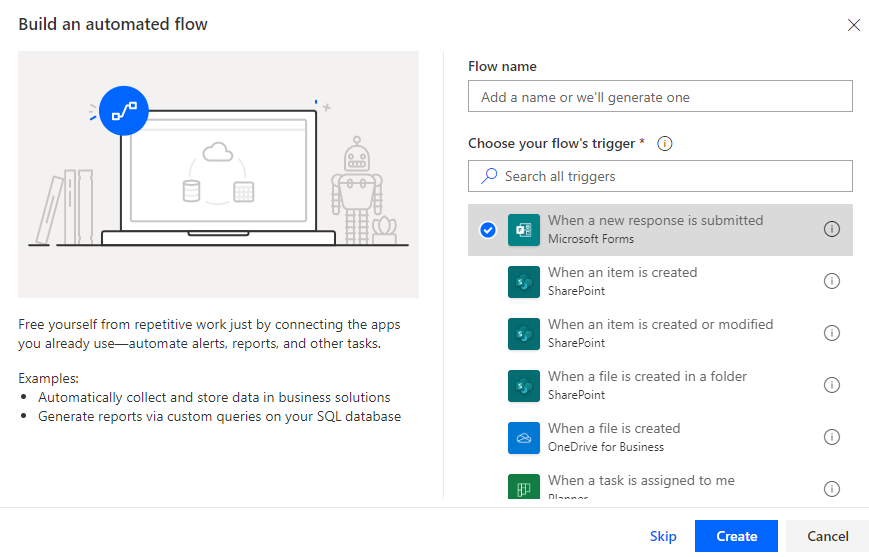
Now we need to create the Flows for self activating and deactivating the selected roles. First start by creating a new blank Flow, starting with the input from PowerApps:

Add a new step and action for the Microsoft PowerApps Graph connector and the Privileged Role Self Activate operation:

When choosing this operation we will get the opportunity to specify input fields, where id is required, as this is the role id for the role we want to activate. In addition we can specify a reason, as well as duration and ticketing info as optional fields:

In my solution I want to specify id and reason, and just use the default duration. For the id field and reason field, just click “Ask in PowerApps”, which will create two parameters to use from PowerApps when I will call the flow:

In the third step I will add a Request – Response action, and use the Body from the previous step, like this:

Save the Flow with a name like I have done below:

Then its a good idea to test the Flow, select the test button, provide the trigger for the flow, and when running we need to manually specify the role id to activate, and a reason, like shown below:
(PS! Remember to test with a role that does not require MFA on elevation, because of the previously reported bug.)

After clickin Run Now, verify that the Flow successfully started, and then click into the activity details. In the example below I can verify that indeed the role was activated:

So that is the Flow for self activating a role, now we need a similar Flow for deactivating a role. Now that we should start getting the hang of this, this is how that Flow should look after creating and saving it:

Deactivating a role only requires the role id as a parameter, as shown above. Lets test this as well:

The Flow should start successfully, and you can verify the steps like in the following:

So, now we have created 3 Flows that we will use in the previously created PowerApp. In the next section we will add the flows and provide some logic to the application.
Connecting the PowerApp to the Flows
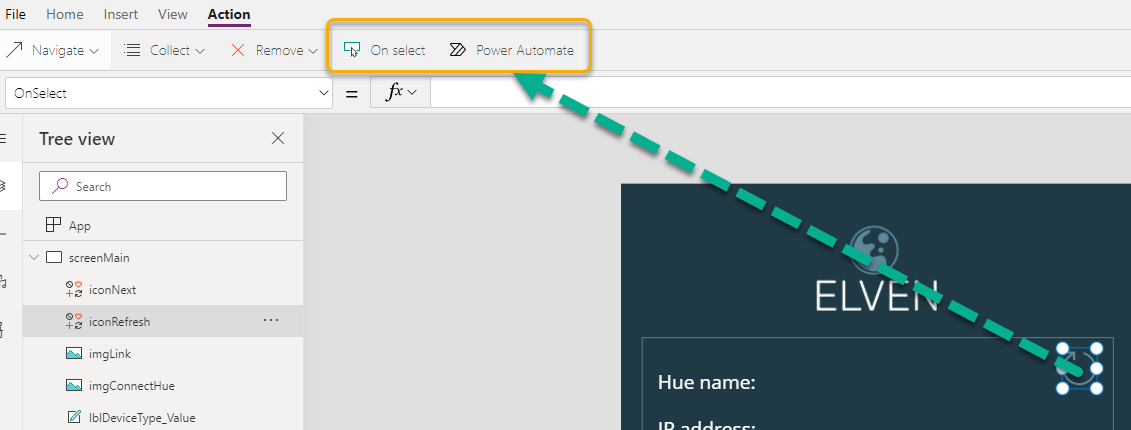
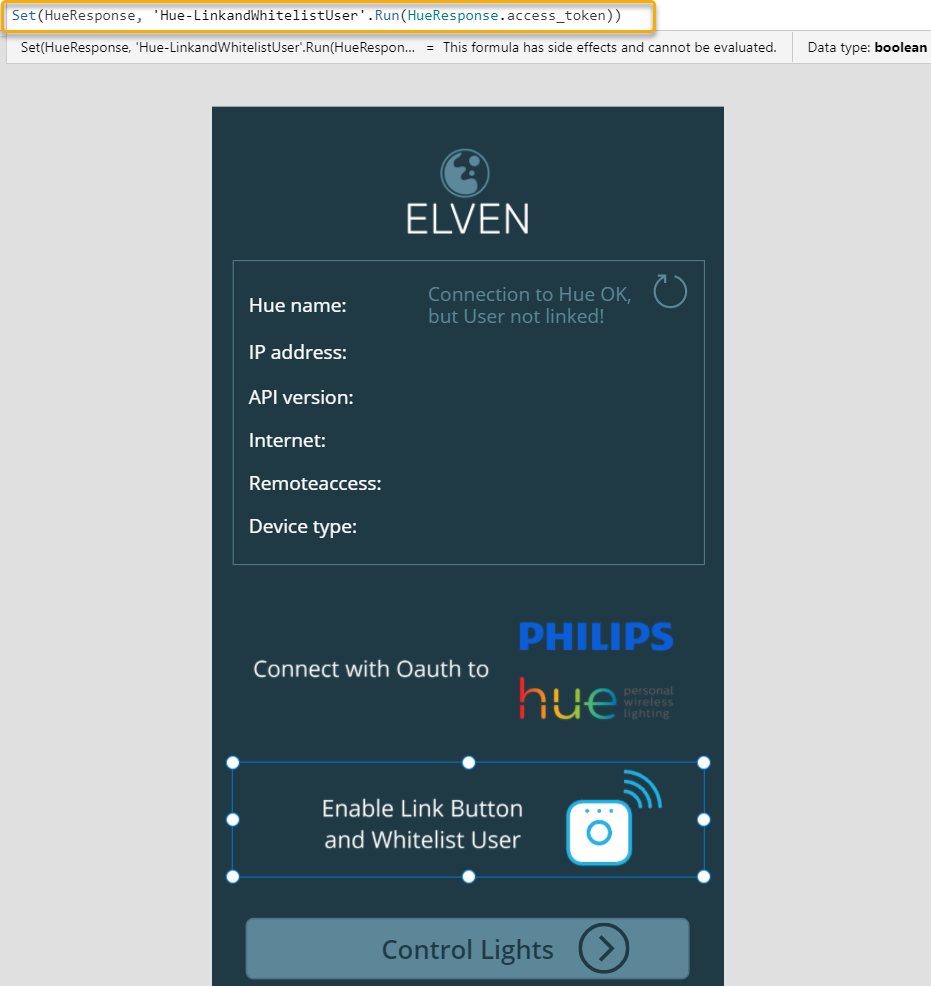
Back in the PowerApp created earlier, open it in Edit mode, and select the Refresh My Roles button. Click on the Action menu, and then on Flows, and from the Data section select the Flow we created earlier for Get My Role Assignments:

When selecting that Flow, the OnSelect event will populate with the name of the Flow and the Run method. As this Flow doesn’t have any input arguments we can just close the parenthis after like this .Run(), as shown below:

So now our button will get any role assignments for the connected user, but we have store the output we get back from the Flow, and use that in the listbox and in the details labels below. So while the Refresh My Roles is still selected, add the following to the OnSelect event:
Set(wait,true);
ClearCollect(MyPIMRoles,GetMyRoleAssignments.Run());
Set(wait,!true)
Like this:

A little explanation, the Set(wait,true) and Set(wait,!true) are used at the beginning and end of the action for indicating that the PowerApp is busy when calling the Flow. The ClearCollect is used to store the output response we get back from the Flow in a variable; MyPIMRoles.
Next, set the Items property of the listbox for My Roles to MyPIMRoles:

If we now du a test run of the PowerApp, the easiest way to do that is to hold the ALT button down and then click on the Refresh My Roles button. This should return the roles you are assigned to like this:

If your listbox is not showing the displayname of the roles, you can change that from the advanced properties of the listbox:

While the listbox i still selected, change to the OnSelect method and add the following:
Set(SelectedRole,First(lstMyRoles.SelectedItems))
It should look like this:

A quick explanation of this: I’m setting a variable “SelectedRole”, every time I click on a role in the listbox, by getting the first instance of the lstMyRoles.SelectedItems. (In fact, as my listbox only allows to select one item at a time, the first will always be the one I selected).
This “SelectedRole” variable can now be used in my other label details. First, set the lblRoleIdValue.Text property to the following:

Likewise, set the lblRoleElevatedValue.Text property to the following:

And then set the lblRoleExpiresValue.Text property to: Text(DateTimeValue(SelectedRole.expirationDateTime), DateTimeFormat.ShortDateTime24), like this:

As you can see, I’ve added some format functions to display any date and time values from the selected role in the format of short datetime 24 hour clock.
Now, if you hold down the ALT button again, you can click on the selected roles in the listbox, and the labels below will update with the selected role id, if it is elevated or not, and any expiry of existing elevations:
Now it’s time to add the other Flows to the Activate and Deactivate buttons, first select the Activate button, and on the Action and Flow menu, select to add the Priviliged Role Self Activate Flow:

This Flow needs two inputs:

The first input we will get from SelectedRole.roleId, and the second from the txtActivationReason.Text, so it would look like this:

Similarly, add the Flow for the Deactivate button, specifying the SelectedRole.roleId as input:

Now, at this point we should be able to get my role assignments in the list box, and also to be able to activate or deactivate the selected roles. I do want to add some more logic to the app though. Starting with activating/deactivating the buttons regarding the status of the role. On the Activate button, change the DisplayMode property to:
If(!SelectedRole.isElevated, DisplayMode.Edit, DisplayMode.Disabled)
Like this:

And similarly for the DisplayMode property for the Deactivate button:
If(SelectedRole.isElevated, DisplayMode.Edit, DisplayMode.Disabled)

Next, I want to add some hint text to the text box for activation reason, this is done this way:

At the bottom I have created a label with a message, this lblShowMessage control I want to set visible if I try to activate a role without specifying a reason:

Now I need to make some changes to the Activate button and OnSelect method to implement some logic:

Lets break that down: First I use the Set method to control wait to indicate that the App is busy, then I do an If check on the txtActivationReason text box, and if I have specified a reason I proceed to run the Flow to self activate the role. After that I clear the txtActivationReason text box, and call the flow for refresh the roles in the list box. At the end I use a ShowMessage variable, setting it to true or false, which in turn is connected to the Visible property of the lblShowMessage control like this:

Here is the Activate button OnSelect code for you to copy:
Set(wait,true);
If(!IsBlank(txtActivationReason.Text),
PrivilegedRoleSelfActivate.Run(SelectedRole.roleId,txtActivationReason.Text);
Reset(txtActivationReason);
ClearCollect(MyPIMRoles,GetMyRoleAssignments.Run());
Set(wait,!true),
UpdateContext({ShowMessage: true});
UpdateContext({ShowMessage: false}))
And for the Deactivate button I change the OnSelect to:

I don’t need to check the txtActivationReason text box now, so I’ll just clear it and refresh the roles. Here is the code:
Set(wait,true);
PrivilegedRoleSelfDeactivate.Run(SelectedRole.roleId);
Reset(txtActivationReason);
ClearCollect(MyPIMRoles,GetMyRoleAssignments.Run());
Set(wait,!true)
I’ll also add a reset of the activation reason text box to the Refresh My Roles button:

And finally, at the OnSelect method of the lstMyRoles listbox, I’ll set the ShowMessage variable to false whenever I click on different roles in the list, so that any previous activation error message is not shown.

That should be it! We’ve now implemented some logic to the PowerApp, and are ready to publish and run the App.
Publish and Run the Azure AD PIM App
On the File menu click Save, and the Publish:

You can also Share the PowerApp in your organization:

(please see my previous blog post https://gotoguy.blog/2017/12/17/access-microsoft-graph-api-using-custom-connector-in-powerapps-and-flows/, and the sharing section at the end for details on the experience on this).
After you have published the PowerApp, you can click the Play button to run the PowerApp. First time you will need to accept permission:

After that you should be able to refresh your roles:

Let’s try to activate a role:

After I click the Activate button, the role will be activated, the list will be refreshed, and I can look at the Device Administrators role that it is now elevated and with an expiry time:

The Activate button is now disabled for that role, and the Deactivate button is enabled. Let’s try to deactivate the role again, clicking the Deactivate button. After a short time the role is deactivated, elevation status is false:

So now the Azure AD PIM App is working as intended, every user that have been assigned a role can now elevate themselves using the App. Even better is that my users also now can use the mobile PowerApps app to run this from their mobile phones!
As an administrator I can also see the results of the activations in the Directory roles audit history:

Known issues and tips
The biggest issue right now is a problem with the Microsoft Graph beta endpoint for selfactivate the role, as it currently does not support activating roles that require MFA. So I you want to use Microsoft Graph for activating roles now, you have to disable the requirement of requiring MFA for activation, either by default for all roles or for roles individually:

I’ll keep you posted of any changes to this issue, and update the blog post if that changes.
Another tip is that if you want to do some reporting on how many users are using the PowerApp for activating their PIM roles, you can for example use the ticketSystem string for specifying a constant like below:

That should wrap up this blog post, hope this will be useful for you, thanks for reading