Tag Archives: Project Honolulu

Configure Azure AD Authentication for Project Honolulu version 1803

Just a few days ago a new version of Project Honolulu, technical preview 1830, was released for Windows Server Insiders, https://blogs.windows.com/windowsexperience/2018/03/13/announcing-project-honolulu-technical-preview-1803-and-rsat-insider-preview-for-windows-10/.

One of the major updates to that version was the support for changing access control from local group/Active Directory to Azure AD Authentication. Configuring Azure AD Authentication will provide the ability to pre-authenticate users with their Azure AD credentials, as well as restrict access to selected users or even integrate with Azure AD Conditional Access.

In this blog post I will provide some steps, examples and screenshots for how I did that configuration in my own environment.

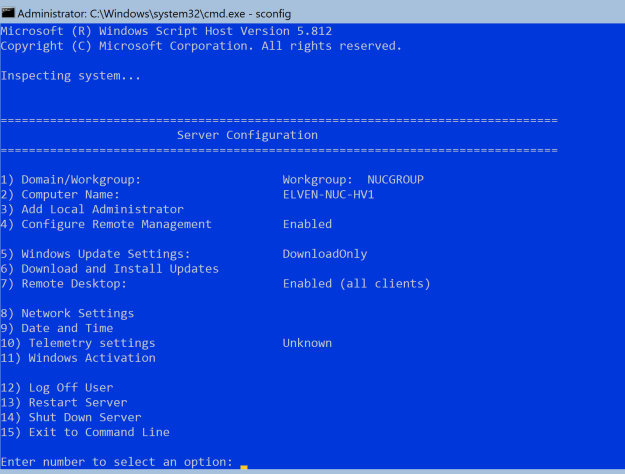
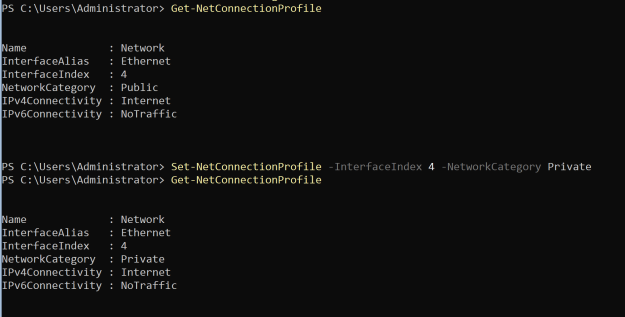
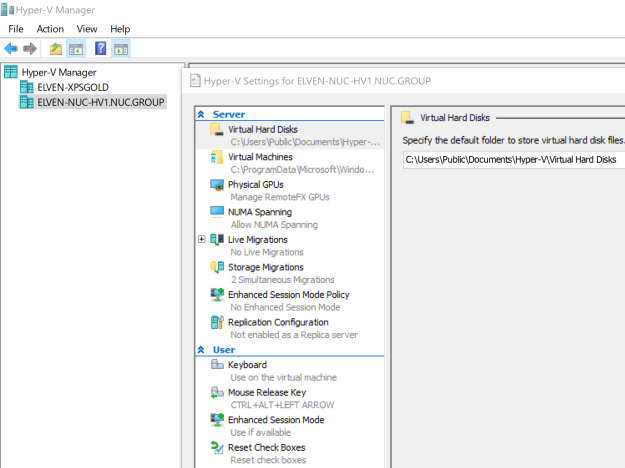
This scenario builds on the previous installation I have made with Windows Server 1709 (Server Core) and Project Honolulu, see blog article for how my setup is: https://gotoguy.blog/2018/02/13/installing-windows-server-version-1709-on-intel-nuc-skull-canyon-and-configure-hyper-v-for-remote-management/

Update existing version of Project Honolulu to version 1803

Since I had an existing installation of Project Honolulu on this server ELVEN-NUC-HV1.nuc.group, I downloaded the 1803 installation file, connected to the server and ran the following command to silently install and update the existing installation:

msiexec /i HonoluluTechnicalPreview1803.msi /qn /L*v log1803.txt SME_PORT=443 SSL_CERTIFICATE_OPTION=generate

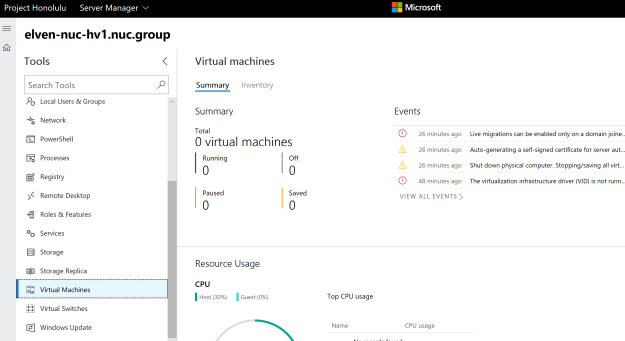
After that I navigated to the https://elven-nuc-hv1.nuc.group url from my client machine, and verified that I could sign in and see that the Project Honolulu website was updated.

image

I also note the certificate warning I receive because my client doesn’t trust the self generated certificate the gateway server installation provided. This will be a problem when using Azure AD Authentication, so in the next step I will make sure the client trusts that.

Export and trust self signed certificate

First, start a PowerShell session on the Honolulu Gateway Server, and then run the command:

Get-ChildItem –Path cert:\LocalMachine\My | FL

This will return any certificates in the machine store. As I have previously installed and generated a self signed certificate for Project Honolulu gateway server, I see 2 certificates now, and can note the thumbprint for the most recent one:

image

Next I will run the following commands for getting the certificate and exporting it to a .cer file:

$cert = (Get-ChildItem –Path cert:\LocalMachine\my\<THUMBPRINT>)
Export-Certificate –Cert $cert –FilePath <path>\<filename>.cer.

In my enviroment I ran the following:

imageAfter that, transfer the .cer file to the client computer(s) you want to be able to connect to the Project Honolulu website, and run the following commands to get and import the .cer certificate into trusted root store:

$cert = (Get-ChildItem –Path <path>\<filename>.cer)
$cert | Import-Certificate –CertStoreLocation cert:\LocalMachine\Root

In my enviroment this looked like this (from an elevated PowerShell window):

image

I took the extra step of verifying that the self signed certificate indeed was imported into trusted root store:

image

Change Access Control to Azure AD

Now I am ready to change access control in Project Honolulu. Click on the Settings cogwheel, and under Settings click Access.

My current settings are set to Active Directory or Local groups, so I click on Change access control:

image

I then change to Azure Active Directory (AAD), and see the prerequisites for connecting the gateway to Azure:

image

I downloaded the New-AadApp.ps1 script, note that this script requires the modules AzureRM.Resources and AzureAD to be installed at the machine where you run the script. If you don’t have them installed, you can install these using Install-Module, as shown in this example:

image

I chose to run this script on my client computer (not on my server core gateway computer), and with the following command:

.\New-AadApp1803.1.ps1 –GatewayEndpoint https://elven-nuc-hv1.nuc.group

(PS! I didn’t have the AzureAD module installed, but the AzureADPreview module instead. A simple change in the Requires section of the script fixed that;)

Running the script prompted me to specify a Global Administrator account for the tenant I wanted to register the Azure AD App in, and after sucessfully authenticating I got confirmation. Note the AAD Application name and other Id’s:

image

Back at the Access Control settings, refresh the browser, note the changed instructions show in the dialog below, and then Save. This will restart the gateway service.

image

After refreshing the browser again, you will be prompted by the following consent for permissions (provided that you already had an active logged on session, or else you will prompted to log in to the tenant you registered the app in):

image

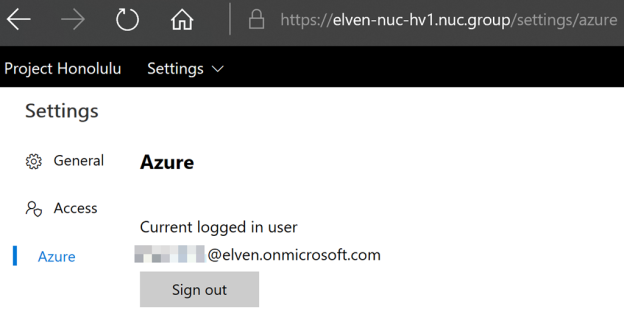
After successfully authenticating and accepting, I’m logged into the Project Honolulu website. Under Settings and Azure, I can verify that I’m logged in and sign out again if needed.

image

Logging on with other users from the tenant

Remember by default all members of the Azure AD tenant will have user access to the Honolulu gateway service. That includes any B2B Guest Users!

Each user logging in need to first time consent to permissions, in the following screenshots I have logged on with a normal user account and then a B2B guest account:

imageimage

Only local administrators on the gateway machine will have administrator access to the Honolulu gateway.

Under Access Settings you can click on a link to go directly to the Azure AD App that got registered when you ran the script earlier:

image

Clicking on that link and logging in with a Global Administrator, you will get to your SME-<name> app. From there you can go to users and groups, and all users that have logged in until now will be listed. By default they will not have any role assigned, but you can change role between Gateway Administrator or Gateway User as I have done below:

image

If you want to restrict which users or groups that are allowed to log into the Project Honolulu site with their Azure AD Credentials, you can go to Properties and then enable the setting for require user assignment:

image

After enabling this setting users that aren’t added to the list of users or groups either directly or via group membership will not be allowed to log on to Project Honolulu.

Summary and next steps

In this blog post I have shown a first look for enabling Azure AD Authentication for Project Honolulu version 1803 technical preview.

The next step is to look into configuring Azure AD Conditional Access for this application, that will come in a later update to this blog article, stay tuned!

A couple of issues is also on my list:

  • I’m prompted to log on with local admin credentials in addition to the Azure AD credentials
  • When I follow the link from Access Control settings I’m able to find the Azure AD App, but I cannot see it by just browsing the Enterprise Applications list. Based on the documentation I this should have work. This means for now I cannot add that App to any Conditional Access policies as it is not browseable.
  • The .\New-AadApp1803.1.ps1 script cannot be run on the Windows Server 1709 core version, as there is no GUI and I get iframe errors, it could be that this is related to the issue above, as I ran the script on my client instead.

I will also look into these issues in an update to this blog post. Please comment below if you are seeing similar issues or have any other experiences. Thanks for reading 🙂

Installing Windows Server, version 1709, on Intel NUC Skull Canyon and Configure Hyper-V for Remote Management

A while back I wrote a blog post on Installing Hyper-V Server 2016 on my Intel NUC Skull Canyon: https://gotoguy.blog/2016/10/17/installing-microsoft-hyper-v-server-2016-on-intel-nuc-skull-canyon/

You can read more on the hardware setup on that referred blog post, but in this blog post I will revisit the steps on how to repeat this setup on the new Semi-Annual Channel release of Windows Server, version 1709. You can read more on this new server version here: https://docs.microsoft.com/en-us/windows-server/get-started/get-started-with-1709

Setup Windows Server, version 1709

I needed to add a bootable volume for which I could install Windows Server, version 1709, and prepared an USB stick for which I would boot up the installation media for Windows Server 1709. The following steps should help you set up a bootable USB stick for Windows Server, version 1709:

  1. Download the .iso image for the Windows Server, version 1709, and mount it to a drive letter (in my example this will be f:)
  2. Make sure the USB stick is inserted and note the drive letter (in my case this is E:)
  3. Launch an elevated Command Prompt or PowerShell window (Run as Administrator)
  4. Run command: Diskpart (this will start DiskPart tool in interactive mode)
  5. Run command: list disk (from the list, note the disk number of the USB drive)
  6. Run command: select disk 1 (use the number from above, double check before next step which is to clean)
  7. Run command: clean (careful, this will wipe out the usb drive completely, so make sure you have selected the correct disk number)
  8. Run command: create partition primary
  9. Run command: select partition 1
  10. Run command: active (this will mark the selected partition as active)
  11. Run command: format fs=ntfs quick label=”1709″ (wait after for formatting to complete)
  12. Run command: exit
  13. You have now exited diskpart, change to the mounted iso drive (f:), and the run command: cd boot
  14. Run command (change drive letters if different in your environment): F:\boot>bootsect /nt60 e:
  15. You will now have updated NTFS filesystem bootcode on the USB drive, and the last step is to copy all Windows Server, version 1709 files:
    xcopy f:\* e: /H /F /E
  16. This could take a while, especially copying the large install.wim file. After copying is finished, you are ready to boot the USB stick on the Intel NUC Skull Canyon.
  17. At the Intel NUC boot screen, hit F10 to enter boot menu, and select the boot option for UEFI USB drive. After this the Windows Server, 1709 server install should begin.

Install the Windows Server, 1709 following the installation process, and since 1709 is only available in Server Core, you will have to use Command Prompt and “SConfig” tool for initially configuring the server as shown in the next section.

Configuring the Windows Server, 1709 version for Remote Management and Hyper-V Server

After installation and changing the Administrator account password before first time logon, the Server Core configuration was ready for to start configure the server.

I first did these changes:

  • Renamed the Computer Name, in this case I renamed the Computer to ELVEN-NUC-HV1
  • Renamed the Workgroup name to NUCGROUP (optional)
  • Enabled Remote Desktop (All clients, less secure). This setting can be reversed after I have configured all the Remote Management scenarios I need to.
  • Under Configure Remote Management, I also Enabled the Server to Response to Ping, that could be useful when setting up the Server.
  • I also downloaded and installed any pending updates.

2018-02-13_00-29-31

My next step was to add the Hyper-V Server Role and configure for Remote Management via Hyper-V Manager.

Add and Configure the Hyper-V Host for Remote Management

In the Command Prompt of the server, type powershell.exe to start a PowerShell session.

Then run the following command to install the Hyper-V Role:

Add-WindowsFeature -Name Hyper-V,RSAT-Hyper-V-Tools

2018-02-13_22-36-56

After a reboot we are ready to configure the server for remote management

I want to use my Windows 10 machine and Hyper-V Manager to remote manage this Hyper-V Host, as described in this link: https://msdn.microsoft.com/en-us/virtualization/hyperv_on_windows/user_guide/remote_host_management.

As this will be my home/portable lab, the Hyper-V Server will not be in a domain, so I need to use the instructions at the end of the above article for Manage a Hyper-V host outside your domain (or with no domain).

This is the steps I went through to set that up:

Configure FQDN for the Hyper-V Host

I want to set the FQDN for the Hyper-V Host so that:

Computername = ELVEN-NUC-HV1
Desired Primary DNS Suffix = nuc.group

In PowerShell, I first add the FQDN of the computer with the Netdom command:

netdom computername $env:computername /Add:ELVEN-NUC-HV1.nuc.group

Second, I add the FQDN of the computer to primary:

netdom computername $env:computername /MakePrimary:ELVEN-NUC-HV1.nuc.group

Restart the server before the next step.

Add the FQDN and IP address to the Hosts file

To be able to access the Hyper-V Server from my Windows 10 client, I add the IP address (I have created a DHCP reservation for it on my Router) and the FQDN in my Hosts file in C:\Windows\System32\Drivers\Etc directory.

image

Configure Remoting on the Hyper-V Server

On the Hyper-V host to be managed, start PowerShell.exe, and run the following as an administrator:

Enable-PSRemoting

Enable-PSRemoting will create the necessary firewall rules for private network zones.

To make sure that the connection are in the private network zone, I check with the command:

Get-NetConnectionProfile

In my case, as this server is in a workgroup, I must specifically change the network zone from public to private:

Set-NetConnectionProfile -InterfaceIndex 4 -NetworkCategory Private

When checking after that, the connection is now Private:

2018-02-13_23-04-11

After that I run the following command:

Enable-WSManCredSSP -Role server

Configure the Client

On my Windows 10 client machine, I run the following commands in a PowerShell (Run As Administrator) session:

# Start the WinRM Service
Start-Service WinRm

# Add the Hyper-V Server as Trusted Host
Set-Item WSMan:\localhost\Client\TrustedHosts -Value “elven-nuc-hv1.nuc.group”

# Add the Hyper-V Server to the list of servers to delegate credentials to
Enable-WSManCredSSP -Role client -DelegateComputer “elven-nuc-hv1.nuc.group”

If you later when adding the Server to Hyper-V Manager, get this error message, you need to follow these instructions on the client via GPedit.msc:

Configure the following group policy: * Computer Configuration | Administrative Templates | System | Credentials Delegation | Allow delegating fresh credentials with NTLM-only server authentication *

Click Enable and add wsman/elven-nuc-hv1.nuc.group

image


Add the Server to Hyper-V Manager

Finally, we should be ready to add the Server to Hyper-V Manager:

  1. Select Connect to Server, specify name and Connect as your Admin user:image
  2. And now I can successfully configure the Hyper-V Server:
    2018-02-13_23-09-11

I can now configure Hyper-V Settings and add VMs to the Server via Hyper-V Manager from my Windows 10 client to the Windows Server, version 1709!

Manage the Windows Server 1709 with Project Honolulu

Another way to remote manage the Windows Server, version 1709 is to use the browser based server management tool “Project Honolulu”, https://docs.microsoft.com/en-us/windows-server/manage/honolulu/Honolulu.

Project Honololu is supported in Gateway Mode on the 1709 server version, and to install you first have to download the Honolulu installer, and then run a command like this:

msiexec /i <HonoluluInstallerName>.msi /qn /L*v log.txt SME_PORT=<port> SSL_CERTIFICATE_OPTION=generate

In my example I ran the command like this:

msiexec /i HonoluluTechnicalPreview1712-05002.msi /qn /L*v log.txt SME_PORT=443 SSL_CERTIFICATE_OPTION=generate

After installing Project Honolulu I can now also remote manage via browser from my client:

2018-02-13_23-26-59