Tag Archives: Azure AD Application Proxy

Install & Register Azure AD Application Proxy Connector on Windows Server 1709

I recently installed the new release of Windows Server, version 1709 on my Intel NUC, you can read about that here.

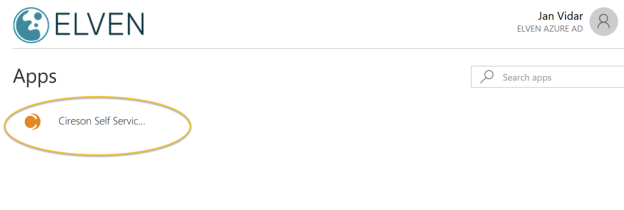
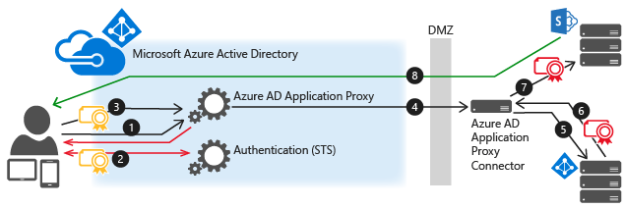
I have installed Project Honolulu for remote server management on that server, but as this Intel NUC is usually located on my home lab network, I want to be able to publish and access the Honolulu website using Azure AD Application Proxy.

As the Windows Server 1709 is Server Core, I need to install and configure the Azure AD Application Proxy Connector silently, and these are the steps I did to do that.

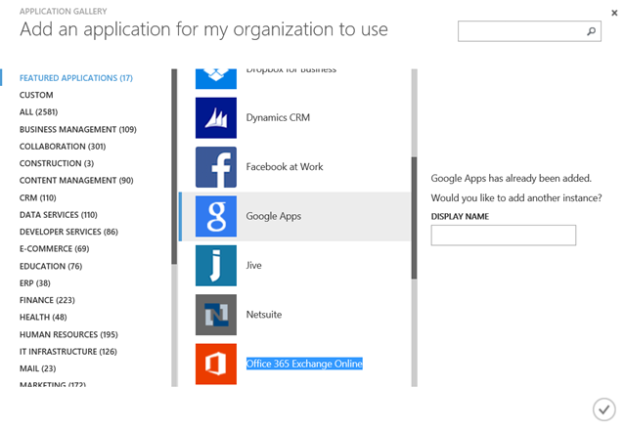
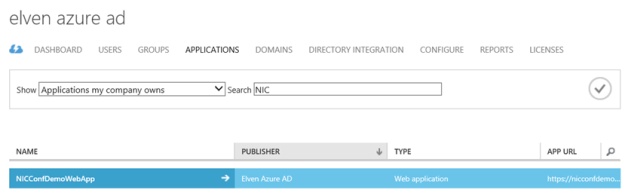
First, you need to download the Application Proxy connector install file, and transfer it to the server. You can access the connector download from Application Proxy section in your Azure AD portal:

image

After that, run the following command to do a quiet install of the connector, skipping registration interactively:

AADApplicationProxyConnectorInstaller.exe REGISTERCONNECTOR=”false” /q

image

Next we need to register the Application Proxy connector to Azure AD, and for that we need to run some PowerShell commands. There are two ways this can be done, with a Credential Object, or using an Offline Token. Using Credential is simplest, but has the drawback that you cannot use that method if your Global Administrator account is protected with Azure MFA. Lets look at both methods below.

Using Credential Object:

On the Server you want to register the Azure AD App Proxy Connector, start a PowerShell session and run the following commands for setting the Global Administrator user name and password, and then create a Credential Object.

image

After that, run the following commands to run the RegisterConnector.ps1 script for register the connector using Credential object as authentication:

image

You can copy the PowerShell commands used above using the Gist linked at the end of this blog post.

Using Offline Token:

If you can’t or don’t want to use a credential object, you have to use a offline token. The following commands will get an access token for the authorization context needed for Application Proxy Connector Registration.

Getting the Token can be run from any client, and then transferred to the server, but you will need to have the Azure Active Directory Authentication Library (ADAL) installed at the machine you are running the PowerShell commands. The easiest way to get the needed libraries installed is to Install the AzureAD PowerShell Module.

The following commands locates the AzureAD (or AzureADPreview) Module, and then finds the ADAL Helper Library: Microsoft.IdentityModel.Clients.ActiveDirectory.dll, and adds that as a Type to the PowerShell session:

image

Next, run these commands to define some constants, these values are the same for all tenants:

image

Now we can run these commands for setting the authentication context and then prompt user for AuthN:

image

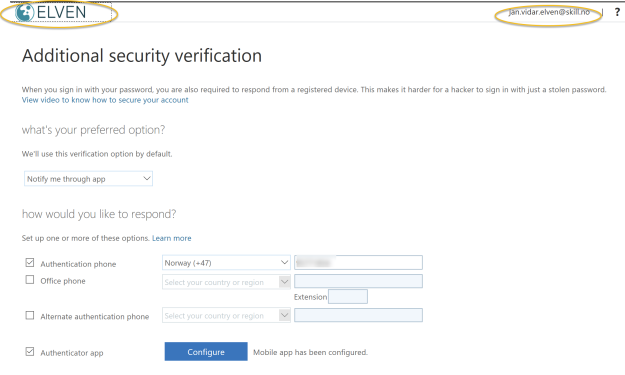
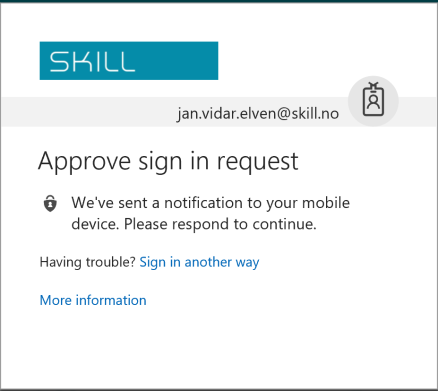
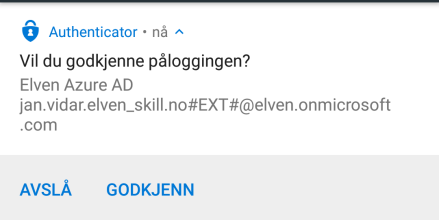
Running the above commands will result in an authentication prompt, this is where you would specify your Global Administrator account, and if MFA enabled this will also work:

image

After authenticating we can check the result and save the token and tenantId in variables as shown below:

image

Next, copy the contents of the $token and $tenantId to the Windows Server 1709, and run the following command to create a secure string from the token:

image

And then run the RegisterConnector.ps1 script with AuthenticationMode as Token and using the secure token and tenant id as parameter values as shown below:

image

PS! According to the official documentation, there are no description or examples for the mandatory parameter “Feature”, but I found that it accepts the value “ApplicationProxy” as used above.

You can copy the above PowerShell commands from the Gist linked at the end of this blog post.


# Register Azure AD App Proxy Connector
# PS! Using Credential Object cannot be used with MFA enabled administrator accounts, use offline token
$User = "<username of global administrator>"
$PlainPassword = '<password>'
$SecurePassword = $PlainPassword | ConvertTo-SecureString -AsPlainText -Force
$cred = New-Object –TypeName System.Management.Automation.PSCredential –ArgumentList $User, $SecurePassword
Set-Location "C:\Program Files\Microsoft AAD App Proxy Connector"
.\RegisterConnector.ps1 -modulePath "C:\Program Files\Microsoft AAD App Proxy Connector\Modules\" `
-moduleName "AppProxyPSModule" -Authenticationmode Credentials -Usercredentials $cred


# Get Offline Token for Azure AD App Proxy Register Connector
# Then Register Connector with that Token
# Locate AzureAD/AzureADPreview PowerShell Module
# Change Name of Module to AzureAD or AzureADPreview after what you have installed
$AADPoshPath = (Get-InstalledModule -Name AzureADPreview).InstalledLocation
# Set Location for ADAL Helper Library
$ADALPath = $(Get-ChildItem -Path $($AADPoshPath) -Filter Microsoft.IdentityModel.Clients.ActiveDirectory.dll -Recurse ).FullName | `
Select-Object -Last 1
# Add ADAL Helper Library
Add-Type -Path $ADALPath
#region constants
# The AAD authentication endpoint uri
[uri]$AadAuthenticationEndpoint = "https://login.microsoftonline.com/common/oauth2/token?api-version=1.0/&quot;
# The application ID of the connector in AAD
[string]$ConnectorAppId = "55747057-9b5d-4bd4-b387-abf52a8bd489"
# The reply address of the connector application in AAD
[uri]$ConnectorRedirectAddress = "urn:ietf:wg:oauth:2.0:oob"
# The AppIdUri of the registration service in AAD
[uri]$RegistrationServiceAppIdUri = "https://proxy.cloudwebappproxy.net/registerapp&quot;
#endregion
#region GetAuthenticationToken
# Set AuthN context
$authContext = New-Object "Microsoft.IdentityModel.Clients.ActiveDirectory.AuthenticationContext" `
-ArgumentList $AadAuthenticationEndpoint
# Build platform parameters
$promptBehavior = [Microsoft.IdentityModel.Clients.ActiveDirectory.PromptBehavior]::Always
$platformParam = New-Object "Microsoft.IdentityModel.Clients.ActiveDirectory.PlatformParameters" -ArgumentList $promptBehavior
# Do AuthN and get token
$authResult = $authContext.AcquireTokenAsync($RegistrationServiceAppIdUri.AbsoluteUri, `
$ConnectorAppId, `
$ConnectorRedirectAddress, `
$platformParam).Result
# Check AuthN result
If (($authResult) -and ($authResult.AccessToken) -and ($authResult.TenantId) ) {
$token = $authResult.AccessToken
$tenantId = $authResult.TenantId
}
Else {
Write-Output "Authentication result, token or tenant id returned are null"
}
#endregion
# Create a secure string from token
$secureToken = $token | ConvertTo-SecureString -AsPlainText -Force
# Register connector with secure token and tenant guid
Set-Location "C:\Program Files\Microsoft AAD App Proxy Connector"
.\RegisterConnector.ps1 -modulePath "C:\Program Files\Microsoft AAD App Proxy Connector\Modules\" `
-moduleName "AppProxyPSModule" -Authenticationmode Token -Token $SecureToken -TenantId $tenantId `
-Feature ApplicationProxy

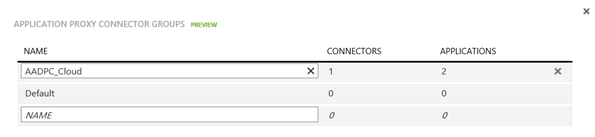
So to recap, after installing the Application Proxy Connector silently on the Windows Server 1709, and then registering the connector, I can now verify in the Azure AD Portal that the connector is available for use. I can see it has a status of Active, from my home IP address, and I have already placed it in a Connector Group.

image

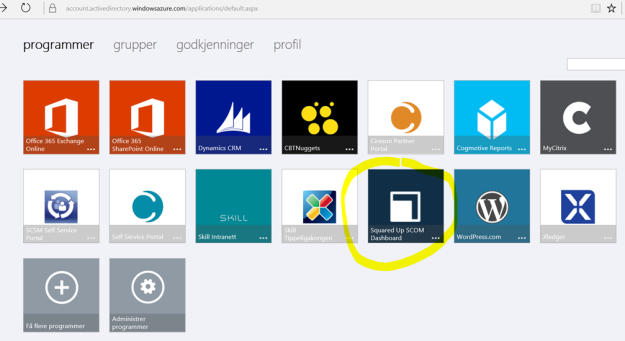
I’m now ready to publish Azure AD Proxy Apps using this connector, and in my next blogpost I will publish the Project Honolulu management website using this!

Here is the Gist source for the above linked PowerShell commands:


# Register Azure AD App Proxy Connector
# PS! Using Credential Object cannot be used with MFA enabled administrator accounts, use offline token
$User = "<username of global administrator>"
$PlainPassword = '<password>'
$SecurePassword = $PlainPassword | ConvertTo-SecureString -AsPlainText -Force
$cred = New-Object –TypeName System.Management.Automation.PSCredential –ArgumentList $User, $SecurePassword
Set-Location "C:\Program Files\Microsoft AAD App Proxy Connector"
.\RegisterConnector.ps1 -modulePath "C:\Program Files\Microsoft AAD App Proxy Connector\Modules\" `
-moduleName "AppProxyPSModule" -Authenticationmode Credentials -Usercredentials $cred


# Get Offline Token for Azure AD App Proxy Register Connector
# Then Register Connector with that Token
# Locate AzureAD/AzureADPreview PowerShell Module
# Change Name of Module to AzureAD or AzureADPreview after what you have installed
$AADPoshPath = (Get-InstalledModule -Name AzureADPreview).InstalledLocation
# Set Location for ADAL Helper Library
$ADALPath = $(Get-ChildItem -Path $($AADPoshPath) -Filter Microsoft.IdentityModel.Clients.ActiveDirectory.dll -Recurse ).FullName | `
Select-Object -Last 1
# Add ADAL Helper Library
Add-Type -Path $ADALPath
#region constants
# The AAD authentication endpoint uri
[uri]$AadAuthenticationEndpoint = "https://login.microsoftonline.com/common/oauth2/token?api-version=1.0/&quot;
# The application ID of the connector in AAD
[string]$ConnectorAppId = "55747057-9b5d-4bd4-b387-abf52a8bd489"
# The reply address of the connector application in AAD
[uri]$ConnectorRedirectAddress = "urn:ietf:wg:oauth:2.0:oob"
# The AppIdUri of the registration service in AAD
[uri]$RegistrationServiceAppIdUri = "https://proxy.cloudwebappproxy.net/registerapp&quot;
#endregion
#region GetAuthenticationToken
# Set AuthN context
$authContext = New-Object "Microsoft.IdentityModel.Clients.ActiveDirectory.AuthenticationContext" `
-ArgumentList $AadAuthenticationEndpoint
# Build platform parameters
$promptBehavior = [Microsoft.IdentityModel.Clients.ActiveDirectory.PromptBehavior]::Always
$platformParam = New-Object "Microsoft.IdentityModel.Clients.ActiveDirectory.PlatformParameters" -ArgumentList $promptBehavior
# Do AuthN and get token
$authResult = $authContext.AcquireTokenAsync($RegistrationServiceAppIdUri.AbsoluteUri, `
$ConnectorAppId, `
$ConnectorRedirectAddress, `
$platformParam).Result
# Check AuthN result
If (($authResult) -and ($authResult.AccessToken) -and ($authResult.TenantId) ) {
$token = $authResult.AccessToken
$tenantId = $authResult.TenantId
}
Else {
Write-Output "Authentication result, token or tenant id returned are null"
}
#endregion
# Create a secure string from token
$secureToken = $token | ConvertTo-SecureString -AsPlainText -Force
# Register connector with secure token and tenant guid
Set-Location "C:\Program Files\Microsoft AAD App Proxy Connector"
.\RegisterConnector.ps1 -modulePath "C:\Program Files\Microsoft AAD App Proxy Connector\Modules\" `
-moduleName "AppProxyPSModule" -Authenticationmode Token -Token $SecureToken -TenantId $tenantId `
-Feature ApplicationProxy

Azure AD B2B Users and Access to Azure AD Application Proxy Apps

The purpose of this blog post is to show a practical approach and some guidelines for publishing Azure AD App Proxy applications to guest users using Azure AD B2B.

To keep this blog post short and to the point, I will make the following assumptions:

Demo scenario

I will first give a quick overview over the demo scenario for this blog post:

  • I will use my tenant elven.onmicrosoft.com, where I have configured a custom domain elven.no.
  • I have invited an external user: [email protected] to the elven.onmicrosoft.com tenant. This user has accepted the invitation and can access resources that will be shared.
  • I have published some App Proxy applications, and in this scenario I will use Cireson Portal, which is a Self Service Portal for SCSM.

In this blog post I will use both single sign-on disabled with forms based authentication, and single sign-on with windows integrated authentication for this guest user, but lets first verify that the guest user can log on to my application panel.

Using Azure AD Access Panel as Guest User

When I log on to the Azure AD Access Panel at https://myapps.microsoft.com as external account I will se all my published applications at my company Skill AS, and since I have been added as a Azure AD B2B guest to the Elven Azure AD tenant, I can switch to that tenant like this:

image

I will then be redirected to the Elven Azure AD tenant and all my published applications will show (but for now this is none):

image

So lets start by adding this external guest to a published application without single sign-on and Windows Integrated Authentication enabled.

Without Single Sign-On

First, this is the guest user I will add to the application:

image

Then I go to the App Proxy Application, and in the properties I have required that any user must be assigned to access the application:

image

Under Application Proxy I will require pre authentication with Azure AD, so that users can not access the URL without being logged on to the tenant (in this case as a guest):

image

In this first scenario single sign-on with Azure AD and Windows Integrated Authentication is disabled:

image

Then I add my guest user as an assigned user to the application:

image

In the meantime I have configured the Cireson Portal to use Forms Based Authentication, and now we can test the guest user:

In the Access Panel my guest user can now see and launch the Cireson Portal published application:

image

And my guest user can successfully get to the web application which now presents a user login form, which will require a on-premises AD user with access rights to the Cireson Portal.

image

In my on-premises AD I have created just that, a user with the account name jan.vidar.guest:

image

And I can successfully log on with the guest user:

image

So far we have seen that an Azure AD B2B user can successfully launch an Azure AD App Proxy application, and in the next step log on with a local AD user with access to the application.

I the next section we will see how we can provide single sign-on with Azure AD and Windows Integrated Authentication.

PS! I will also change the Cireson Portal to use Windows Authentication before this next step!

Azure AD Single Sign-On and Windows Integrated Authentication

First I will need to change the settings for the Azure AD App Proxy application.

Under Single sign-on I will change to Integrated Windows Authentication, specify a SPN for Kerberos Constrained Delegation, and specify to use User principal name for delegated login identity:

image

By now you might have realized that for single sign-on to work with windows integrated authentication in a Azure AD B2B guest user scenario, you will need to have a “shadow” AD user for this external scenario. In my first test above, I had created a “jan.vidar.guest” user. Remember that I chose to use User principal name as a delegated login identity. So I will need a UPN that will be a link between my Azure AD guest user account ([email protected]) and the local AD user. If that link is missing, you will see the following in the Application Proxy Connector Log:

image

So this error message tells us exactly what user principal name is expected from the guest user. The error message below provide more details from this error:

Web Application Proxy encountered an unexpected error while processing the request.
Error: The user name or password is incorrect.
(0x8007052e)

Details:
Transaction ID: {00000000-0000-0000-0000-000000000000}
Session ID: {00000000-0000-0000-0000-000000000000}
Published Application Name:
Published Application ID:
Published Application External URL:
https://selfservice-elven.msappproxy.net/
Published Backend URL:
http://azscsmms3/
User: jan.vidar.elven_skill.no#EXT#@elven.onmicrosoft.com
User-Agent: Mozilla/5.0 (Windows NT 10.0; Win64; x64) AppleWebKit/537.36 (KHTML, like Gecko) Chrome/58.0.3029.110 Safari/537.36 Edge/16.16299
Device ID: <Not Applicable>
Token State: NotFound
Cookie State: NotFound
Client Request URL:
https://selfservice-elven.msappproxy.net/Home/NavigationNodes
Backend Request URL: <Not Applicable>
Preauthentication Flow: PassThrough
Backend Server Authentication Mode: WIA
State Machine State: OuOfOrderFEHeadersWriting
Response Code to Client: 500
Response Message to Client: Internal Server Error
Client Certificate Issuer: <Not Found>
Response Code from Backend: <Not Applicable>
Frontend Response Location Header: <Not Applicable>
Backend Response Location Header: <Not Applicable>
Backend Request Http Verb: <Not Applicable>
Client Request Http Verb: POST

So, lets change the UPN of my local shadow user to that. You can either add the UPN suffix to your Active Directory Forest, or change the user principal name with AD PowerShell like:

Set-ADUser jan.vidar.guest -UserPrincipalName jan.vidar.elven_skill.no#EXT#@elven.onmicrosoft.com

image

Generally you will need to add Azure AD B2B users with user principal name in the form of:

<emailalias>_guestdomain#EXT#tenantdomain

So, lets try to launch the Cireson Portal again now, this time with Azure AD Single Sign-On and Windows Integrated Authentication:

image

And now the user will be logged directly into the Cireson Portal with SSO:

image

So now we have seen that we can successfully use Azure AD B2B Guests in an Azure AD Application Proxy published application scenario, with or without Single Sign-On, and that we require a link with the delegated identiy with a “shadow” user in the on-premises AD.

NB! Before you think that you should create that user as a disabled account, this is what happens:

image

This means, you have to enable the AD user account, but the password can be anything and don’t have to be shared with the external user.

Update: Require MFA from Guest Users

I have had some questions on how requiring MFA would affect guest users when accessing published applications, and decided to update the blog post on this.

First of all you would need to create an Azure AD Conditional Access Policy where you:

  • Target the policy to your guest users, for example by creating a group (assigned or dynamic) with all guest users in your tenant.
  • Target the policy to your selected published Azure AD App Proxy Apps.
  • Setting the policy to require MFA.

Your guest users will have to set up their security verification methods in your tenant before they can authenticate with MFA as guests to your published application. They will be prompted to do that if they haven’t done it before at first time, but they can also do that by accessing their profile in your tenants myapps.microsoft.com. See below picture where my guest user can set up preferred methods for MFA in the elven tenant:

MFAGuest4

In this example I have set up Microsoft Authenticator on my mobile phone, and note the #EXT# identity which is the guest user for Elven tenant:

MFAGuest2

I can the select to launch the application as a guest user, and will be prompted authenticate with my selected method for MFA:

MFAGuest3

In my mobile phone I can approve, again I can see that I authenticate with my #EXT# guest account (most text in Norwegian, but you get the idea;)

MFAGuest1

See notes under for license requirements for MFA and guest users.

Notes and tips

Although Azure AD B2B is a free feature, creating local users in Active Directory and accessing resources like web servers, database servers and any third party applications you publish are not free and you will have to check your licensing requirements.

You shouldn’t synchronize your shadow guest users to Azure AD with Azure AD Connect.

Using Azure AD Conditional Access for require MFA is an Azure AD Premium feature, so you need EMS E3 or Azure AD Premium P1 licenses. You can then use up to 5 Azure AD B2B guests per EMS E3/AADP1 license you own, in a 1:5 ratio. So for example if you internally have 100 EMS licenses, you can require MFA for up to 500 Azure AD B2B guests.

And finally, Microsoft has noted that there will be guidance and documentation coming for best practice and governance for these Azure AD and on-premises AD guest users, as there can be a lot more complex enviroments than my example here, see this link: https://techcommunity.microsoft.com/t5/Azure-Active-Directory-B2B/AAD-Application-Proxy-and-B2B-Users/td-p/85249

Secure Access to Project Honolulu with Azure AD App Proxy and Conditional Access

Last week Microsoft announced Project “Honolulu”, the new Windows Server remote management experience, and now you can download a technical preview to install in your own data center, read here for more details: https://blogs.technet.microsoft.com/windowsserver/2017/09/22/project-honolulu-technical-preview-is-now-available-for-download/.

As the management is browser based, I thought this was a perfect fit for using Azure AD and publishing the management portal using Azure AD Application Proxy, and even better to secure the access using Azure AD Conditional Access. Consider the following diagram, where you instead of just publishing DNS and open Firewall to access the management server directly, I would instead use Azure AD App Proxy for secure access.

ProjectHonolulu

So lets get started setting this up!

Install and configure Project “Honolulu” technical preview

I will not get into great detail on installing Project “Honolulu” here, you can just follow the technical deployment documentation, but in my environment I have installed some servers running as Azure Virtual Machines joined to a single-forest, single-domain Active Directory. I have “on-premises” AD users and groups, and I’m running Azure AD Connect with Password Hash Synchronization.

On one of these Azure VM’s, I’ve downloaded and installed the Project “Honolulu” technical preview, with the following configuration:

  • Management Port: 6516
  • Self-signed Certificate

I’m now able to access the web based management internally, using https://azhon1.elven.local:6516. I can now proceed with publishing this externally with Azure AD App Proxy.

Configure Azure AD Application Proxy

Before you can publish applications using Azure AD Application Proxy, you have enable the feature in your Azure AD tenant, and install and configure one or more servers running Azure AD App Proxy Connector, and configure those in a connector group to use for the application. If you already have this configured, you can proceed to the next section. If you want more details, see this previous blog post, and the first sections on enabling App Proxy and innstalling connectors: https://gotoguy.blog/2017/02/21/publish-the-cireson-configuration-manager-portal-with-azure-ad-application-proxy/

Publish the Project Honolulu as an Azure AD App Proxy App

In the Azure AD management blade in the Azure Portal, select Enterprise Applications and click to add a new application. Select On-premises application:

image Specify a Name for your application, and the Internal Url where you installed the Project Honolulu technical preview, including port number as shown below. If you want you can change parts of the External Url, even using your own domain and SSL certificate. I will just use the default here. I will use Azure Active Directory as Pre Authentication, meaning that no-one can access this website without beeing authenticated with Azure AD first. And last, I select my Connector Group of Azure AD App Proxy Connector Servers. PS! Remember that these servers need to be able to access the Internal Url directly, in case you have any Firewalls, NSGs or other components that might block traffic.

image

After adding the application, I have to do some more configurations. First, optionally, you can select a custom logo:

image

User assignment is required in this configuration, so next I need to assign some users to the application. Here I have added a normal domain user and a domain admin user. Both these users are synchronized from my local AD.

image

Next I wan’t to configure Single Sign-On, so that users that authenticate with Azure AD automatically will be signed in to the Project Honolulu management site. I select Integrated Windows Authentication for sign-on mode, and then I specify the internal application SPN for which is needed for Kerberos Constrained Delegation.

image

After that I have one more important step, and that is to configure delegation at my Application Proxy Connector servers. In my local Active Directory, open the Computer object for every server that acts as Azure AD App Proxy Connectors, and on the Delegation tab, add the server that you installed the Project Honolulu on, selecting http as the service. In my environment, I have added this now. I have some previous delegations for others servers as well.

image

We are now ready to test the application publishing via Azure AD!

Access Application using Azure AD

You now have basically two options for accessing the application:

When using the Azure AD Access Panel, if your users has been assigned access, you will see the application published:

image

When launching that, I will be automatically logged in to the Project Honolulu web site, configured via SSO and Windows Integrated Authentication:

image

And I can start managing my configured servers:

image

So, now we have successfully configured an Azure AD App Proxy Application, and can connect securely from external url using SSO with Windows Integrated Authentication and Azure AD Pre Authentication. The application also requires that only assigned users can access the application.

In the next section I will configure Conditional Access for the application.

Configuring Conditional Access

When publishing this server management tool for external access, I wan’t to secure access as much as possible. For example, if one of my admins credentials have been leaked, I want that extra layer of security that users have to use Azure Multi-Factor Authentication when accessing the Project Honolulu application. I will configure that using Azure AD Conditional Access. On the application, I select Conditional Access as shown below:

image

I select to create a new policy, giving it a name:

image

I then select this to apply for all users:

image

Confirm that this policy applies to the Project Honolulu application:

SNAGHTML7d43e5d

On Conditions I can optionally configure conditions for sign-in risk, device platforms, locations and client apps, but I will just let this policy apply for all conditions for now, so I’m leaving Conditions as it is.

image

Under Access Control I select to Require Multi-Factor Authentication, and the set to Enable the policy. Note that I can select additional controls for even more secure access, but for now I just want to require MFA:

SNAGHTML7d8d124

So, save the policy, and lets test how accessing the application works now.

If I either go directly to the external url, og via the Access Panel, I will now be prompted for MFA:

image

That concludes this blog post. I’m very excited for this new preview for Project “Honolulu”, and using the great Azure AD Application Proxy feature I can securely publish and access the management site from external locations and clients. And even better with Azure AD Conditional Access, I can create a policy that sets access control for multi-factor autentication requirements, and if I want I can even control which device clients and what apps they use to access.

Hopefully this has been helpful for you, if you have any questions reach out to me on Twitter or use the comments below this blog post 🙂

Publish the Cireson Configuration Manager Portal with Azure AD Application Proxy

Cireson will soon be releasing a new web based Portal for System Center Configuration Manager, http://go.cireson.com/cireson-portal-for-configmgr. This would make it possible to access a lot of functionality for Configuration Manager anywhere with a web browser. The Cireson Portal for Configuration Manager must be installed locally, either on the Configuration Manager server or on a server close to the Configuration Manager server and database.

This makes this an ideal candidate for Azure AD Application Proxy publishing, as we can make it available as an Azure AD App with all the features and possibilities that this can give, including:

  • Azure AD Preauthentication and Single Sign-On to the Portal
  • Assigning Users and Groups
  • Conditional Access
  • Easy access via the users Access Paneler or the Office 365 App Launcher

We will look into all this in a two-part blog post! This will also be a good opportunity to use the new management experience for the preview of Azure Active Directory management in the Azure Portal, https://portal.azure.com.

Part 1: Publish the Cireson Configuration Manager Portal with Azure AD Application Proxy
Part 2: Conditional Access and Self Service for the published Configuration Manager Portal Application (link when available)

Enable Azure AD Application Proxy

I you want to publish applications with Azure AD Application Proxy, there are some requirements:

  • You need an Azure AD tenant configured with licenses for Azure AD Premium P1 or EMS E3 Suite. Actually it is enough with Azure AD Basic licenses for AAD App Proxy, but if you want to configure Conditional Access you will need at least Premium P1. More on that later.
  • If you want to enable SSO for your internal users you have to synchronize those users via Azure AD Connect.
  • You have to Enable Azure AD Application Proxy for your AAD tenant directory, and download and install one or more Application Proxy Connectors.

The diagram below shows the communication flow from when the user launch the published application, authenticates to Azure AD, and then via the Application Proxy Connector installed internally access the web based portal. Single Sign-On is achieved via the Application Proxy Connector authentication on behalf of the user via Kerberos Constrained Delegation.

image

So the first step is to go to the Azure Portal, and open the Azure Active Directory blade, which at the moment is in preview. From there go to the Application Proxy section and make sure that the Application Proxy is enabled as shown below:

image

In the image above we also see that there already are some Azure AD App Proxy Connectors installed and active. They are also configured in two different groups, and these groups are used later when we publish the application. At the top of the blade, you can download a new Connector installation file.

Download and install Application Proxy Connector

The Application Proxy Connector must be installed on a server that can reach the internal web portal server. In this case I want to install the Connector locally on the Configuration Manager server that also hosts the Cireson Portal for Configuration Manager. I could have used one of my existing connectors, but they are installed respectively on an Azure VM environment and on a separate network from our Configuration Manager environment.

Following the download link from above, I download and start the Application Proxy Connector installation on my SCCM server.

image

During installation you must provide a global administrator admin account:

image

After finishing the installation of the connector, we will se the new connector with the server name in the portal.

We can now create a group, and place the connector installed in the group:

image

Publish the Configuration Manager Portal App

To start publishing the Configuration Manager Portal Application, go to Enterprise Applications and select Add, and from the Add your own app section select to add an “On-premises application”:

image

Next, specify the Name of the Application and the Internal Url. In this case I have installed it internally as http://configmgrportal. For External Url, you have a choice for the alias and domain. By default the alias will be the Application Name without spaces, appended with –<tenant name>.msappproxy.net.

image

You can change the domain to one of your verified domains, which I have done here together with changing the alias so that the External Url now will be https://configmgrportal.skill.no. By the way, you have to upload a SSL certificate if you want to use your own domain, either a wildcard certificate or a certificate with the appropriate FQDN. We will look at that later.

image

Note that I need to add a CNAME entry at my DNS provider as stated in the info box above. I will do that right now before I proceed.

I set Pre Authentication to Azure Active Directory, as I want everyone accessing the External Url to be a valid Azure AD user from my tenant. I also select to translate URL in headers, and select my previously configured App Proxy Connector Group.

Press Add to add the application to the directory. After that you are presented with a Quick start menu like below:

image

First I go to Properties, and optionally you can upload a logo which I have done here, note also that User assignment is required is set to yes, this means that no user cannot access the published application until I have added users or groups to it.

image

After saving I go to users and groups, and add some users to test the published application:

image

These users will now be able to launch the published application, but we have some more configuration to do first. As I want to have Single Sign-On configured for this application, I configure the following settings for Single Sign-On. I set the mode to Integrated Windows Authentication, meaning that the App Proxy Connector will impersonate any Azure AD authenticated user to the on-premises application via Kerberos constrained delegation.

I also need to specify a internal SPN for the application, which will be HTTP/<fqdn-of-server>, where the server is where the internal web application is installed. I will also specify which delegated login identity, which in most cases will work fine with user principal name for synchronized federated users.

image

After configuring Single Sign-On settings, and if you elected to use your own domain name, you need to upload or specify an existing SSL certificate. Go back to Application Proxy settings and click to view or change certificate settings:

image

After saving this configuration, the required portal configuration for the application is now complete, but optionally we can configure self service and conditional access, We will get back to that later in part 2 of this blog post.

That leaves only one more step, and that is to configure kerberos delegation for the App Proxy Connector server. In your on-premises Active Directory, find the computer object for the server you installed the App Proxy Connector on, and go to Delegation, and select to trust this computer for delegation to specified services only, and for kerberos only adding the computer name and http service for the server where the internal web application is installed. This should med the same as the internal spn you configured in the portal earlier for Windows integrated authentication.

image

Testing Single Sign-On

We can now test the application. Go to https://myapps.microsoft.com and log in with one of the assigned users. Among other published apps I will see the Configuration Manager Portal:

image

And if I launch it, I will see that I can access the Configuration Manager Portal, and I have been automatically signed in with my local AD user via Single Sign-On and Kerberos Constrained Delegation. I also see my url, https://configmgrportal.skill.no, which I can access directly if I want without going through the MyApps panel.

image

So now we have successfully published the Cireson Configuration Manager Portal with Azure AD Application Proxy, using SSO with Azure AD, and User Assignment so that only users that are pre-authenticated and assigned the application by Azure AD, will have access to it.

Stay tuned for part 2 of this blog post, where we will configure Conditional Access using Azure MFA and Device Compliance, and what Self Service functionality we have.

Speaking at NIC 2017

I’m very happy that I have been selected as a speaker again for next years NIC 2017!

I will have at least one session to present, and hoping for a second session but the organizers have a lot of interesting session proposals to choose from so we’ll see.

My session will be about Enterprise Applications and Publishing in the new Azure AD Management Experience:

image

In this session we will look into the new management experience of Azure AD Applications in the new Azure Portal. The session will cover publishing and management of Application Proxy applications, Web App/API Applications and Enterprise Applications including SaaS Applications, and how and in which scenarios we can use the new Azure Portal, PowerShell or the Classic Portal for administration. Another important topic that will be covered is how you can configure Conditional Access for those applications for Users and Devices with the Enterprise Mobility & Security offering.

NIC 2017 is 2nd and 3rd of February, with a Pre-Conf day at the 1th. Read more at www.nicconf.com.

Hope to see you there!

Publish the itnetX ITSM Portal with Azure AD App Proxy and with Conditional Access

Last week at SCU Europe 2016 in Berlin, I presented a session on Application Publishing with Azure AD. In one of my demos I showed how to use Azure AD Application Proxy to publish an internal web application like the itnetX ITSM Portal. The session was recorded and will be available later at itnetX’s Vimeo channel and on Channel 9.

In this blog post I will detail the steps for publishing the portal in Azure AD, and also how to configure Conditional Access for Users and Devices. Device compliance and/or Domain join conditional access recently went into preview for Azure AD Applications, so this will be a good opportunity to show how this can be configured and how the user experience is.

Overview

itnetX has recently released a new HTML based ITSM Portal for Service Manager, and later there will be an analyst portal as well.

This should be another good scenario for using the Azure AD Application Proxy, as the ITSM Portal Web Site needs to be installed either on the SCSM Management Server or on a Server that can connect to the Management Server internally.

In this blog article I will describe how to publish the new ITSM Portal Web Site. This will give me some interesting possibilities for either pass-through or pre-authentication and controlling user and device access.

There are two authentication scenarios for publishing the ITMS Portal Web Site with Azure AD App Proxy:

  1. Publish without pre-authentication (pass through). This scenario is best used when ITSM Portal is running Forms Authentication, so that the user can choose which identity they want to log in with.
  2. Publish with pre-authentication. This scenario will use Azure AD authentication, and is best used when ITSM Portal Web Site is running Windows Authentication so that we can have single sign-on with the Azure AD identity. Windows Authentication is also default mode for ITSM Portal installations.

I will go through both authentication scenarios here.

I went through these steps:

Configure the itnetX ITSM Portal Web Site

First I make sure that the portal is available and working internally. I have installed it on my SCSM Management Server, in my case with the URL http://azscsmms2:82.

In addition to that, I have configured the ITSM Portal to use Forms Authentication, so when I access the URL I see this:

image

Create the Application in Azure AD

In this next step, I will create the Proxy Application in Azure AD where the ITSM Portal will be published. To be able to create Proxy Applications I will need to have either an Enterprise Mobility Suite license plan, or an Azure AD Basic/Premium license plan. App Proxy require at least Azure AD Basic for end-users accessing applications, and if using Conditional Access you will need a Azure AD Premium license. From the Azure Management Portal and Active Directory, under Applications, I add a new Application and select to “Publish an application that will be accessible from outside your network”:

I will then give a name for my application, specify the internal URL and pre-authentication method. I name my application “itnetX ITSM Portal”, use http://azscsmms2:82/ as internal URL and choose Passthrough as Pre-Authentication method.

After the Proxy Application is added, there are some additional configurations to be done. If I have not already, Application Proxy for the directory have to be enabled. I have created other Proxy Applications before this, so I have already done that.

After I have uploaded my own custom logo for the application, I see this status on my quickstart blade for the application:

image

I also need to download the Application Proxy connector, install and register this on a Server that is member of my own Active Directory. The Server that I choose can be either on an On-Premise network, or in an Azure Network. As long as the Server running the Proxy connector can reach the internal URL, I can choose which Server that best fits my needs.

When choosing pass through as authentication method, all users can directly access the Forms Based logon page as long as they know the external URL. Assigning accounts, either users or groups, will only decide which users that will see the application in the Access Panel or My Apps.

image

I now need to make additional configurations to the application, and go to the Configure menu. From here I can configure the name, external URL, pre-authentication method and internal URL, if I need to change something.

I choose to change the External URL so that I use my custom domain, and note the warning about creating a CNAME record in external DNS. After that I hit Save so that I can configure the Certificate.

image

After that I upload my certificate for that URL, and I can verify the configuration for the external and internal URL:image

When using passthrough I don’t need to configure any internal authentication method.

I have to select a connector group, where my installed Azure AD App Proxy Connectors are installed, and choose to have the default setting for URL translation. Internal authentication is not needed when using Pass Through authentication:

image

If I want, I can allow Self-Service Access to the published application. I have configured this here, so that users can request access to the application from the Access Panel (https://myapps.microsoft.com). This will automatically create an Azure AD Group for me, which I either can let users join automatically or via selected approvers:

image

After I have configured this, I am finished at this step, and can test the application using pass through.

Testing the application using pass through

When using Pass through I can go directly to the external URL, which in my case is https://itsmportal.elven.no. And as expected, I can reach the internal Forms Based login page:

image

For the users and groups I have assigned access to, they will also see the itnetX ITSM Portal application in the Access Panel (https://myapps.microsoft.com) or in My Apps, this application is linked to the external URL:

image

This is how the Access Panel looks in the coming new look:

image

Now I’m ready to do the next step which is change Pre-Authentication and use Azure AD Authentication and Single Sign-On.

Change Application to use Azure AD Authentication as Preauthentication

First I will reconfigure the Azure AD App Proxy Application, by changing the Preauthentication method to Azure Active Directory.

Next I need to configure to use Internal Authentication Method “Windows Integrated Authentication”. I also need to configure the Service Principal Name (SPN). Here I specify HTTP/portalserverfqdn, in my example this is HTTP/azscsmms2.elven.local.

image

PS! A new preview feature is available, to choose which login identity to delegate. I will continue using the default value of User principal name.

Since I now will use pre-authentication, it will be important to remember to assign individual users or groups to the Application. This enables me to control which users who will see the application under their My Apps and who will be able access the application’s external URL directly. If users are not given access they will not be able to be authorized for the application.

Enable Windows Authentication for itnetX ITSM Portal

The itnetX ITSM Portal site is configured for Windows Authentication by the default, but since I reconfigured the site to use Forms Authentication earlier, I just need to reverse that now. See installation and configuration documentation for that.

It is a good idea at this point to verify that Windows Integrated Authentication is working correctly by browsing internally to the ITSM Portal site. Your current logged on user (if permissions are correct) should be logged in automatically.

Configure Kerberos Constrained Delegation for the Proxy Connector Server

I now need to configure so that the Server running the Proxy Connector can impersonate users pre-authenticating with Azure AD and use Windows Integrated Authentication to the Squared Up Server.

I find the Computer Account in Active Directory for the Connector Server, and on the Delegation tab click on “Trust this computer for delegation to specified services only”, and to “Use any authentication protocol”. Then I add the computer name for the web server that the ITSM Portal is installed on and specify the http service as shown below (I already have an existing delegation set up):

image

This was the last step in my configuration, and I am almost ready to test.

If you, like me, have an environment consisting on both On-Premise and Azure Servers in a Hybrid Datacenter, please allow room for AD replication of these SPN’s and more.

Testing the published application with Azure AD Authentication!

Now I am ready to test the published proxy application with Azure AD Authentication.

When I go to my external URL https://itsmportal.elven.no, Azure AD will check if I already has an authenticated session, or else I will presented with the customized logon page for my Azure AD:

image

Remember from earlier that I have assigned the application either to a group of all or some users or directly to some pilot users for example.

If I log in with an assigned user, I will be directly logged in to the ITSM Portal:

image

However, if I try to log in with an Azure AD account that hasn’t been assigned access to the application, I will see this message:

image

This means that the pre-authentication works and I can control who can access the application via Azure AD.

Conditional Access for Users and Devices

When using Azure AD as preauthentication, I can also configure the application for conditional access for users and devices. Remember this is a Azure AD Premium feature.

From the the configuration settings for the application I can configure Access Rules via MFA and location, and Access Rules for devices which now is in Preview:

image

If I enable Access Rules for MFA and location I see the following settings, where I can either for all users or for selected groups require multi-factor authentication, or require multi-factor when not at work, or block access completely from outside work. I have define my network location IP ranges for that to take effect.

image

If I enable Access Rules for devices, I see the following settings. I can select for all users or selected groups that will have device based access rules applied (and any exceptions to that).

I can choose between two device rules:

  • All devices must me compliant
  • Only selected devices must be compliant, other devices will be allowed access

If I select all devices, a sub option for windows devices shows where I need to select between domain joined or marked as compliant, or just marked as compliant or domain joined selectively.

image

If I select the second option, I can even specify which devices will be checked for compliancy:

image

So I can with different access rules for both MFA, location and selected devices, in addition to the Azure AD Preauthentication, apply the needed conditional access for my application.

In this case I will select device rules for compliant/domain joined, and for all the different devices. This will mean that for users to access the ITSM Portal, their device must either be MDM enrolled (iOS, Android, Windows Phone) or in the case of Windows devices either be MDM enrolled, Azure AD Joined, Compliant or Domain Joined. Domain joined computers must be connected to Azure AD via the steps described here: https://azure.microsoft.com/en-us/documentation/articles/active-directory-azureadjoin-devices-group-policy/.

After I’m finished reconfiguring the Azure AD App Proxy Application, I can save and continue and test with my devices.

Testing device based conditional access

Lets see first when I try to access the ITSM Portal via an unknown device:

image

On the details I see that my device is Unregistered, so I will not be able to access the application.

Now, in the next step I can enroll my Windows 10 Device either through MDM or via Azure AD Join. In this scenario I have added my Windows 10 to Azure AD Join:

image

If I look at the Access Panel and Profile I will also se my devices:

image

The administrator can see the Device that the user has registered in Azure Active Directory:

image

Lets test the published ITSM Portal again:

image

Now I can see that my device has been registered, but that it is not compliant yet, so I still cannot access the ITSM Portal.

When I log on to the Client Manage Portal (https://portal.manage.microsoft.com), I can see that my Windows 10 Device not yet are Compliant:

image

So when I investigate, fix whatever issues this device has and then re-check compliance, I can successfully verify that I should be compliant and good to go:

image

After that, I’m successfully able to access the ITSM Portal again, this time after my device has been checked for compliance:

image

Summary

In this blog post we have seen have to publish and configure the itnetX ITSM Portal with Azure AD Application Proxy, using both pass-through authentication and Azure AD Preauthentication with Kerberos constrained delegation for single sign-on.

With the additional possibility for conditional access for users and devices, we have seen that we can require either MFA or location requirements, and device compliance for mobile platforms and windows devices.

Hope this has been an informative blog post, thanks for reading!

PS! In addition to access the application via the Access Panel (https://myapps.microsoft.com), I can use the App Launcher menu in Office 365 and add the ITSM Portal to the App chooser:

image

This will make it easy for my users to launch the application:

image

Speaking at System Center Universe Europe 2016 – Berlin

I’m really excited that I will have two sessions at this years SCU Europe in Berlin, August 24th – 26th. System Center Universe Europe is a really great community conference that focuses on Cloud, Datacenter and Modern Workplace Management, covering technologies like Microsoft System Center, Microsoft Azure, Office 365 and Microsoft Hyper-V. Read more about SCU Europe here: http://www.systemcenteruniverse.ch/about-scu-europe.html

I have been visiting all SCU Europe Conferences since the inaugural start in Bern 2013. I met some amazing MVPs, sponsors and community leaders already then, in fact it inspired me even more to share more of my own workings and knowledge by blogging, using social media and eventually speaking at technical  and community conferences myself.  The following two years SCU Europe were held in Basel, both the great conference venue at Swissotel and lest not forget Bar Rouge had its fair share of memorable moments 🙂

This years SCU Europe will be held in Berlin from the 24th to the 26th of August. Moving the conference to Berlin is a smart move I think, it will make the conference even more accessible to most European and overseas travelers, and attract the attendance it deserve.

A few months ago I received some great news, I had two sessions accepted for SCU Europe, and received my first Microsoft MVP Award for Enterprise Mobility. I’m really happy to not only go and learn and enjoy the conference sessions and community, but also to contribute myself along with over 40 top, top speakers from all over the world!

My first session will cover “Premium Management and Protection of Identity and Access with Azure AD”:

image

In the session I will focus on Azure AD Identity Protection, Azure AD Privileged Identity Management for controlling role and admin access, how to monitor it all will Azure AD Connect Health, and how Azure Multi-Factor Authentication works with these solutions. The session will cover the recent announcements regarding Enterprise Mobility + Security.

The second session will be a deep dive on “Publish Applications with Azure AD”:

image

In this demo-packed session I will go deep into what you need to get started on publishing the different types of applications, and how to configure and troubleshoot user access to these applications. The session will cover Azure AD Single Sign-On and Password Single Sign-On, integrating Azure AD SSO with your internally developed applications, and publishing applications with Azure AD App Proxy that either use pre-authentication or pass through.

Hope to see you at the conference, and if you haven’t registered yet there is still time: http://www.systemcenteruniverse.ch/registration.html

Session Recap – Nordic Infrastructure Conference (NIC) 2016 – Publishing Azure AD Applications

This week I had the pleasure of not only revisiting Nordic Infrastructure Conference (www.nicconf.com), but also presenting a session myself: Deep Dive – Publishing Applications with Azure AD. My session was about how you with Azure AD can publish applications from a SaaS Gallery, your organization’s own applications, or internal applications that will be accessible outside with Azure AD Application Proxy.

This was the 5th anniversary of NIC, held in Oslo, Norway and the venue of Oslo Spektrum. NIC has been established as a premium event for IT-professionals, attracting internationally renowned speakers and MVPs, SMEs and Partners.

In this blog post I will do a recap of my session, for both attendees that was there and others that couldn’t be. I will also expand on some of the things we went through in the session as there were some limits to the time we could use on several demos.

Proud Speaker

The presentation and session recording will later be available at the www.nicconf.com webpage. At the end of this blog post, there is also a link to where you can download the presentation and other code samples and files that where used in the session.

Session Menu

The theme for the presentation was to present a menu for publishing Azure AD Applications with Azure AD. The menu would consist of required ingredients, recipes for publishing scenarios, consumption of the published applications from the users’ perspective, and some extras and tip for self-servicing and troubleshooting.

I started with pointing to the key features of Azure AD as an Identity and Access Management Solution, for both Cloud and On-Premise Solutions, an enabler for true Enterprise Mobility and Business Everywhere, with one common, hybrid identity. There are some important Business Value for Organizations such as controlling access to applications, single sign-on, conditional access, hybrid identity and self-servicing.

Ingredients

It is no surprise that you need Azure AD as a key ingredient 😉 But what edition of Azure AD should you use? Free, Basic or Premium? In the session I covered the most important differences relevant for Publishing Applications, where you would need at least Basic to be able to publish internal applications with Azure AD App Proxy, and Premium Edition if you want to cover all the self-servicing scenarios and advanced reporting. For all details, refer to https://azure.microsoft.com/en-us/documentation/articles/active-directory-editions/.

In addition to the application you want to publish, you will need an Azure AD identity, either a cloud based identity or a hybrid identity synchronized with Azure AD Connect.

In the first demo of the session we looked into configuring and verifying that your Azure AD tenant is ready for publishing applications.

Recipes

The publishing scenarios we looked at in the session was from the following menu of three alternatives in Azure AD:

Add an application from the gallery

The first publishing scenario we looked at in the session was publishing applications from the SaaS gallery of applications. The gallery contains over 2500 different SaaS applications, many offering both true Single Sign-On (SSO) with Azure AD and provisioning/de-provisioning of users and groups. Other applications provide password-based same sign-on.

The demos in the session used two different SaaS apps as example; Twitter and Google Apps.

Twitter is a good example of a SaaS application using password same sign on.

When configuring single sign-on for Twitter, we don’t have the option of using Azure AD Single Sign-On. Some applications can maybe support one of the federation protocols implemented in a local ADFS or a third-party provider, but that is dependent on the application. So for Twitter we will typically use Password Single Sign-On.

After configuring Password Single Sign-On, the next step is to assign account to the application. When assigning accounts, you can select that the users enter passwords themselves in the Access Panel. Or you can enter the credentials on behalf of the user.

This opens up a very interesting scenario: Consider you have a company based social media account on Twitter, Facebook, Instagram or other. All the users in the marketing department should have access to that/those application/applications, so you start handing out the username and password to the shared account. This is a risk, as users can lose the password and it can get on wrong hands, or maybe previous employees that are no longer in the company still have the username and password to the application.

With Azure AD, by entering the Twitter credentials on behalf of the user, they are never given the logon details directly. And when they leave the organization after removing the user from Azure AD, they will no longer have access. You can even apply conditional access policies for the application.

You can even configure automatic password rollover to update the password at a defined frequency:

The other part of the demo focused on Google Apps. I had an existing subscription for Google Apps, which I configured to use Azure AD Single Sign-On and account provisioning for.

There is a complete tutorial for configuring SSO and provisioning for Google Apps at https://azure.microsoft.com/en-us/documentation/articles/active-directory-saas-google-apps-tutorial/.

In the demo I created a test user named [email protected], and assigned that user to the Google Apps application.

I showed that the user didn’t exist in the Google Apps user directory for my organization, and after a while (new user accounts are provisioned ca every 10 minutes), the user appeared in the Google Apps directory via Azure AD.

The new user can now use Azure AD SSO when logging into Google:

I’m redirected to my Azure AD tenant for signin in:

And then the user is logged in to Google:

Add an application my organization is developing

The next part of the publishing scenarios was adding applications that my organization is developing. Most times these applications will be Web Applications or Web API, but it’s possible to publish native client applications also.

When creating a web application you give it a name, and a sign-on url and unique app id uri:

Keep in mind that creating a web application here only does the publishing part of it, you still would need to create the actual application somewhere, for example as an App Service in an Azure Subcstiption.

You can have the web applications do their own authentication, for example integrating with on-premise Active Directory Federation Services, or you can have the application use Azure Active Directory as SSO provider.

In the session demo we looked at how we could quickly create a Web Application, integrate it with Azure AD for authentication and publish it. These are the main steps:

  1. Create a new Web App in you Azure Subscription. In the new Azure Portal for your subscription, under App Services create a new Web App. The Service Name must be unique, and you select either an existing resource group or create a new, and specify an App Service plan.
  2. After the Web App is created, open the application properties and under Settings find Features and Authentication / Authorization:
  3. Enable App Service Authentication and log in action. Enable Azure Active Directory as authentication provider and configure Express settings. PS! Here we can create and publish a new AD App (or select an existing one) also. We created a new one for our demo:
  4. Remember to save the Web App and the first part of the demo is done. A this point you can go to http://nicconfdemowebapp.azurewebsites.net, and be prompted to sign in with a Azure AD account from the directory the application was configured for. There is no content in the application, and every user in the Azure AD directory can access the application as long as they authenticate:
  5. The next part of this demo was to change some configuration settings for the published web application which is now published to Azure AD:
  6. I want to upload a custom logo, and configure the application so that only assigned users/groups can access it. First upload a logo:
  7. Then at the Configure page, I select that user assignment is required to access the App:
  8. Then after saving, I go to the Users and Groups page, and select to assign the users I want:

    If you assign individual users the assignment method will be Direct, if you assign Groups the members will assigned by inheritance.

  9. Now, if I start a new session to the Web App and log in with a user that has not been assigned, I will get this message:
  10. The final steps of this demo showed how you can create some content in that Web App via Visual Studio. There are several development tools you can use, I have been using Visual Studio 2015, and you can download a Community Edition that is free if you don’t have a license. In my example I created a VB.NET Web App Project, and by using a Publish Profile file and some custom code I was able to show the logged in users claim properties.You can even create App Services directly from Visual Studio, and create and publish Azure AD Web Apps from there. But if you download this file from the Web App:


    And import it to the Visual Studio project, you can publish your changes directly.

  11. This is the result for the demo web application, the code is included at the end of this blog post:

Publish an application that will be accessible from outside your network

The third scenario for publishing applications with Azure AD is the applications you want to be available from outside your network. These applications are internal web applications like SharePoint, Exchange Outlook Web Access or other internal web sites, you can even publish Remote Desktops and Network Device Enrollment Services (NDES) with Azure AD Application Proxy.

Azure AD App Proxy uses Connector Servers and Connector Groups inside the on premise infrastructure that must be able to connect to the internal URLs. These Connector Servers also can perform Kerberos Constrained Delegation for Windows Authentication, so that you can use Azure AD Single Sign-On to those internal applications.

A sample diagram showing the communication flow is shown below:

In the demo we looked at how you could install and configure a Connector installation, and organize Connector Servers in Groups for the applications to use. Here are some of the steps required:

  1. First the setting for enabling Application Proxy Services for the Azure AD Directory must be enabled, and Connectors downloaded for installation.
  2. You create and manage connector groups:
  3. And organize the installed connectors in those groups:
  4. When these requirements are in place you can start publishing your internal web applications.

For each internal published web application, you can configure authentication method, custom domain names, conditional access and self-servicing options. For details on how to do these different configurations, see previous blog posts I have published on this subject:

Consumption, Self Service and Troubleshooting

The last part of the session focused on the user experience for accessing the different published Azure AD applications.

User can access Azure AD published applications via:

  • Access Panel, https://myapps.microsoft.com
  • My Apps (iOS, Google Play)
  • App Launcher in Office 365
  • Managed Browser App with My Apps
  • Directly to URL

The Access Panel is a web-based portal that allows an end user with an organizational account in Azure AD to view and launch applications to which they have been assigned access. The Edge browser in Windows 10 is not fully supported yet, so you need to use either Internet Explorer, Chrome or Firefox for all supported scenarios. In addition, an Access Panel Extension needs to be installed for accessing Password SSO Applications.

The Access Panel is also where users can view account details, change or reset password, edit multi-factor authentication settings and preferences, and if you are using Azure AD Premium self-manage Groups.

The Access Panel via Internet Explorer:

The Access Panel via My Apps and Managed Browser Apps:

If the user is licensed for Office 365, the published applications are available via the App Launcher and URL https://portal.office.com/myapps:

Conditional Access, which is an Azure AD Premium licensed feature, can be configured for each published Azure AD Application. These settings consist of enabling Access Rules for All Users or selected Groups, and optionally with exceptions to those users/groups. The access rules settings are requiring multi-factor authentication, require MFA when not at work, or block access when not at work. For the location based rules to work there must be configured IP addresses/subnets for the company’s known IP address ranges.

Instead of Assigning Users and Groups you could also let users manage self-service access to the published applications. When configured a group will be automatically created that application, and optionally you could configure 1 or more Approvers:

The end user will access this self-servicing via the Access Panel:

The session was wrapped up with some links to troubleshooting and more resources:

Presentation and files downloads

The presentation and files used in the demos can be downloaded from this link: http://1drv.ms/1Q429rh

Thank you for attending my session and/or reading this recap!

Speaking at NIC 2016 #NICConf

I’m very excited to have a session at Nordic Infrastructure Conference, 5th anniversary edition, in Oslo February 4.-5. 2016. In exactly one month from today (with a pre-conference day starting at Feb 3rd) NIC kicks off the fifth version of this premium event for IT professionals!

Aiming for up to 1400 participants, the sessions will be presented in 7 tracks:


For a list of current published sessions, see this link: http://www.nicconf.com/sessions

My session will be a deep dive on publishing applications with Azure AD, http://www.nicconf.com/deep-dive–publishing-applications-with-azure-ad.

The session will cover Azure AD Single Sign-On and Password Single Sign-On, integrating Azure AD SSO with your internally developed applications, and publishing applications with Azure AD App Proxy that either use pre-authentication or pass through. The session will cover how to assign users, configure access control with MFA per-application, use self-servicing and how users can access these applications on different platforms and through which portals.

The session will honor the NIC original concept: Less slides, more demos!

I’m very much looking forward to next month, and hope to see you there!

Read more about NIC here: http://www.nicconf.com.

Publish the Squared Up SCOM Web Dashboard with Azure AD Application Proxy

The Scenario

Squared Up is a Web based Dashboard solution for SCOM environments, and since its built on HTML5 it works on any device or browser as long as you can connect to the Web Server the solution is installed on.

This should be another good scenario for using the Azure AD Application Proxy, as the Squared Up Web Site needs to be installed either on the SCOM Management Server or on a Server that can connect to the Management Server internally.

In this blog article I will describe how to publish the new Squared Up Web Site. This will give me some interesting possibilities for either pass-through or pre-authentication and controlling user access.

There are two authentication scenarios for publishing the Squared Up Web Site with Azure AD App Proxy:

  1. Publish without pre-authentication (pass through). This scenario is best used when Squared Up is running Forms Authentication, so that the user can choose which identity they want to log in with. Forms Authentication is also default mode for Squared Up installations.
  2. Publish with pre-authentication. This scenario will use Azure AD authentication, and is best used when Squared Up Web Site is running Windows Authentication so that we can have single sign-on with the Azure AD identity.

I will go through both authentication scenarios here.

I went through these steps:

Create the Application in Azure AD

In this next step, I will create the Proxy Application in Azure AD where the Self Service Portal will be published. To be able to create Proxy Applications I will need to have either an Enterprise Mobility Suite license plan, or Azure AD Basic/Premium license plan. From the Azure Management Portal and Active Directory, under Applications, I add a new Application and select to “Publish an application that will be accessible from outside your network”:

I will then give a name for my application, specify the internal URL and pre-authentication method. I name my application “Squared Up SCOM Dashboard”, use http://scomdashboardserver/SquaredUp/ as internal URL and choose Passthrough as Pre-Authentication method.

After the Proxy Application is added, there are some additional configurations to be done. If I have not already, Application Proxy for the directory have to be enabled. I have created other Proxy Applications before this, so I have already done that.

I also need to download the Application Proxy connector, install and register this on a Server that is member of my own Active Directory. The Server that I choose can be either on an On-Premise network, or in an Azure Network. As long as the Server running the Proxy connector can reach the internal URL, I can choose which Server that best fits my needs.

When choosing passthrough as authentication method, all users can directly access the Forms Based logon page as long as they know the external URL. Assigning accounts, either users or groups, will only decide which users that will see the application in the Access Panel or My Apps.

I now need to make additional configurations to the application, and go to the Configure menu. From here I can configure the name, external URL, pre-authentication method and internal URL, if I need to change something.

I choose to change the External URL so that I use my custom domain, and note the warning about creating a CNAME record in external DNS. After that I hit Save so that I can configure the Certificate.

Since I have already uploaded a certificate (see previous blog post https://systemcenterpoint.wordpress.com/2015/06/10/using-a-custom-domain-name-for-an-application-published-with-with-azure-ad-application-proxy/), I can just verify that it is correct.

When using passthrough I don’t need to configure any internal authentication method.

Another feature that is in Preview, is to allow Self-Service Access to the published application. I have configured this here, so that users can request access to the application from the Access Panel (https://myapps.microsoft.com).

After I have configured this and uploaded a logo, I am finished at this step, and can test the application using passthrough.

Testing the application using passthrough

When using Passthrough I can go directly to the external URL, which in my case is https://scom.skill.no/squaredup. And as expected, I can reach the internal Forms Based login page:

For the users and groups I have assigned access to, they will also see the Squared Up application in the Access Panel or in My Apps, this application is linked to the external URL:

Now I’m ready to do the next step which is change Pre-Authentication and use Azure AD Authentication and Single Sign-On.

Change Application to use Azure AD Authentication as Pre-Authentication

First I will reconfigure the Azure AD App Proxy Application, by changing the Preauthentication method to Azure Active Directory.

Next I need to configure to use Internal Authentication Method “Windows Integrated Authentication”. I also need to configure the Service Principal Name (SPN). Here I specify HTTP/scomdashboardserverfqdn, in my example this is HTTP/skill-scom02.skill.local.

PS! A new preview feature is available, to choose which login identity to delegate. I will continue using the default value of User principal name.

Since I now will use pre-authentication, it will be important to remember to assign individual users or groups to the Application. This enables me to control which users who will see the application under their My Apps and who will be able access the application’s external URL directly.

From the bottom part of the configuration settings I can configure Access Rules, which at this time is in Preview. This is cool, because I can for example require for this Application that users will be required to use multi-factor authentication. I have not enabled that here though.

After I’m finished reconfiguring the Azure AD App Proxy Application, I can save and continue with the other requirements.

Enable Windows Authentication for Squared Up

The Squared Up Web site supports Windows Authentication, the instructions for configuring that is described here: http://support.squaredup.com/support/solutions/articles/4136-enable-integrated-windows-authentication-single-sign-on-.

Follow that article and you should be ready for the next step.

It is a good idea at this point to verify that Windows Integrated Authentication is working correctly by browsing internally to http://scomdashboardserver/SquaredUp. Your current logged on user (if permissions are correct) should be logged in automatically.

Configure Kerberos Constrained Delegation for the Proxy Connector Server

I now need to configure so that the Server running the Proxy Connector can impersonate users pre-authenticating with Azure AD and use Windows Integrated Authentication to the Squared Up Server.

I find the Computer Account in Active Directory for the Connector Server, and on the Delegation tab click on “Trust this computer for delegation to specified services only”, and to “Use any authentication protocol”. Then I add the computer name for the web server that Squared Up is installed on and specify the http service as shown below (I already have an existing delegation set up):

This was the last step in my configuration, and I am almost ready to test.

If you, like me, have an environment consisting on both On-Premise and Azure Servers in a Hybrid Datacenter, please allow room for AD replication of these SPN’s and more.

Testing the published application with Azure AD Authentication!

Now I am ready to test the published proxy application with Azure AD Authentication.

When I go to my external URL https://scom.skill.no/squaredup, Azure AD will check if I already has an authenticated session, or else I will presented with the logon page for Azure AD (in Norwegian but you get the picture ;):

Remember from earlier that I have assigned the application either to a group of all or some users or directly to some pilot users for example.

If I log in with an assigned user, I will be directly logged in to the Squared Up Dashboard:

In addition to access the application via the Access Panel (https://myapps.microsoft.com), I can use the App Launcher menu in Office 365 and add the Squared Up Dashboard to the App chooser for easy access:

I can also access the Squared Up Application from the “My Apps” App on my Mobile Devices.

So to conclude, Squared Up is another great solution for publishing with Azure AD Application Proxy !