This is a short blog post showing how you can get started and some examples of using the PIM PowerShell Module for Azure AD Privileged Identity Management.
You can read more about Azure AD Privileged Identity Management here: https://docs.microsoft.com/en-us/azure/active-directory/active-directory-privileged-identity-management-configure, or by just using the following short URL: https://aka.ms/AzureADPIM!
Installing the Azure AD PIM PowerShell Module
Since there are no PIM related commands in the AzureAD or AzureADPreview PowerShell Modules, we will have to install a separate module for PIM. You can find this module at the PowerShell Gallery here: https://www.powershellgallery.com/packages/Microsoft.Azure.ActiveDirectory.PIM.PSModule
To install the module just run the following command in an elevated PowerShell session:
Install-Module Microsoft.Azure.ActiveDirectory.PIM.PSModule

After installing you can list the available commands in the PIM module:
Get-Command -Module Microsoft.Azure.ActiveDirectory.PIM.PSModule

Here is a short explanation of the available commands:
- Connect-PimService. Prompts you to log on with an Azure AD Account that might have any PIM roles assigned. You can optionally specify a username, tenantname or credential object as parameters. Especially tenantname would be useful if you are a guest user with roles assigned in another tenant.
- Show-PimServiceConnection. This will show the active PimService session details you have, after connecting with Connect-PimService.
- Get-PrivilegedRoleAssignment. This would list any permanent or eligible role assignments the user you connected with using Connect-PimService has.
- Enable-PrivilegedRoleAssignment. This command will enable a specified role assignments. It is required to specify which role either by RoleId or by a RoleAssignment variable. It is also required to specify a Duration for activation. Optional parameters includes Reason, TicketNumber, TicketSystem and StartTimeUtc.
- Disable-PrivilegedRoleAssignment. If you previously have activated one or more roles with Enable-PrivilegedRoleAssignement, you can preemptively deactivate these roles again before the duration expires. You must specify a RoleId or RoleAssignment variable.
- Disconnect-PimService. Disconnects any previous sessions to PimService.
Examples of Azure AD PIM Commands
In the following I will show some examples of using the Azure AD PIM Module.
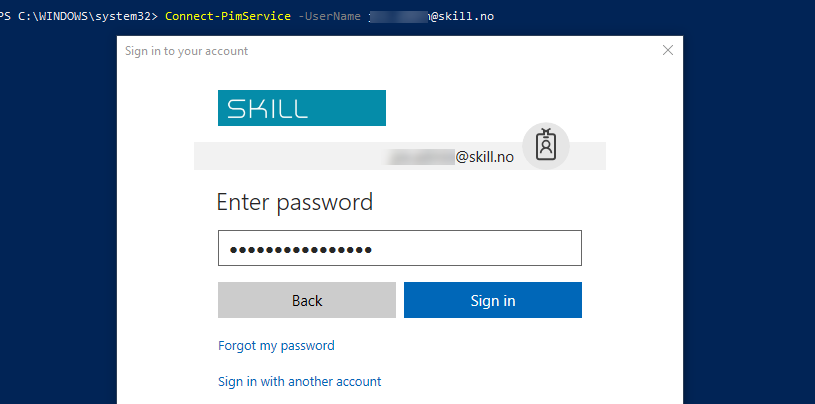
Connect-PimService
In the following I’m connecting with a specified username, if it is required to use Azure MFA for this user I will be prompted for that as well:
Connect-PimService –UserName <username>

After authenticating, PIM service connection details are returned, here slightly masked:
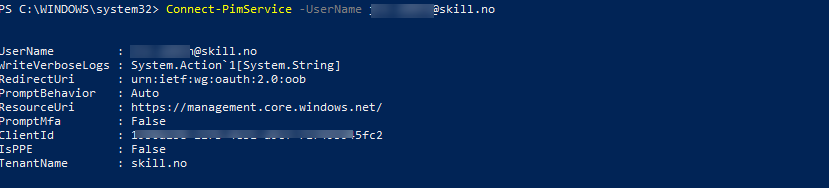
The above returned is exactly the same as would be returned by running the command:
Show-PimServiceConnection
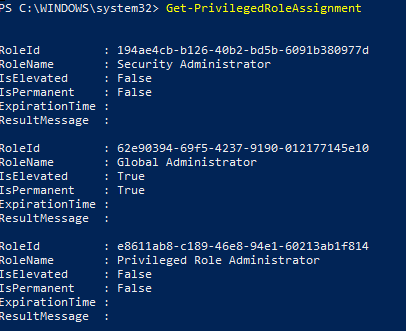
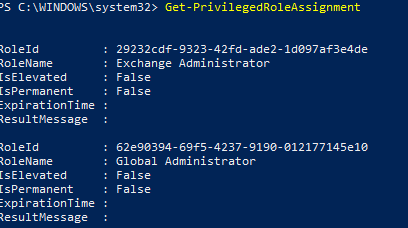
Get-PrivilegedRoleAssignment
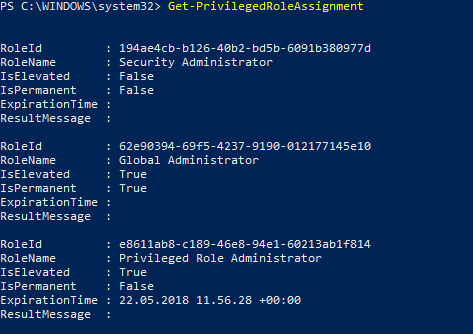
This command will list any role assignments, permanent or eligible your user might have. Here is a couple of examples for outputs for two different admin users. The first user is eligible for Security Administrator and Privileged Role Administrator, and permanent for Global Administrator:
The second admin user is eligible for Exchange Administrator and Global Administrator:
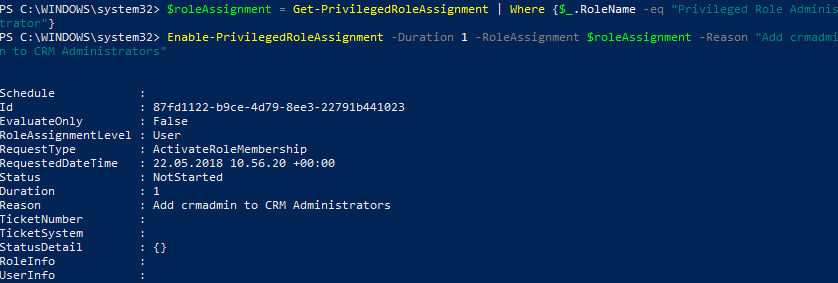
If I want to assign a variable to a role assignment, I can do it like the following command:
$roleAssignment = Get-PrivilegedRoleAssignment | Where {$_.RoleName -eq "Privileged Role Administrator"}
I now have a role assignment variable I can use in the following commands.
Enable-PrivilegedRoleAssignment
To enable one of my roles, I need to specify a duration (PS! keep inside the allowed role settings for max duration!), and specify which role either by RoleId or RoleAssignment variable. Optional parameters like Reason etc can also be specified.
Here is a working example:
Enable-PrivilegedRoleAssignment –Duration 1 –RoleAssignment $roleAssignment –Reason “Add crmadmin to CRM Administrators”
After running the command, if successful it will return as a submitted request for activating role membership.
By running Get-PrivilegedRoleAssignment again, we can now see that the role of “Privileged Role Administrator” is indeed activated (elevated), and with a ExpirationTime (UTC time):
PS! If you have required MFA on activation for the role, one of two things will happen:
- If the user already has verified the identity with Azure MFA when authenticating with Connect-PimService, the user will not be asked again. This is the same experience as by using the Azure Portal for activating roles.
- If the user hasn’t verified with Azure MFA, the user will be prompted when activating the role, similar to this example:


Disable-PrivilegedRoleAssignment
Any roles you have activated will automatically deactivate after the duration specified has passed. However, if you are finished doing administrative tasks with your role, you can deactivate the role manually.
To deactivate an active assignment, run the following command specifying a RoleId or RoleAssignment variable:
Disable-PrivilegedRoleAssignment –RoleAssignment $roleAssignment

Disconnect-PimService
To end your connection to Azure AD PIM Service, run the following command:
Disconnect-PimService
After running that command you can also see that there are no role assignments to list anymore.

Hope these commands and examples have been helpful, enjoy working with Azure AD PIM!