Monthly Archives: January 2016

Getting SCSM Object History using PowerShell and SDK

Some objects in the Service Manager CMDB, does not have the History tab. For example for Active Directory Users:

image

This makes it more difficult to keep track of changes made by either the AD Connector or Relationship Changes.

Some years ago this blog post from Technet showed how you could access object history programmatically using the SDK and a Console Application: http://blogs.technet.com/b/servicemanager/archive/2011/09/16/accessing-object-history-programmatically-using-the-sdk.aspx

I thought I could accomplish the same using PowerShell and the SDK instead, so I wrote the following script based on the mentioned blog article:

# Import module for Service Manager PowerShell CmdLets
$SMDIR    = (Get-ItemProperty 'hklm:/software/microsoft/System Center/2010/Service Manager/Setup').InstallDirectory
Set-Location -Path $SMDIR
If (!(Get-Module –Name System.Center.Service.Manager)) { Import-Module ".\Powershell\System.Center.Service.Manager.psd1" }

# Connect to Management Server
$EMG = New-Object Microsoft.EnterpriseManagement.EnterpriseManagementGroup "localhost"

# Specify Object Class
# In this example AD User
$aduserclass = Get-SCSMClass -DisplayName "Active Directory User"

# Get Instance of Class
$aduser = Get-SCSMClassInstance -Class $aduserclass | Where {$_.UserName -eq 'myusername'}

# Get History of Object Changes
$listhistory = $emg.EntityObjects.GetObjectHistoryTransactions($aduser)

# Loop History and Output to Console
ForEach ($emoht in $listhistory) {

    Write-Host "*************************************************************" -ForegroundColor Cyan
    Write-Host $emoht.DateOccurred `t $emoht.ConnectorDisplayName `t $emoht.UserName -ForegroundColor Cyan
    Write-Host "*************************************************************" -ForegroundColor Cyan

    ForEach ($emoh in $emoht.ObjectHistory) {

        If ($emoh.Values.ClassHistory.Count -gt 0) {
        
            Write-Host "*************************" -ForegroundColor Yellow
            Write-Host "Property Value Changes"  -ForegroundColor Yellow
            Write-Host "*************************"  -ForegroundColor Yellow

            ForEach ($emoch in $emoh.Values.ClassHistory) {
                ForEach ($propertyChange in $emoch.PropertyChanges) {
                    $propertyChange.GetEnumerator() | % {
                        Write-Host $emoch.ChangeType `t $_.Key `t $_.Value.First `t $_.Value.Second -ForegroundColor Yellow
                    }
                }
            }

        }
        
        If ($emoh.Values.RelationshipHistory.Count -gt 0) {

            Write-Host "*************************" -ForegroundColor Green
            Write-Host "Relationship Changes" -ForegroundColor Green
            Write-Host "*************************" -ForegroundColor Green

            ForEach ($emorh in $emoh.Values.RelationshipHistory) {

                $mpr = $emg.EntityTypes.GetRelationshipClass($emorh.ManagementPackRelationshipTypeId)
                Write-Host $mpr.DisplayName `t $emorh.ChangeType `t (Get-SCSMClassInstance -Id $emorh.SourceObjectId).DisplayName `t (Get-SCSMClassInstance -Id $emorh.TargetObjectId).DisplayName -ForegroundColor Green
            
            }

        }

    }

}


Running the script outputs the source of the changes, and any Property or Relationship changes, as shown in the below sample image:

image

Publish Operations Management Suite Portal with Azure AD

To be able to access the Operations Management Suite Portal for your OMS workspace, you will need to have an account with either administrator or user access to the workspace.

This could be a Microsoft Account, or if you have added an Azure Active Directory Organization to your OMS workspace, you can add Azure users or groups to your workspace.

add organization

When users from your Azure AD has been granted either administrator or user access to the OMS workspace, you can notify them that they can log on to the portal.

But, where should they go to log in? The simplest way could be to tell them to go to http://www.microsoft.com/oms, and hit the Sign In link at the top. After signing in they will be instructed to choose the OMS workspace and then be directed to the OMS portal.

Another method is to tell them the workspace url for the portal directly. This would be something like: https://<workspaceid>.portal.mms.microsoft.com/#Workspace/overview/index

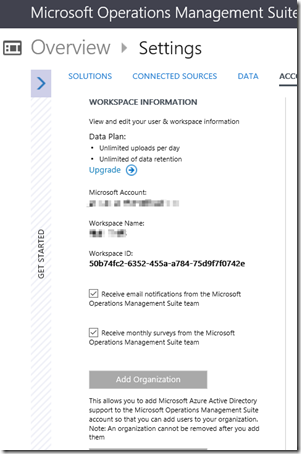
You will find the Workspace ID under Settings, and sometimes you can also use the Workspace Name in the above URL as well.

image

So you can communicate to users in your organization one of the methods above on how to access the portal. Chances are that most users will forget this info after a short while. They will either search after your e-mail, or ask you again at some time.

In this blog post I will show how you can publish the Operations Management Suite Portal as an Azure AD Application, utilizing Single Sign-On, so that users can access it easily with My Apps or the App Launcher in Office 365!

Step 1 – Add Organizational User or Group Accounts to OMS Workspace

First you will need to add the Azure AD User or Group Account to your OMS Workspace. Select account type Organizational Account, and if they should be users or administrators. In the Choose User/Group type in and search for the users or groups you want to add:

image

Step 2 – Creating the Azure AD Application

Next, log on as an Azure AD Global Administrator to the classic Azure management portal (manage.windowsazure.com). Under Active Directory, select your Azure AD, and then select Applications. Select Add to start adding a new Application. Select to Add an application my organization is developing:

image

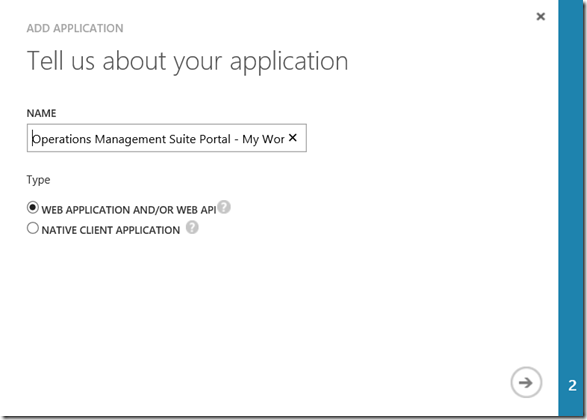
Next, specify a name for the application, and type of web application:

image

Specify URL for SIGN-ON and APP ID UR. This will be the OMS Portal url. using either workspace name or ID which you have discovered before:

image

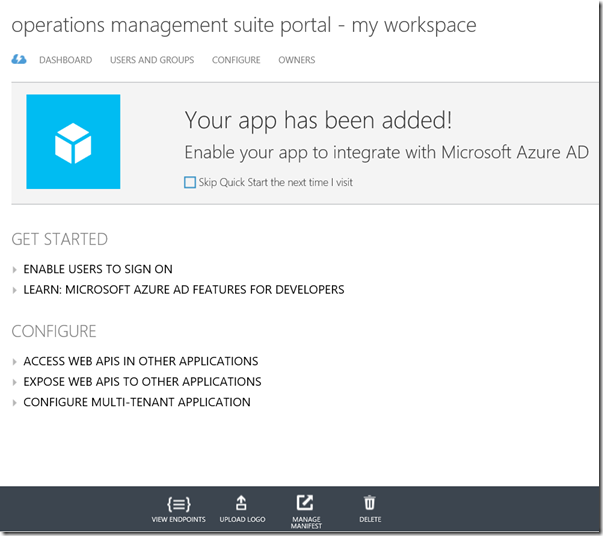
Finishing that and the Application has been added to Azure AD:

image

Step 3 – Adding Users and Groups to the Application

Next I need to add which Users or Groups that will see the published application. At the Users and Groups page for my application, I’m notified that user assignment are not currently required to access Operations Management Suite Portal. That is correct, because users can access the portal directly if they know the URL or sign in at the Microsoft OMS site.

Adding Users or Groups here will enable the application to be visible for the users at the My Apps / App Launcher:

image

I search for and select to Assign the Groups (or Users) I want to have the application visible for.

Step 4 – Logo and optional configuration

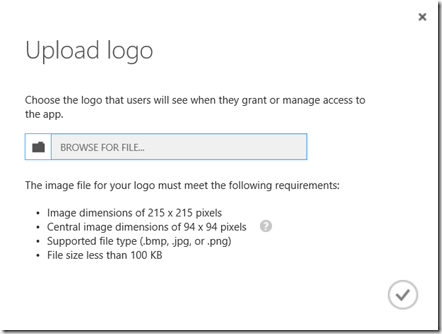
After adding users, the application is ready to test, but first I would want to add my own logo.

image

In this example I’m using a transparent png image with dimensions 215×215, and a central image dimension of 94×94.

image

image

At the Configure page, other settings can be set such as requiring user assignment, access rules with Multi-Factor Authentication and Self-Service access for users that has not been specifically assigned access.

I this scenario I only wanted to get the application published to users, so I will not configure any more settings. We are ready to test.

Part 5 – User Access to the Published Application

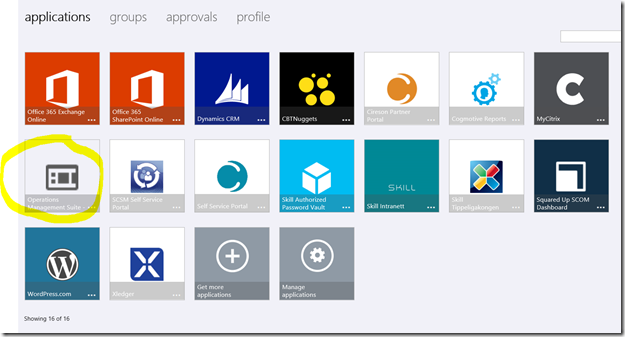
Users can now access My Apps at https://myapps.microsoft.com. When logging in with the Azure AD User a list of published applications will be visible, and I can see the OMS Portal Application:

image

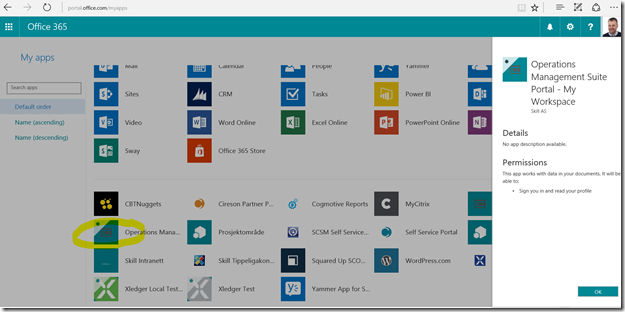
And, logged in to Office 365, I can select the App Launcher and show all my apps at https://portal.office.com/myapps.

image

I can pin the application to the App Launcher if I want for quicker access.

image

So to conclude this blog post, users now have a quickly accessible shortcut to the Operations Management Suite Portal using single sign-on with Azure AD.

Speaking at NIC 2016 #NICConf

I’m very excited to have a session at Nordic Infrastructure Conference, 5th anniversary edition, in Oslo February 4.-5. 2016. In exactly one month from today (with a pre-conference day starting at Feb 3rd) NIC kicks off the fifth version of this premium event for IT professionals!

Aiming for up to 1400 participants, the sessions will be presented in 7 tracks:


For a list of current published sessions, see this link: http://www.nicconf.com/sessions

My session will be a deep dive on publishing applications with Azure AD, http://www.nicconf.com/deep-dive–publishing-applications-with-azure-ad.

The session will cover Azure AD Single Sign-On and Password Single Sign-On, integrating Azure AD SSO with your internally developed applications, and publishing applications with Azure AD App Proxy that either use pre-authentication or pass through. The session will cover how to assign users, configure access control with MFA per-application, use self-servicing and how users can access these applications on different platforms and through which portals.

The session will honor the NIC original concept: Less slides, more demos!

I’m very much looking forward to next month, and hope to see you there!

Read more about NIC here: http://www.nicconf.com.