Monthly Archives: February 2017

Get Started with Group Based Licensing in the Azure AD Portal!

Just the other day I wrote a blog post on how you could use Azure AD v2 PowerShell and Dynamic Groups based on extension attributes to set EMS license plans for your cloud and on-premises users, https://gotoguy.blog/2017/02/17/assign-ems-license-with-azure-ad-v2-powershell-and-dynamic-groups/.

And now, User and Group based licensing in the Azure AD Portal has been added in Preview! This is a long awaited feature, and works will all of your purchased services, either its EMS, Office 365, Dynamics 365, PowerBI and many more.

Let’s take a quick look on the functionality. Based on the above referenced blog post, I will use the same Dynamic Groups, where membership is defined based on values for extension attributes. So I already have configured Dynamic Groups for EMS E3, EMS E5and Office 365:

image

The new Licensing functionality are now added to the Azure AD Preview at https://portal.azure.com:

image

When I go to the Licenses blade I get a quick overview over my purchased products and total of assigned licenses:

image

When I go to All products, a list of my product subscriptions are shown, with an overview of licenses assigned, available and if any are expiring soon:

image

If I go into one of the products, I will see the already existing licensed users, which in my case are Direct assigned (I did that with the PowerShell script in the previous blog post).

image

Let’s configure Licensed Groups:

image

Click + Assign to add a group to License, I will use my Dynamic Group:

image

Then, at Assignment options, I can optionally configure individual services:

image

After clicking OK and Assign, the group has been added for processing:

image

And if I look at Licensed Users again after the change has been processed, I will see that uses now have an inherited license based on the group. Of course, the Direct assignments added by PowerShell are not removed, so I will have to remove those later.

image

In the same way I can add my Office 365 and EMS E5 Dynamic Groups:

imageimage

By the way, you can go into each group after and look at License status, and Reprocess if needed.

image

At the Group’s Audit Log we can track the license activity as well:

image

So there we have it, a long sought after functionality that I’m sure many organizations will have good use for. As this is in Preview, some more testing are should be done before setting it directly into production, and if I find anything special I will update this blog post.

I am sure there will be an announcement and blog post at the Enterprise Mobility + Security blog shortly also: https://blogs.technet.microsoft.com/enterprisemobility/

Publish the Cireson Configuration Manager Portal with Azure AD Application Proxy

Cireson will soon be releasing a new web based Portal for System Center Configuration Manager, http://go.cireson.com/cireson-portal-for-configmgr. This would make it possible to access a lot of functionality for Configuration Manager anywhere with a web browser. The Cireson Portal for Configuration Manager must be installed locally, either on the Configuration Manager server or on a server close to the Configuration Manager server and database.

This makes this an ideal candidate for Azure AD Application Proxy publishing, as we can make it available as an Azure AD App with all the features and possibilities that this can give, including:

  • Azure AD Preauthentication and Single Sign-On to the Portal
  • Assigning Users and Groups
  • Conditional Access
  • Easy access via the users Access Paneler or the Office 365 App Launcher

We will look into all this in a two-part blog post! This will also be a good opportunity to use the new management experience for the preview of Azure Active Directory management in the Azure Portal, https://portal.azure.com.

Part 1: Publish the Cireson Configuration Manager Portal with Azure AD Application Proxy
Part 2: Conditional Access and Self Service for the published Configuration Manager Portal Application (link when available)

Enable Azure AD Application Proxy

I you want to publish applications with Azure AD Application Proxy, there are some requirements:

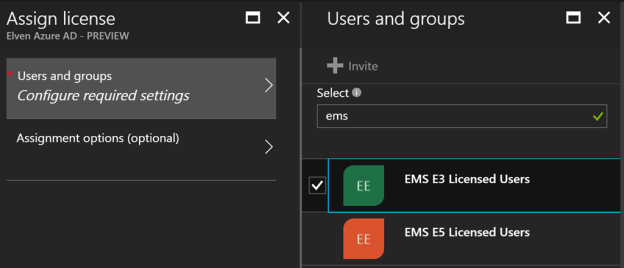
  • You need an Azure AD tenant configured with licenses for Azure AD Premium P1 or EMS E3 Suite. Actually it is enough with Azure AD Basic licenses for AAD App Proxy, but if you want to configure Conditional Access you will need at least Premium P1. More on that later.
  • If you want to enable SSO for your internal users you have to synchronize those users via Azure AD Connect.
  • You have to Enable Azure AD Application Proxy for your AAD tenant directory, and download and install one or more Application Proxy Connectors.

The diagram below shows the communication flow from when the user launch the published application, authenticates to Azure AD, and then via the Application Proxy Connector installed internally access the web based portal. Single Sign-On is achieved via the Application Proxy Connector authentication on behalf of the user via Kerberos Constrained Delegation.

image

So the first step is to go to the Azure Portal, and open the Azure Active Directory blade, which at the moment is in preview. From there go to the Application Proxy section and make sure that the Application Proxy is enabled as shown below:

image

In the image above we also see that there already are some Azure AD App Proxy Connectors installed and active. They are also configured in two different groups, and these groups are used later when we publish the application. At the top of the blade, you can download a new Connector installation file.

Download and install Application Proxy Connector

The Application Proxy Connector must be installed on a server that can reach the internal web portal server. In this case I want to install the Connector locally on the Configuration Manager server that also hosts the Cireson Portal for Configuration Manager. I could have used one of my existing connectors, but they are installed respectively on an Azure VM environment and on a separate network from our Configuration Manager environment.

Following the download link from above, I download and start the Application Proxy Connector installation on my SCCM server.

image

During installation you must provide a global administrator admin account:

image

After finishing the installation of the connector, we will se the new connector with the server name in the portal.

We can now create a group, and place the connector installed in the group:

image

Publish the Configuration Manager Portal App

To start publishing the Configuration Manager Portal Application, go to Enterprise Applications and select Add, and from the Add your own app section select to add an “On-premises application”:

image

Next, specify the Name of the Application and the Internal Url. In this case I have installed it internally as http://configmgrportal. For External Url, you have a choice for the alias and domain. By default the alias will be the Application Name without spaces, appended with –<tenant name>.msappproxy.net.

image

You can change the domain to one of your verified domains, which I have done here together with changing the alias so that the External Url now will be https://configmgrportal.skill.no. By the way, you have to upload a SSL certificate if you want to use your own domain, either a wildcard certificate or a certificate with the appropriate FQDN. We will look at that later.

image

Note that I need to add a CNAME entry at my DNS provider as stated in the info box above. I will do that right now before I proceed.

I set Pre Authentication to Azure Active Directory, as I want everyone accessing the External Url to be a valid Azure AD user from my tenant. I also select to translate URL in headers, and select my previously configured App Proxy Connector Group.

Press Add to add the application to the directory. After that you are presented with a Quick start menu like below:

image

First I go to Properties, and optionally you can upload a logo which I have done here, note also that User assignment is required is set to yes, this means that no user cannot access the published application until I have added users or groups to it.

image

After saving I go to users and groups, and add some users to test the published application:

image

These users will now be able to launch the published application, but we have some more configuration to do first. As I want to have Single Sign-On configured for this application, I configure the following settings for Single Sign-On. I set the mode to Integrated Windows Authentication, meaning that the App Proxy Connector will impersonate any Azure AD authenticated user to the on-premises application via Kerberos constrained delegation.

I also need to specify a internal SPN for the application, which will be HTTP/<fqdn-of-server>, where the server is where the internal web application is installed. I will also specify which delegated login identity, which in most cases will work fine with user principal name for synchronized federated users.

image

After configuring Single Sign-On settings, and if you elected to use your own domain name, you need to upload or specify an existing SSL certificate. Go back to Application Proxy settings and click to view or change certificate settings:

image

After saving this configuration, the required portal configuration for the application is now complete, but optionally we can configure self service and conditional access, We will get back to that later in part 2 of this blog post.

That leaves only one more step, and that is to configure kerberos delegation for the App Proxy Connector server. In your on-premises Active Directory, find the computer object for the server you installed the App Proxy Connector on, and go to Delegation, and select to trust this computer for delegation to specified services only, and for kerberos only adding the computer name and http service for the server where the internal web application is installed. This should med the same as the internal spn you configured in the portal earlier for Windows integrated authentication.

image

Testing Single Sign-On

We can now test the application. Go to https://myapps.microsoft.com and log in with one of the assigned users. Among other published apps I will see the Configuration Manager Portal:

image

And if I launch it, I will see that I can access the Configuration Manager Portal, and I have been automatically signed in with my local AD user via Single Sign-On and Kerberos Constrained Delegation. I also see my url, https://configmgrportal.skill.no, which I can access directly if I want without going through the MyApps panel.

image

So now we have successfully published the Cireson Configuration Manager Portal with Azure AD Application Proxy, using SSO with Azure AD, and User Assignment so that only users that are pre-authenticated and assigned the application by Azure AD, will have access to it.

Stay tuned for part 2 of this blog post, where we will configure Conditional Access using Azure MFA and Device Compliance, and what Self Service functionality we have.

Working with Azure AD Extension Attributes with Azure AD PowerShell v2

In a recent blog post, https://gotoguy.blog/2017/02/17/assign-ems-license-with-azure-ad-v2-powershell-and-dynamic-groups/, I wrote about how to use extension attributes in local Active Directory and Azure AD, for the purpose of using these extension attributes for determine membership i Azure AD Dynamic Groups.

In the process of investigating my Azure AD users (synchronized and cloud based),  I wanted to see how I could use Azure AD v2 PowerShell CmdLets for querying and updating these extension attributes. This blog post is a summary of tips and commands, and also some curious things I found. There is a link to a Gist with all the PowerShell Commands at the end of the blog post if you prefer to skip to that.

Lets start by looking into one user:

image

For my example user I have the following output:

image

In the above linked blog post, I wrote about using the msDS_cloudExtensionAttribute1 and 2 for assigning licenses, so I see those values and more.

I can also serialize the user object to JSON by using $aadUser.ToJson(), which also will show me the value of the extension attributes:

image

I can look into and explore the user object with Get-Member:

image

From there I can see that that the Extension Property, which is of type System.Collections.Generic.Dictionary supports Get and Set. So lets look into how to update those extension attributes. This obviously only work on cloud homed users, as synchronized users must be updated in local Active Directory. This series of commands shows how to add extension attributes for cloud users:

image

The next thing I thought about, was how can I make a list of all users with their extension attributes? I ended up with the following, where you either can get all users or make a filtered collection, and from there loop through and read any extension attributes:

image

When I look into my extended users list object, I can list the users and values with extension values:

image

image

So to some curios things I found. As explained in the blog post https://gotoguy.blog/2017/02/17/assign-ems-license-with-azure-ad-v2-powershell-and-dynamic-groups/, if you are running a Hybrid Exchange organization you would probably use extensionAttribute1..15 instead of the msDS_cloudExtensionAttribute. In another Azure AD tenant I tested on that, but using the commands above I never could list out the extensionAttribute1..15 on my users. I never found a way to validate and check those values, but if I created a Dynamic Group using for example extensionAttribute1 or 2, members would be populated! So it was obvious that the value was there, I just can’t find a way to check it.

I even tested on Graph API, but did not find any extensionAttribute there either, only msDS_cloudExtensionAttribute. For example by querying:

https://graph.microsoft.com/v1.0/users/<userid or upn>?$select=extension_66868723f2984d3e8c18f0ebd134240f_msDS_cloudExtensionAttribute2

image

I can see my extension value.

However, if I try: https://graph.microsoft.com/v1.0/users/<userid or upn>?$select=extensionAttribute2, I cannot see the value even I know it’s there.

image

Strange thing, hopefully I will find out some more on this, and please comment if you have any ideas. I will also ask this from the Azure AD team.

Here is the gist with all the commands:


# Azure AD v2 PowerShell Module CmdLets for working with Extension Attribute Properties
# Connect to Azure AD with Global Administrator
Connect-AzureAD
# Get a User and Read Extension Properties
$aadUser = Get-AzureADUser -ObjectId <youruser>
$aadUser | Select -ExpandProperty ExtensionProperty
# Serialize User Object to JSON
$aadUser.ToJson()
# Explore Object Properties
$aadUser | Get-Member
# How to: Add Extension Properties
# PS! Can only write to Cloud homed users
$aadUser = Get-AzureADUser -ObjectId <yourclouduser>@elven.onmicrosoft.com
$extensionProp = New-Object "System.Collections.Generic.Dictionary“2[System.String,System.String]"
$extensionProp.Add('extension_<YourTenantSchemaExtensionAppId>_msDS_cloudExtensionAttribute1','ENTERPRISEPACK')
$extensionProp.Add('extension_<YourTenantSchemaExtensionAppId>_msDS_cloudExtensionAttribute2','EMSPREMIUM')
Set-AzureADUser -ObjectId $aadUser.ObjectId -ExtensionProperty $extensionProp
# Check added Extension Properties
Get-AzureADUser -ObjectId <yourclouduser>@elven.onmicrosoft.com | Select -ExpandProperty ExtensionProperty
#region List all users with Extension Properties
$aadUsers = Get-AzureADUser | Select DisplayName, ObjectId
$aadUsersExt = @()
ForEach ($aadUser in $aadUsers) {
$user = Get-AzureADUser -ObjectId $aadUser.ObjectId | Select ObjectId, DisplayName
$userDetail = Get-AzureADUser -ObjectId $aadUser.ObjectId | Select -ExpandProperty ExtensionProperty
        foreach ($key in $userDetail.Keys)
        {
            if($key -like "extension_<YourTenantSchemaExtensionAppId>_msDS_cloudExtensionAttribute1")
            {
                $ext1 = $userDetail."$key"
            }
            elseif($key -like "extension_<YourTenantSchemaExtensionAppId>_msDS_cloudExtensionAttribute2")
            {
                $ext2 = $userDetail."$key"
            }
else { $ext1 = ""; $ext2 = "" }
        }
$obj = [pscustomobject]@{"DisplayName"=$user.DisplayName; "ObjectId"=$user.ObjectId; "Ext1"=$ext1; "Ext2"=$ext2}
$aadUsersExt += $obj
}
# List only users with values for extension attributes
$aadUsersExt | Where {$_.Ext1 -or $_.Ext2} | FT
#endregion
# List all users
$aadUsersExt
# Serialize users and extension attributes to JSON
$aadUsersExt | ConvertTo-Json

Cireson Portal 7.3 – Admin Menu Items for Norwegian Disappeared

After upgrading a couple of customers and our own environment til the latest Cireson Portal 7.3, I saw that the new re-arranged Admin menu was missing some expected menu elements. This is what I saw:

image

After investigating I found that the reason was if the logged on Admin user was configured with Norwegian display language. When I switched to English, I saw this Admin menu:

image

To solve this I navigated to the Localization Settings and checked the list for NOR that missed translations, and provided Norwegian translations for every related setting for the Admin menu (both the links and the labels at each admin section):

image

After that I could switch back to Norwegian display language again, now showing the correct Admin menu:

image

Assign EMS License with Azure AD v2 PowerShell and Dynamic Groups

While we are waiting for support for group based licensing in the Azure AD Portal I have created this Azure AD v2 PowerShell solution for assigning EMS (Enterprise Mobility + Security) license plans using Azure AD v2 PowerShell module and Dynamic Groups.

The PowerShell CmdLets used here requires the Azure AD v2 PowerShell Module, which you can read about how to install or update here: https://gist.github.com/skillriver/35fba9647fbfbe3e99718f0ad734b241

Source of Authority, Attributes, Sync and Dynamic Groups

In my scenario I want to use extension attributes to automatically calculate membership using Dynamic Groups in Azure AD. The members of these groups will be assigned the EMS licenses.

Most organizations will have an on-premises Active Directory synchronizing to Azure AD, so the source of authority is important for where I set the value of the extension attributes, as I want my Dynamic Groups to calculate membership for both On-premise and Cloud based users (I have some Cloud based admin account I want to license as well).

So, lets take a look at my local Active Directory environment. If you have Exchange installed in your organization, you will have extended the schema with extensionAttribute1..15.

But in my case, I never have installed any versions of Exchange in my current environment, and only used Exhange Online, so I don’t have those attributes. Instead I have msDS-cloudExtensionAttribute1..20.

So I decided on using the following attributes locally in AD:

image

I have previously used ENTERPRISEPACK (SkuPartNumber for Office 365 E3) for licensing Office 365 E3 plans. In this scenario I will use the msDS-cloudExtensionAttribute2 for either EMS (SkuPartNumber for EMS E3) or EMSPREMIUM (SkuPartNumber for EMS E5).

You can also use Active Directory PowerShell to set these values on-premises:

image

Note that if I had Exchange installed, I could just have used extensionAttribute1 and extensionAttribute2, and these would be automatically synchronized to Azure AD in an Exchange Hybrid deployment. However, in my case I need to manually specify the option for Directory extension attribute sync in Azure AD Connect:

image

And then selecting to synchronize those two selected attributes:

image

After these Directory extensions are configured and synchronized to Azure AD, I can check these attributes with the following AAD v2 command:

Get-AzureADUser –ObjectId <youruser> | Select -ExpandProperty ExtensionProperty

In my environment I will find these attributes:

image

Note that the msDS_cloudExtensionAttribute1..2 has now been created in Azure AD for me, and been prefixed with extension_<GUID>_, where the GUID represent the Tenant Schema Extension App:

image

So now I know that my on-premises users with values for msDS_cloudExtensionAttribute1..2 will be synchronized to the extension attributes in Azure AD. But what about users that are source from Cloud? There are no graphical way to set these extension attributes, so we will have to do that with Azure AD v2 PowerShell. In my example I have a Cloud admin account I want to set this attribute extension for (scripts are linked later in the blog):

image

With that, I now have configured the users I want with the extension attribute values, and are ready to create the Dynamic Groups.

Creating Dynamic Groups for Assigning EMS Licenses

Earlier in the blog post I mentioned that I wanted to use the msDS_cloudExtensionAttribute2 for assigning either EMS E3 or EMS E5 licenses. If I run the following command, I get my Subscriptions, here listed by SkuId an SkuPartNumber. EMSPREMIUM refers to EMS E5, while EMS refers to the original EMS which is now E3.

image

On that basis I will create 2 Dynamic Groups, one that looks for EMSPREMIUM and one that looks for EMS in the extension attribute. You can create Dynamic Groups in the new Azure AD Portal, or by running these PowerShell commands:

image

After a while memberships in these dynamic groups will be processed, and I can check members with the following commands:

image

In my environment I will have this returned, showing users with membership in the EMS E3 and EMS E5 group respectively:

image

Before I proceed I will save these memberships to objects variables:

image

Assigning the EMS licenses based on group membership

With users, attributes and dynamic groups membership prepared, I can run the actual PowerShell commands for assigning the licenses. I also want to make sure that any users previously assigned to another EMS license will be changed to reflect the new, so that they are not double licensed. Meaning, if a user already has an EMS E3 license, and the script adds EMS E5, I will remove the EMS E3 and vice versa.

The full script is linked below, but I will go through the main parts here first. First I will save the SkuId for the EMS subscriptions:

image

Then I will loop through the membership objects saved earlier:

image

Next, create License Object for adding and removing license:

image

Then create a AssignedLicenses object, adding the AssignedLicense object from above. In addition, I check if the user has an existing EMS license to be removed, and if so add that SkuId to RemoveLicenses. If there are no license to remove, I still need to specify an empty array for RemoveLicenses.

image

And then, update the user at the end of the loop:

image

After looping through the EMS E3 members, a similar loop through EMS E5 members:

image

So to summarize, with this script commands you can assign either EMS E3 or E5 licenses based on user membership in Dynamic Groups controlled by extension attributes. In a later blog post I will show how we can consistenly apply these licenses, stay tuned!

Link to the full script is below:


# PowerShell CmdLets for Assigning EMS Licenses with Azure AD v2 PowerShell Module
# Read blog post for details: https://gotoguy.blog/2017/02/17/assign-ems-license-with-azure-ad-v2-powershell-and-dynamic-groups/
# Connect to Azure AD with Global Administrator
Connect-AzureAD
# List Subscriptions
Get-AzureADSubscribedSku | Select SkuId, SkuPartNumber
# EMS E3 license Service Plans
$EMSlicense = Get-AzureADSubscribedSku | Where-Object {$_.SkuPartNumber -eq 'EMS'}
# EMS E5 license Service Plans
$EMSpremiumlicense = Get-AzureADSubscribedSku | Where-Object {$_.SkuPartNumber -eq 'EMSPREMIUM'}
# Create a Dynamic Group for EMS E3 Users to be Licensed
New-AzureADMSGroup -DisplayName "EMS E3 Licensed Users" -Description "Dynamic group for EMS E3 Users" `
-SecurityEnabled $true -MailEnabled $false -MailNickname "EMSE3Users" -GroupTypes "DynamicMembership" `
-MembershipRule "(user.extension_<YourTenantSchemaExtensionAppId>_msDS_cloudExtensionAttribute2 -eq ""EMS"")" `
-MembershipRuleProcessingState "On"
# Create a Dynamic Group for EMS E5 Users to be Licensed
New-AzureADMSGroup -DisplayName "EMS E5 Licensed Users" -Description "Dynamic group for EMS E5 Users" `
-SecurityEnabled $true -MailEnabled $false -MailNickname "EMSE5Users" -GroupTypes "DynamicMembership" `
-MembershipRule "(user.extension_<YourTenantSchemaExtensionAppId>_msDS_cloudExtensionAttribute2 -eq ""EMSPREMIUM"")" `
-MembershipRuleProcessingState "On"
# Get Group and members
$EMSE3Group = Get-AzureADMSGroup -SearchString "EMS E3 Licensed Users"
# Check if membership has been processed, wait and try again if not yet
Get-AzureADGroupMember -ObjectId $EMSE3Group.Id
$EMSE5Group = Get-AzureADMSGroup -SearchString "EMS E5 Licensed Users"
# Check if membership has been processed, wait and try again if not yet
Get-AzureADGroupMember -ObjectId $EMSE5Group.Id
# Save members to object variable
$membersEMSE3 = Get-AzureADGroupMember -ObjectId $EMSE3Group.Id
$membersEMSE5 = Get-AzureADGroupMember -ObjectId $EMSE5Group.Id
#region EMS License Management for Dynamic Group Membership
# Get SkuId for EMS E5 (EMSPREMIUM) and EMS
$EmsE3SkuId = (Get-AzureADSubscribedSku | Where { $_.SkuPartNumber -eq 'EMS'}).SkuId
$EmsE5SkuId = (Get-AzureADSubscribedSku | Where { $_.SkuPartNumber -eq 'EMSPREMIUM'}).SkuId
# Loop through EMS E3 Members
ForEach ($member in $membersEMSE3) {
# Get the user
$User = Get-AzureADUser -ObjectId $member.ObjectId
# Create a License Object for assigning the EMS E3 SkuId
$AddLicense = New-Object -TypeName Microsoft.Open.AzureAD.Model.AssignedLicense
$AddLicense.SkuId = $EmsE3SkuId
# Create a License Object for removing the EMS E5 SkuId
$RemoveLicense = New-Object -TypeName Microsoft.Open.AzureAD.Model.AssignedLicense
$RemoveLicense.SkuId = $EmsE5SkuId
# Create a Licenses Object for Adding and Removing the Licenses
$Licenses = New-Object -TypeName Microsoft.Open.AzureAD.Model.AssignedLicenses
$Licenses.AddLicenses = $AddLicense
# Check if the User has license to be removed
If ($user.AssignedLicenses | Where-Object {$_.SkuId -eq $EmsE5SkuId}) {
$Licenses.RemoveLicenses = $RemoveLicense.SkuId
}
Else { $Licenses.RemoveLicenses = @() }
# And lastly, update User license with added and removed licenses
Set-AzureADUserLicense -ObjectId $User.ObjectId -AssignedLicenses $Licenses
}
# Loop through EMS E5 Members
ForEach ($member in $membersEMSE5) {
# Get the user
$User = Get-AzureADUser -ObjectId $member.ObjectId
# Create a License Object for assigning the EMS E5 SkuId
$AddLicense = New-Object -TypeName Microsoft.Open.AzureAD.Model.AssignedLicense
$AddLicense.SkuId = $EmsE5SkuId
# Create a License Object for removing the EMS E3 SkuId
$RemoveLicense = New-Object -TypeName Microsoft.Open.AzureAD.Model.AssignedLicense
$RemoveLicense.SkuId = $EmsE3SkuId
# Create a Licenses Object for Adding and Removing the Licenses
$Licenses = New-Object -TypeName Microsoft.Open.AzureAD.Model.AssignedLicenses
$Licenses.AddLicenses = $AddLicense
# Check if the User has license to be removed
If ($user.AssignedLicenses | Where-Object {$_.SkuId -eq $EmsE3SkuId}) {
$Licenses.RemoveLicenses = $RemoveLicense.SkuId
}
Else { $Licenses.RemoveLicenses = @() }
# And lastly, update User license with added and removed licenses
Set-AzureADUserLicense -ObjectId $User.ObjectId -AssignedLicenses $Licenses
}
#endregion

Link to script for managing and listing extension attribute properties for your users:


# Azure AD v2 PowerShell Module CmdLets for working with Extension Attribute Properties
# Connect to Azure AD with Global Administrator
Connect-AzureAD
# Get a User and Read Extension Properties
$aadUser = Get-AzureADUser -ObjectId <youruser>
$aadUser | Select -ExpandProperty ExtensionProperty
# Serialize User Object to JSON
$aadUser.ToJson()
# Explore Object Properties
$aadUser | Get-Member
# How to: Add Extension Properties
# PS! Can only write to Cloud homed users
$aadUser = Get-AzureADUser -ObjectId <yourclouduser>@elven.onmicrosoft.com
$extensionProp = New-Object "System.Collections.Generic.Dictionary“2[System.String,System.String]"
$extensionProp.Add('extension_<YourTenantSchemaExtensionAppId>_msDS_cloudExtensionAttribute1','ENTERPRISEPACK')
$extensionProp.Add('extension_<YourTenantSchemaExtensionAppId>_msDS_cloudExtensionAttribute2','EMSPREMIUM')
Set-AzureADUser -ObjectId $aadUser.ObjectId -ExtensionProperty $extensionProp
# Check added Extension Properties
Get-AzureADUser -ObjectId <yourclouduser>@elven.onmicrosoft.com | Select -ExpandProperty ExtensionProperty
#region List all users with Extension Properties
$aadUsers = Get-AzureADUser | Select DisplayName, ObjectId
$aadUsersExt = @()
ForEach ($aadUser in $aadUsers) {
$user = Get-AzureADUser -ObjectId $aadUser.ObjectId | Select ObjectId, DisplayName
$userDetail = Get-AzureADUser -ObjectId $aadUser.ObjectId | Select -ExpandProperty ExtensionProperty
        foreach ($key in $userDetail.Keys)
        {
            if($key -like "extension_<YourTenantSchemaExtensionAppId>_msDS_cloudExtensionAttribute1")
            {
                $ext1 = $userDetail."$key"
            }
            elseif($key -like "extension_<YourTenantSchemaExtensionAppId>_msDS_cloudExtensionAttribute2")
            {
                $ext2 = $userDetail."$key"
            }
else { $ext1 = ""; $ext2 = "" }
        }
$obj = [pscustomobject]@{"DisplayName"=$user.DisplayName; "ObjectId"=$user.ObjectId; "Ext1"=$ext1; "Ext2"=$ext2}
$aadUsersExt += $obj
}
# List only users with values for extension attributes
$aadUsersExt | Where {$_.Ext1 -or $_.Ext2} | FT
#endregion
# List all users
$aadUsersExt
# Serialize users and extension attributes to JSON
$aadUsersExt | ConvertTo-Json

Session Recap, PowerShell Scripts and Resources from session on Azure AD Management Skills at NICConf 2017

Last week at NICConf I presented two sessions on Management of Microsoft Azure AD, Application Publishing with Azure AD – the New Management Experience! and Take your Azure AD Management Skills to the Next Level with Azure AD Graph API and Powershell!

In the last session i presented demos and scripts with some technical details, so in this blog post I will link to those PowerShell scripts together with some explanations. See also my slides for the sessions published here: https://docs.com/jan-vidar-elven-1/7677/nicconf-2017, and the session recording might be available later which I will link to.

First i talked about the new Azure AD PowerShell v2 module and install info:


# Azure AD v2 PowerShell Quickstart module install
# Azure AD has a GA version: AzureAD and Preview version: AzureADPreview
# Check available versions installed
Get-Module AzureAD -ListAvailable
Get-Module AzureADPreview -ListAvailable
# Install from PowerShell Gallery
Install-Module AzureAD
Install-Module AzureADPreview
# Update new versions from PS Gallery
Update-Module AzureAD
Update-Module AzureADPreview
# Check and uninstall old versions
$Latest = Get-InstalledModule ("AzureADPreview")
Get-InstalledModule ("AzureADPreview") -AllVersions | ? {$_.Version -ne $Latest.Version} | Uninstall-Module -WhatIf
# Check Commands, see also list of commands at: ref. https://docs.microsoft.com/en-us/powershell/azuread/v2/azureactivedirectory
Get-Command -Module AzureADPreview

Then connecting and exploring some objects and license info:


# Azure AD v2 PowerShell Quickstart Connect
# Connect with Credential Object
$AzureAdCred = Get-Credential
Connect-AzureAD -Credential $AzureAdCred
# Connect with Modern Authentication
Connect-AzureAD
# Explore some objects
Get-AzureADUser
# Getting users by objectid, upn and searching
Get-AzureADUser -ObjectId <objectid>
Get-AzureADUser -ObjectId [email protected]
Get-AzureADUser -SearchString "Jan Vidar"
# Explore deeper via object variable
$AADUser = Get-AzureADUser -ObjectId [email protected]
$AADUser | Get-Member
$AADUser | FL
# Look at licenses and history for enable and disable
$AADUser.AssignedPlans
# Or
Get-AzureADUser -ObjectId [email protected] | Select-Object -ExpandProperty AssignedPlans
# More detail for individual licenses for plans
Get-AzureADUserLicenseDetail -ObjectId $AADUser.ObjectId | Select-Object -ExpandProperty ServicePlans
# Get your tenants subscriptions, and explore details
Get-AzureADSubscribedSku | FL
Get-AzureADSubscribedSku | Select-Object SkuPartNumber -ExpandProperty PrepaidUnits
Get-AzureADSubscribedSku | Select-Object SkuPartNumber -ExpandProperty ServicePlans
# Invalidate Users Refresh tokens
Revoke-AzureADUserAllRefreshToken -ObjectId $AADUser.ObjectId

Then performing some Administration tasks including creating Dynamic Groups, setting user thumbnail photo, adding licenses and changing passwords:


# Create a Dynamic Group for my test users of Seinfeld characters
New-AzureADMSGroup -DisplayName "Seinfeld Users" -Description "Dynamic groups with all Seinfeld users" -MailEnabled $false -SecurityEnabled $true -MailNickname "seinfeld" -GroupTypes "DynamicMembership" -MembershipRule "(user.department -eq ""Seinfeld"")" -MembershipRuleProcessingState "Paused"
# Get Group and members
$AADGroup = Get-AzureADMSGroup -SearchString "Seinfeld Users"
Get-AzureADGroupMember -ObjectId $AADGroup.Id
# Set Membership Processing
$AADGroup | Set-AzureADMSGroup -MembershipRuleProcessingState On
# Save members to object variable
$members = Get-AzureADGroupMember -ObjectId $AADGroup.Id
# Set User Thumbnail Photo
# Note that setting Thumbnailphoto can only be set against cloud mastered objects, or else error message:
# Unable to update the specified properties for on-premises mastered Directory Sync objects or objects currently undergoing migration.
Set-AzureADUserThumbnailPhoto -ObjectId <myuserupn or objectid> -FilePath C:\_source\temp\[email protected]
# Get and View User Thumbnail Photo
Get-AzureADUserThumbnailPhoto -ObjectId <myuserupn or objectid> -view $true
#region License management for a collection of users
# For example assigning EMS E5 license plan
# Get SkuId for EMS E5 (EMS PREMIUM)
$EmsSkuId = (Get-AzureADSubscribedSku | Where { $_.SkuPartNumber -eq 'EMSPREMIUM'}).SkuId
ForEach ($member in $members) {
# Get the user
$User = Get-AzureADUser -ObjectId $member.ObjectId
# Create a License Object for assigning the wanted SkuId
$License = New-Object -TypeName Microsoft.Open.AzureAD.Model.AssignedLicense
$License.SkuId = $EmsSkuId
# Create a Licenses Object for Adding the License
$Licenses = New-Object -TypeName Microsoft.Open.AzureAD.Model.AssignedLicenses
$Licenses.AddLicenses = $License
# If I wanted to remove licenses I would use .RemoveLicenses instead
# And lastly, update User license with added (or removed) licenses
Set-AzureADUserLicense -ObjectId $User.ObjectId -AssignedLicenses $Licenses
}
#endregion
# Reset a Users password
# Note that synchronized users need Azure AD Premium, and Azure AD Connect with Password Write-Back Configured
$password = Read-Host -AsSecureString
Set-AzureADUserPassword -ObjectId <myuserupn or objectid> -Password $password
# Change (not Reset) the current logged on users password
Update-AzureADSignedInUserPassword -CurrentPassword $CurrentPassword -NewPassword $NewPassword

In the next part of my session I went on to talk about the Azure AD Graph API and the Microsoft Graph API. The Microsoft Graph API will eventually be the “one API to rule them all”, as Azure AD also can be accessed by that API, but there are still use cases for the Azure AD Graph API.

In either case, to be able to use the APIs you must create and register an Azure AD Application of type Web App/Api, and give that Application the needed permissions to access the APIs. I showed in my session how to do this in the portal, and here you have a PowerShell Script for creating that same type of Application, this example for accessing the Azure AD Graph API:


# This Application is for accessing the Azure AD Graph Api
# Log in to Azure AD with Global Admin
Connect-AzureAD
# Create the Azure AD API Application
$azureAdApp = New-AzureADApplication -DisplayName "Elven Azure AD Reporting Api App" -Homepage "https://localhost&quot; -IdentifierUris "https://localhost/azureadreportingapi&quot; -ReplyUrls "https://localhost&quot;
$keyStartDate = "{0:s}" -f (get-date).AddHours(-1) + "Z"
$keyEndDate = "{0:s}" -f (get-date).AddYears(1) + "Z"
# Create Password Key Secret
$azureAdAppKeySecret = New-AzureADApplicationPasswordCredential -ObjectId $azureAdApp.ObjectId -CustomKeyIdentifier "Azure AD Api Reporting Key" -StartDate $keyStartDate -EndDate $keyEndDate
# Get the Azure AD SPN
$azureAdSpn = Get-AzureADServicePrincipal -Filter "DisplayName eq 'Microsoft.Azure.ActiveDirectory'"
# Get the Oauth2 permissions for Read and Sign-in plus Directory Read
$azureAdOauth2UserSignInProfileRead = $azureAdSpn | select -expand Oauth2Permissions | ? {$_.value -eq "User.Read"}
$azureAdOauth2DirectoryRead = $azureAdSpn | select -expand Oauth2Permissions | ? {$_.value -eq "Directory.Read.All"}
# Build a Required Resource Access Object with permissions for User.Read + Sign in and Directory Read
$requiredResourceAccess = [Microsoft.Open.AzureAD.Model.RequiredResourceAccess]@{
  ResourceAppId=$azureAdSpn.AppId ;
  ResourceAccess=[Microsoft.Open.AzureAD.Model.ResourceAccess]@{
    Id = $azureAdOauth2UserSignInProfileRead.Id ;
    Type = "Scope"
},
[Microsoft.Open.AzureAD.Model.ResourceAccess]@{
Id = $azureAdOauth2DirectoryRead.Id ;
Type = "Role"
}
}
# Set the required resources for the Azure AD Application
Set-AzureADApplication -ObjectId $azureadapp.ObjectId -RequiredResourceAccess $requiredResourceAccess
# Associate a new Service Principal to my Azure AD Application
$appspn = New-AzureADServicePrincipal -AppId $azureadapp.AppId -Tags @("WindowsAzureActiveDirectoryIntegratedApp")
# Add Permission Grant for that App Service Principal to the Microsoft.Azure.ActiveDirectory API
## This is the only thing that cannot be automated by now!
### Go to the Azure Portal and your Azure AD, under App Registrations, find this Reporting Api App, and under Permissions select to Grant Permission

Note that for the above script, you will need to note some output and manual operations:

  • Take a note of the Application ID, you will need that later:
    azureadapp
  • Take note of the Key Secret, you will need that later also:
    azureadappkeysecret
  • Application must be manually granted permission here, as this per now cannot be automated with PowerShell:
    azureadappgrantpermission

By the way, you should newer share this App Id and key secret publically (as I have just done here 😉 Other people could use that same information to access your APIs and Azure AD info, so take care to protect that info! (Of course I have deleted that info after showing this here 😉

Now, with this App registered in Azure AD, we can now start managing Azure AD via REST API calls, for example from PowerShell. The following script shows how we can get Self Service Password Registration Activity via the Azure AD Graph API, specifically we will use the Reporting API (https://msdn.microsoft.com/en-us/library/azure/ad/graph/howto/azure-ad-reports-and-events-preview). Note that the script will need the App Id and Key value noted from above:


# PowerShell for calling the Azure AD Graph Reporting REST API, https://msdn.microsoft.com/en-us/library/azure/ad/graph/howto/azure-ad-reports-and-events-preview
# Getting Self Service Password Reset Registrations
# This script will require registration of a Web Application in Azure Active Directory
# Method 1: Use steps here for manually creating required Web App: https://docs.microsoft.com/en-us/azure/active-directory/active-directory-reporting-api-prerequisites
# Method 2: Use Azure AD PowerShell as documented here: https://gist.github.com/skillriver/b46c51e2902a331a91221c6828bd320c#file-azureadapiapplication-ps1
$loginURL = "https://login.microsoftonline.com&quot;
$tenantdomain = "<yourtenant>.onmicrosoft.com"
# Fill in your App Id and Key Secret
$azureAdAppId = "<app id for azure ad application>"
$azureAdAppKey = "<valid key secret for azure ad application>"
# Create a credential based on already registered Azure AD App Id and Key Secret
$keysecurestring = ConvertTo-SecureString $azureAdAppKey -AsPlainText -Force
$reportingapicred = New-Object System.Management.Automation.PSCredential ($azureAdAppId, $keysecurestring)
# Get an Oauth 2 access token based on client id, secret and tenant domain
$body = @{grant_type="client_credentials";resource=$resource;client_id=$reportingapicred.UserName;client_secret=$reportingapicred.GetNetworkCredential().Password}
$oauth = Invoke-RestMethod -Method Post -Uri $loginURL/$TenantDomain/oauth2/token?api-version=1.0 -Body $body
# Define a header with the authorization token
$headerParams = @{'Authorization'="$($oauth.token_type) $($oauth.access_token)"}
# Build the request, here we are looking for SSPR activity
$topResults = 100 # Tweak this value if you want different page size and present it in a report
$reportContent = @()
$reportUrl = "https://graph.windows.net/$TenantDomain/reports/ssprRegistrationActivityEvents?api-version=beta&amp;`$top=$topResults"
$reportCount = 0
# Returns a JSON document for the "ssprRegistrations" report
$ssprRegistrations = (Invoke-WebRequest -Headers $headerParams -Uri $reportUrl -UseBasicParsing).Content | ConvertFrom-Json
# Adding data to the Report
$reportContent += $ssprRegistrations.value | Select -Unique eventTime, role, registrationActivity, displayName, userName
# Showing the Report
$reportContent
# Exporting the Report to a Comma Separated Value file
$reportContent | Export-Csv "ElvenAzureAD_SSPRregistrations.csv" -NoTypeInformation -Delimiter ","

With that last export to a Csv file I can import it to Power BI as a table, and create a report and a dashboard on it, for example showing which password reset registration method the users configured, what user and role type did the registration and the count and date for the registrations:

PowerBIReport.PNG

In the session we also looked at the new Content Pack for Azure AD, showing sign-in and audit events, and also how you can get data from the Microsoft Graph API using a OData Feed:

I hope this scripts will be as useful for you as it is for me! Good luck with taking your management of Azure AD to the next level with Azure AD PowerShell and Graph APIs!

How to use PowerShell script for setting Azure AD Password Reset Writeback On-premises Permissions

When you configure the Azure AD Premium Self Service Password Reset solution on your Azure AD tenant and then the Azure AD Connect Password Writeback feature, you will need to add permissions in your local Active Directory that permits the Azure AD Connect account to actually change and reset passwords for your users  , as detailed here: https://docs.microsoft.com/en-us/azure/active-directory/active-directory-passwords-getting-started#step-4-set-up-the-appropriate-active-directory-permissions.

I wrote this PowerShell script that helps you configure this correctly in your domain/forest. Some notes:

  • You can use it in a single-domain, single-forest domain, or in a multi-domain forest, just remember to specify a Domain Controller for the wanted domain, and for the domain the Azure AD Connect account is in.
  • You have to find the Azure AD Connect Synchronization account, it would be MSOL_xxxx.. if you have used Express settings, or a dedicated account. Look at current configuration for details.
  • You can specify an OU for your users, and if inheritance is enabled all subordinate users and OUs will inherit the permissions. If not, please run the script once for each OU you want the permissions to be applied for.

Here is the script:


# Description: Sets Azure AD Connect Password Write Back AD Permissions
# Created by: Jan Vidar Elven, Enterprise Mobility MVP, Skill AS
# Last Modified: 01.06.2016
# Run this on-premises for your domain/forest
Import-Module ActiveDirectory
#region Initial Parameters/Variables
# Domain Controller in wanted domain, leave blank if using current domain
$dcserver = "mydc.domain.local"
# Azure AD Connect Synchronization Account
$aadcaccount = "MSOL_xxxxx"
# Azure AD Connect Account Domain Controller
$aadcserver = "mydc.domain.local"
# Organizational Unit Distinguished Name, starting point for delegation
$oudn = "OU=<UsersOU>,DC=domain,DC=local"
#endregion
# Check if default current domain or specified domain should be used
If ($dcserver -eq $null) {
# Get a reference to the RootDSE of the current domain
$rootdse = Get-ADRootDSE
# Get a reference to the current domain
$domain = Get-ADDomain
}
Else {
# Get a reference to the RootDSE of the domain for the specified server
$rootdse = Get-ADRootDSE -Server $dcserver
# Get a reference to the domain for the specified server
$domain = Get-ADDomain -Server $dcserver
}
# Refer to my Active Directory, either current or specified server from above
New-PSDrive -Name "myAD" -Root "" -PsProvider ActiveDirectory -Server $rootdse.dnsHostName
# Change to My Active Directory Command Prompt
cd myAD:
# Create a hashtable to store the GUID value of each schema class and attribute
$guidmap = @{}
Get-ADObject -SearchBase ($rootdse.SchemaNamingContext) -LDAPFilter `
"(schemaidguid=*)" -Properties lDAPDisplayName,schemaIDGUID |
% {$guidmap[$_.lDAPDisplayName]=[System.GUID]$_.schemaIDGUID}
# Create a hashtable to store the GUID value of each extended right in the forest
$extendedrightsmap = @{}
Get-ADObject -SearchBase ($rootdse.ConfigurationNamingContext) -LDAPFilter `
"(&(objectclass=controlAccessRight)(rightsguid=*))" -Properties displayName,rightsGuid |
% {$extendedrightsmap[$_.displayName]=[System.GUID]$_.rightsGuid}
# Get a reference to the OU we want to delegate
$ou = Get-ADOrganizationalUnit -Identity $oudn
# Get the SID value of the Azure AD Connect Sync Account we wish to delegate access to
$a = New-Object System.Security.Principal.SecurityIdentifier (Get-ADUser $aadcaccount -Server $aadcserver).SID
# Get a copy of the current DACL on the OU
$acl = Get-ACL -Path ($ou.DistinguishedName)
# Create an Access Control Entry for new permission we wish to add
# Allow the Azure AD Account to reset passwords on all descendent user objects
$acl.AddAccessRule((New-Object System.DirectoryServices.ActiveDirectoryAccessRule `
$a,"ExtendedRight","Allow",$extendedrightsmap["Reset Password"],"Descendents",$guidmap["user"]))
# Allow the Azure AD Account to change passwords on all descendent user objects
$acl.AddAccessRule((New-Object System.DirectoryServices.ActiveDirectoryAccessRule `
$a,"ExtendedRight","Allow",$extendedrightsmap["Change Password"],"Descendents",$guidmap["user"]))
# Allow the Azure AD Account to write lockoutTime extended property
$acl.AddAccessRule((New-Object System.DirectoryServices.ActiveDirectoryAccessRule `
$a,"WriteProperty","Allow",$guidmap["lockoutTime"],"Descendents",$guidmap["user"]))
# Allow the Azure AD Account to write pwdLastSet extended property
$acl.AddAccessRule((New-Object System.DirectoryServices.ActiveDirectoryAccessRule `
$a,"WriteProperty","Allow",$guidmap["pwdLastSet"],"Descendents",$guidmap["user"]))
# Re-apply the modified DACL to the OU
Set-ACL -ACLObject $acl -Path ("myAD:\"+($ou.DistinguishedName))

Hope the script will be helpful!