This blog post is part of the Blog Series: Power’ing up your Home Office Lights with Power Platform. See introduction post for links to the other articles in the series:
https://gotoguy.blog/2020/12/02/blog-series—powering-up-your-home-office-lights-using-power-platform—introduction/
In the previous part 5 we created the first Power Automate Flow of the solution, for retreiving the Access Token and getting the configuration of the Hue Bridge via Remote API. To get all the configuration details of the Bridge, we were dependent on that the user had a Whitelist Identifier in the Microsoft List, and this is the Flow we will be working on in this blog post.
Lets do a quick video where I talk about this Flow and what it does:
Create the Flow for Linking and Whitelisting User
Create a new instant Flow, with PowerApps as Trigger. In my case I have named this Flow “Hue – Link and Whitelist User”.
As the first action in the Flow after the PowerApps trigger, add a Compose action:
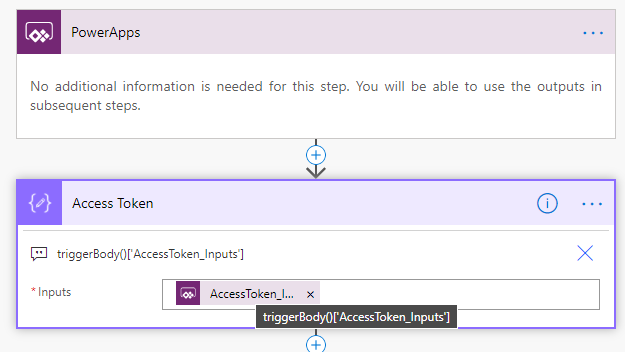
Tips: Make sure that you set a name for the action, in my case I’ve named it “Access Token”, before you under Dynamic content selects “Ask in PowerApps”. This way the Input parameter will get a more descriptive name like “AccessToken_Inputs”, when we later call the Flow from the PowerApp.
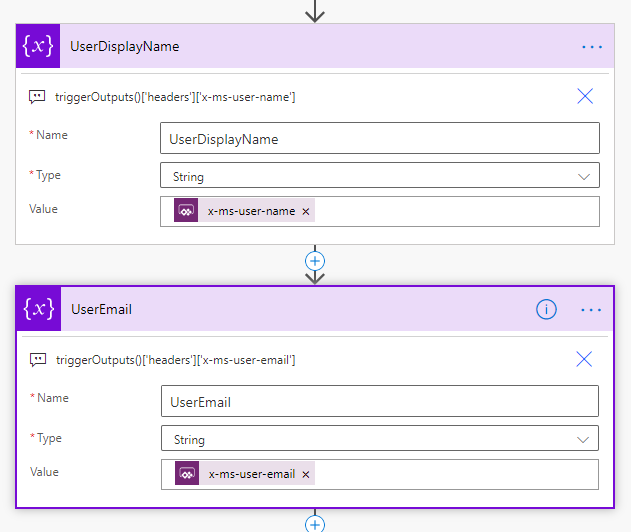
Next, add two Initialize variable actions, called UserDisplayName and UserEmail and type String. For values use the following custom expressions (see comment for expression):
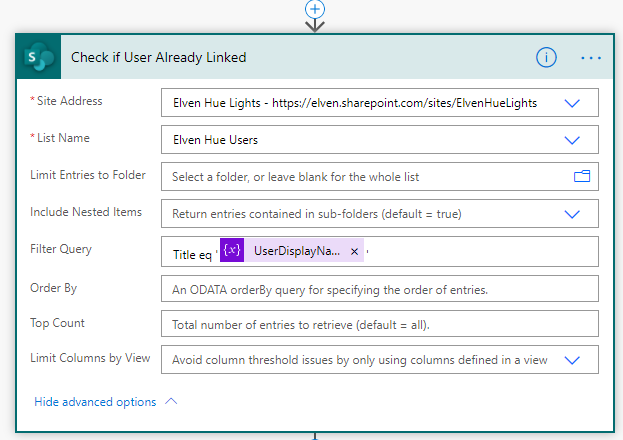
Next, add a Get Items action from SharePoint, and specify your Site and List. For Filter Query, add Title eq ‘<UserDisplayName variable>’:
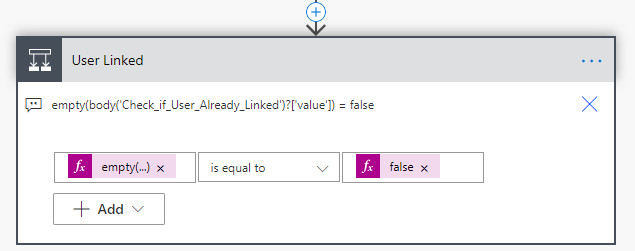
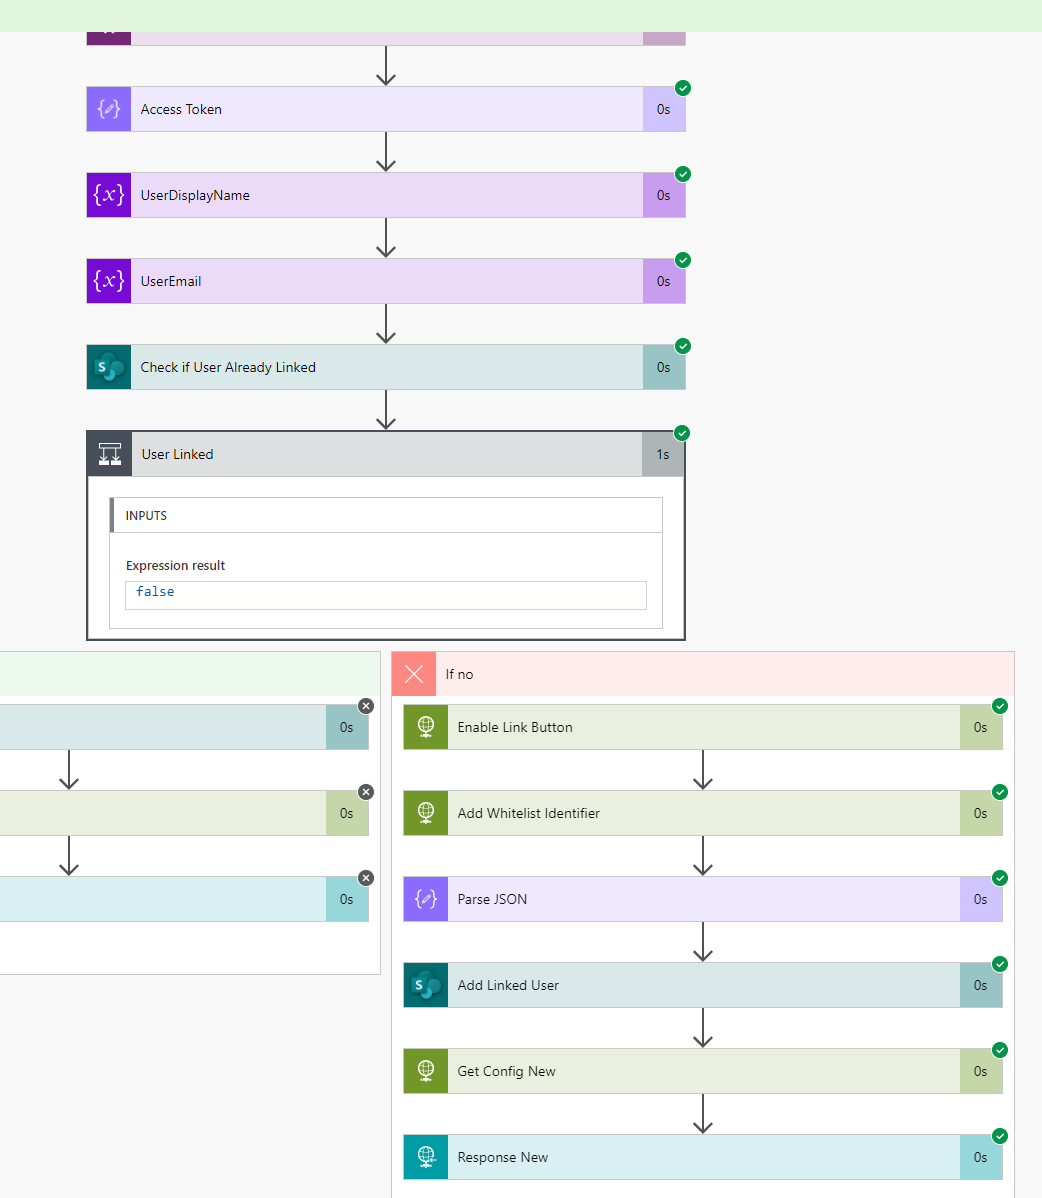
Add a Condition action, where we will check if the Get Items returns an empty result to be false:
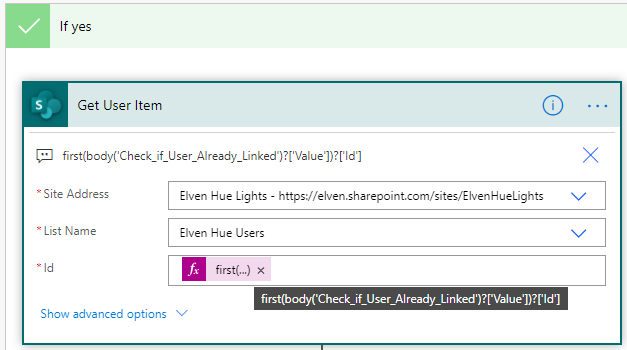
If false, meaning that the user already have a configuration in the List, under “If yes”, add a Get Item action. Specify the Site and List Name, and for Id add the following expression to return the first instance of results first(body('Check_if_User_Already_Linked')?['Value'])?['Id'] :
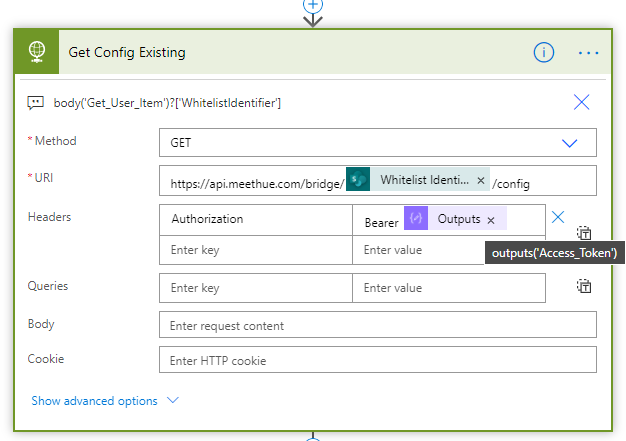
Next, add a HTTP action where we will query the Hue Remote API for the Bridge configuration details. Specify the URI to be https://api.meethue.com/bridge/<whitelist identifier>/config, and add an Authorization Header with Bearer <Token Outputs>:
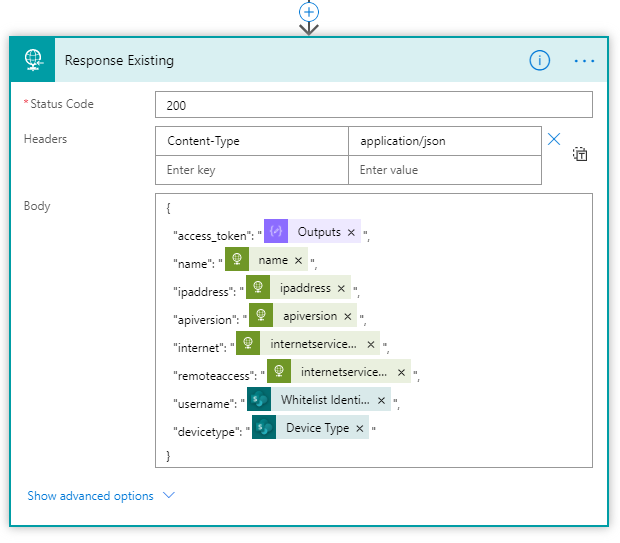
This action should return all the details we want from the Hue Bridge, and we can add a Response action to return that back to the PowerApp:
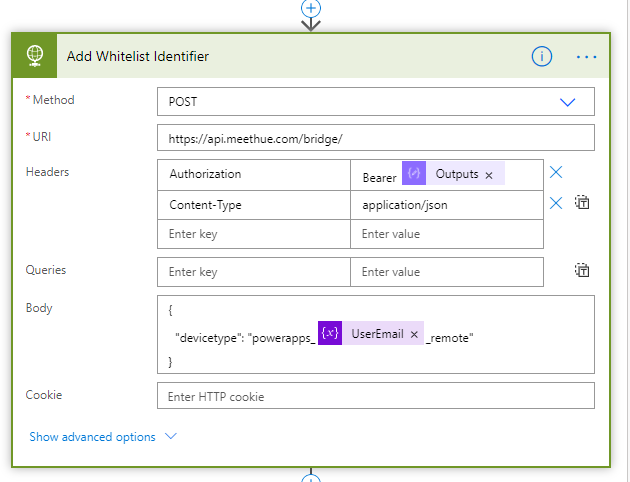
In the other case, when a User Linked was not found in the SharePoint List, we need to add that user and get the Whitelist Identifier. Under “If no”, add a HTTP action. In this action we will “remotely” push the Hue Bridge button via a PUT method. This is basically the same procedure as when you add new lights or equipments, where you need to run and press the button down. But here we do it via the API like below:
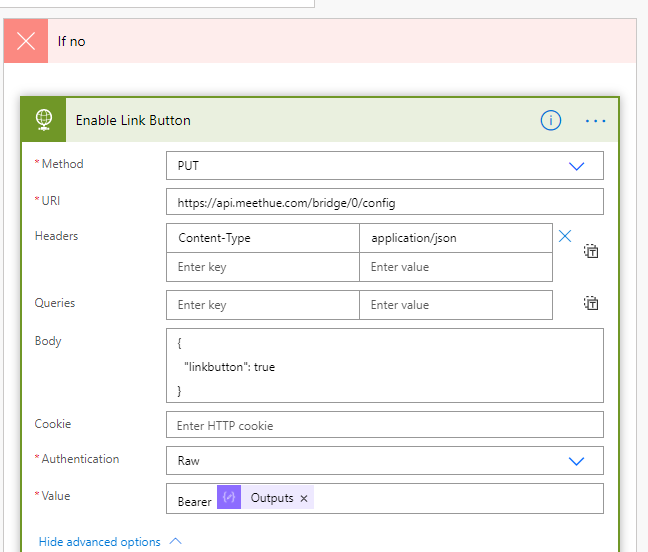
PS! Note that above I’ve used “Raw” Authentication and for Value selected Bearer “AccessToken Outputs”. This is just another option to show, I could have have used an Authorization Header instead.
After the Link Button is enabled, we can add another HTTP action, this will register the username via a POST method and a request body containing the “devicetype” value. Device type is so that you can identify the registered usernames on your bridge:
After this action, add a Parse JSON action so that we can more easliy reuse the outputs from adding the username:
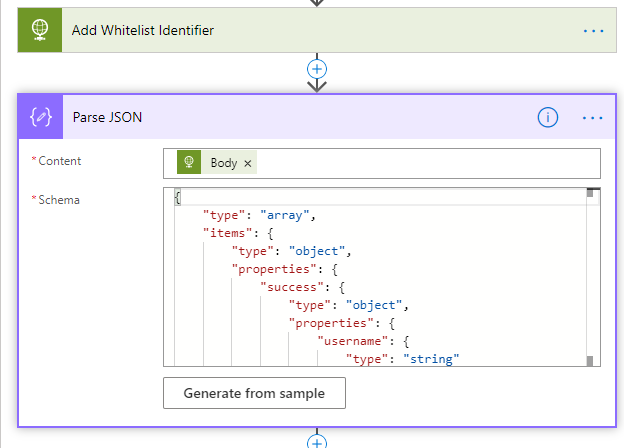
For Schema, select “Generate from sample”, and paste the sample output provided by the Hue API documentation here, https://developers.meethue.com/develop/hue-api/7-configuration-api/#create-user, under 7.1.5. Sample Response.
Next, add a “Create Item” action. Specify the Site and List Name, and add the following values for List columns:
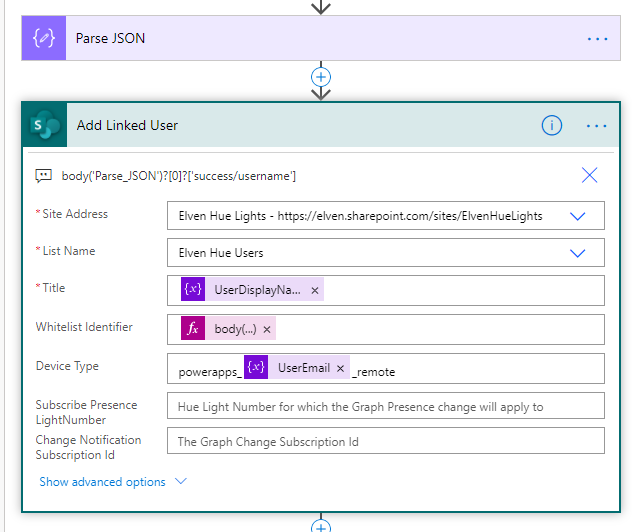
Note that for Whitelist Identifier, use the expression body('Parse_JSON')?[0]?['success/username'], this is because the output from Hue API returns an array, so the [0] is to specify the first instance.
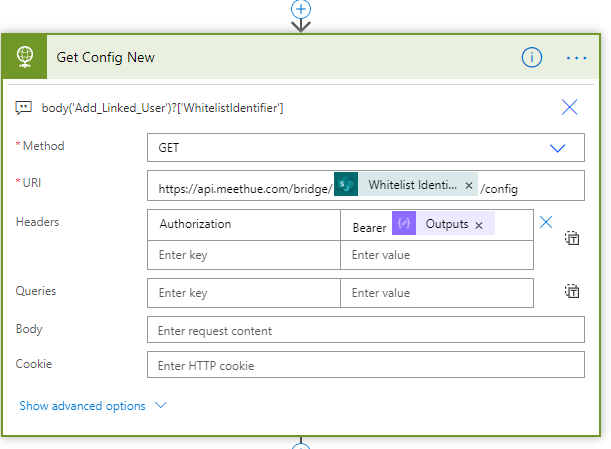
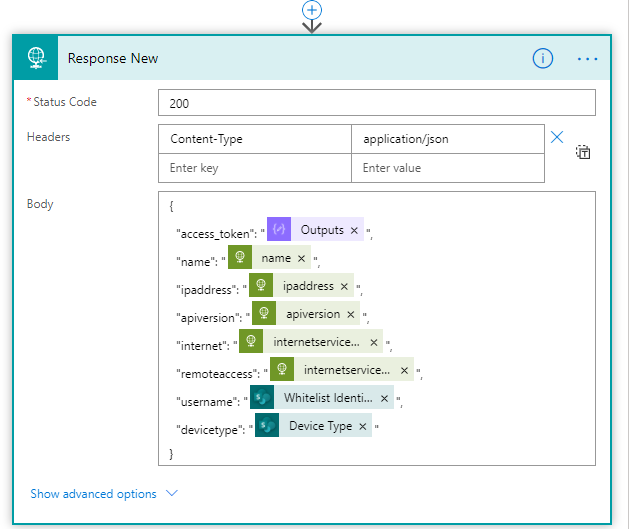
Now, using that newly created username, we can query for the Bridge config using the “Whitelist Identifier” from above:
And lastly, add a Response action that returns this back to the PowerApp:
Verify and Test the Flow
That should complete the Flow. We will link that into a PowerApp later, but if you want to you can test the Flow by performing the Trigger action yourself. Then you need to specify a valid Access Token, and the Flow should run successfully, creating a Linked User if you haven’t already:
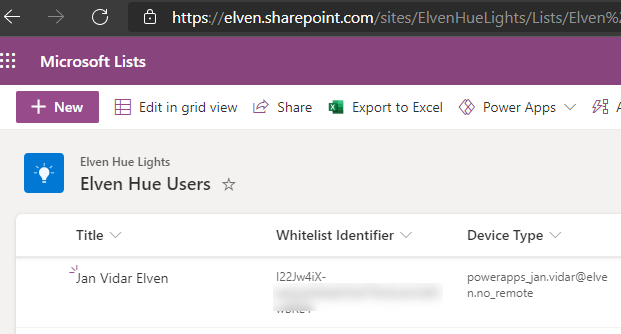
If you check the List a new item should now represent your user:
Summary and Next Steps
We are now ready to start working on the PowerApp, linking the Flows we have created in this and the previous blog posts. That will come in the next part!
Thanks for reading so far 🙂

Pingback: Blog Series – Power’ing up your Home Office Lights using Power Platform – Introduction | GoToGuy Blog