This week I had the pleasure of not only revisiting Nordic Infrastructure Conference (www.nicconf.com), but also presenting a session myself: Deep Dive – Publishing Applications with Azure AD. My session was about how you with Azure AD can publish applications from a SaaS Gallery, your organization’s own applications, or internal applications that will be accessible outside with Azure AD Application Proxy.
This was the 5th anniversary of NIC, held in Oslo, Norway and the venue of Oslo Spektrum. NIC has been established as a premium event for IT-professionals, attracting internationally renowned speakers and MVPs, SMEs and Partners.
In this blog post I will do a recap of my session, for both attendees that was there and others that couldn’t be. I will also expand on some of the things we went through in the session as there were some limits to the time we could use on several demos.
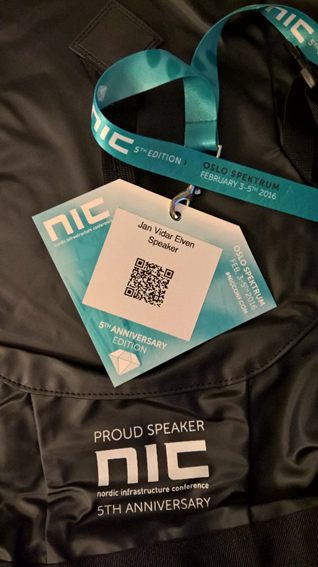
Proud Speaker
The presentation and session recording will later be available at the www.nicconf.com webpage. At the end of this blog post, there is also a link to where you can download the presentation and other code samples and files that where used in the session.
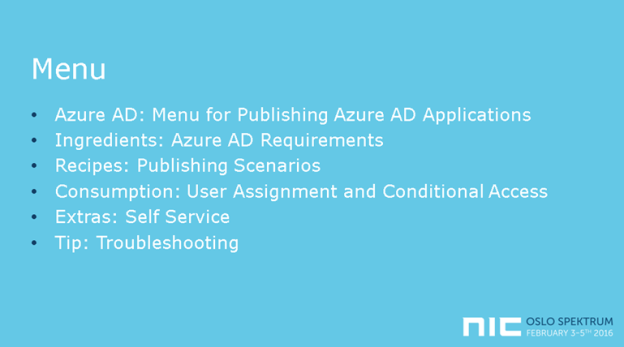
Session Menu
The theme for the presentation was to present a menu for publishing Azure AD Applications with Azure AD. The menu would consist of required ingredients, recipes for publishing scenarios, consumption of the published applications from the users’ perspective, and some extras and tip for self-servicing and troubleshooting.

I started with pointing to the key features of Azure AD as an Identity and Access Management Solution, for both Cloud and On-Premise Solutions, an enabler for true Enterprise Mobility and Business Everywhere, with one common, hybrid identity. There are some important Business Value for Organizations such as controlling access to applications, single sign-on, conditional access, hybrid identity and self-servicing.
Ingredients
It is no surprise that you need Azure AD as a key ingredient 😉 But what edition of Azure AD should you use? Free, Basic or Premium? In the session I covered the most important differences relevant for Publishing Applications, where you would need at least Basic to be able to publish internal applications with Azure AD App Proxy, and Premium Edition if you want to cover all the self-servicing scenarios and advanced reporting. For all details, refer to https://azure.microsoft.com/en-us/documentation/articles/active-directory-editions/.
In addition to the application you want to publish, you will need an Azure AD identity, either a cloud based identity or a hybrid identity synchronized with Azure AD Connect.
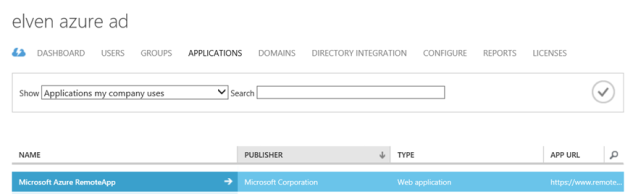
In the first demo of the session we looked into configuring and verifying that your Azure AD tenant is ready for publishing applications.
Recipes
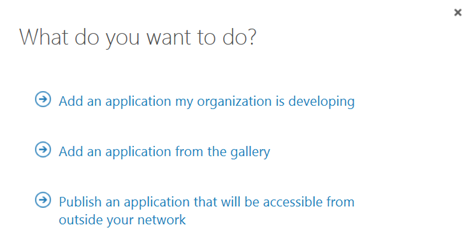
The publishing scenarios we looked at in the session was from the following menu of three alternatives in Azure AD:
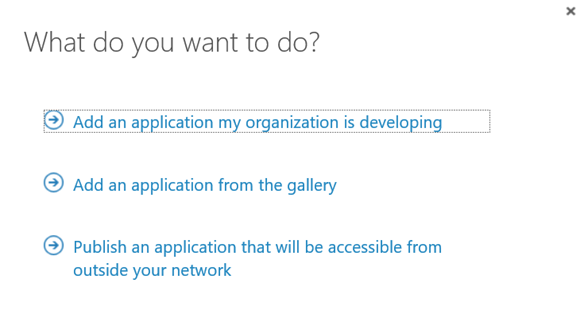
Add an application from the gallery
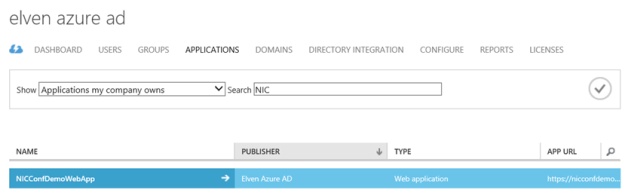
The first publishing scenario we looked at in the session was publishing applications from the SaaS gallery of applications. The gallery contains over 2500 different SaaS applications, many offering both true Single Sign-On (SSO) with Azure AD and provisioning/de-provisioning of users and groups. Other applications provide password-based same sign-on.
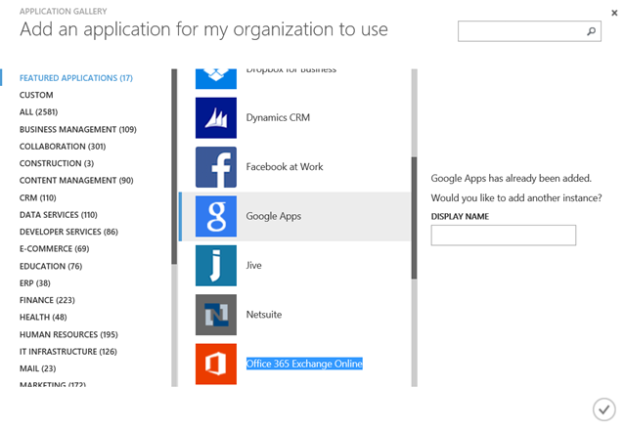
The demos in the session used two different SaaS apps as example; Twitter and Google Apps.
Twitter is a good example of a SaaS application using password same sign on.
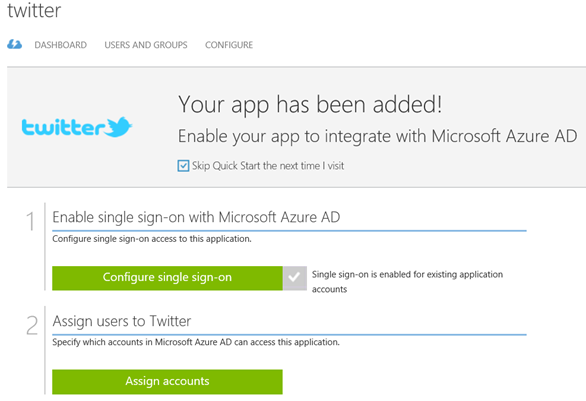
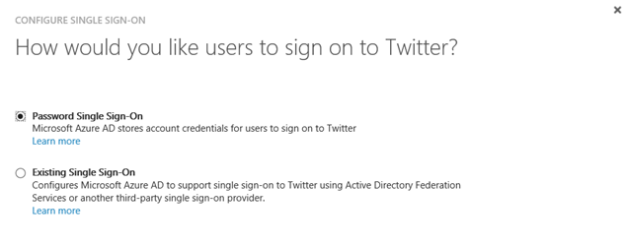
When configuring single sign-on for Twitter, we don’t have the option of using Azure AD Single Sign-On. Some applications can maybe support one of the federation protocols implemented in a local ADFS or a third-party provider, but that is dependent on the application. So for Twitter we will typically use Password Single Sign-On.
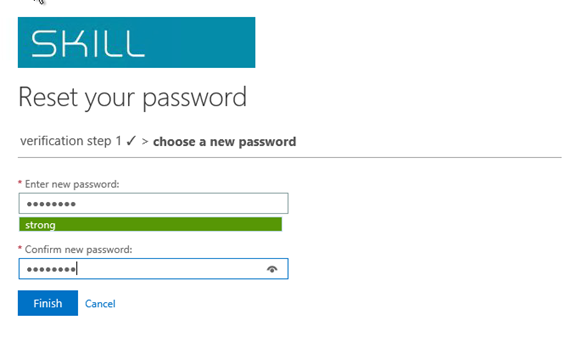
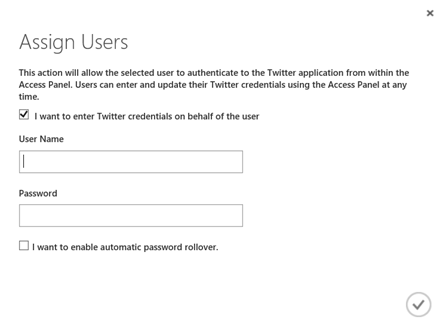
After configuring Password Single Sign-On, the next step is to assign account to the application. When assigning accounts, you can select that the users enter passwords themselves in the Access Panel. Or you can enter the credentials on behalf of the user.
This opens up a very interesting scenario: Consider you have a company based social media account on Twitter, Facebook, Instagram or other. All the users in the marketing department should have access to that/those application/applications, so you start handing out the username and password to the shared account. This is a risk, as users can lose the password and it can get on wrong hands, or maybe previous employees that are no longer in the company still have the username and password to the application.
With Azure AD, by entering the Twitter credentials on behalf of the user, they are never given the logon details directly. And when they leave the organization after removing the user from Azure AD, they will no longer have access. You can even apply conditional access policies for the application.
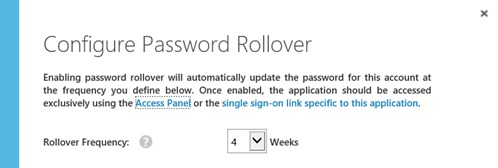
You can even configure automatic password rollover to update the password at a defined frequency:
The other part of the demo focused on Google Apps. I had an existing subscription for Google Apps, which I configured to use Azure AD Single Sign-On and account provisioning for.
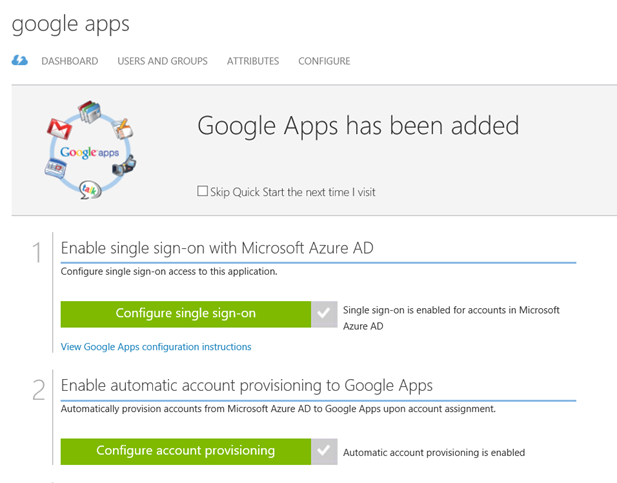
There is a complete tutorial for configuring SSO and provisioning for Google Apps at https://azure.microsoft.com/en-us/documentation/articles/active-directory-saas-google-apps-tutorial/.
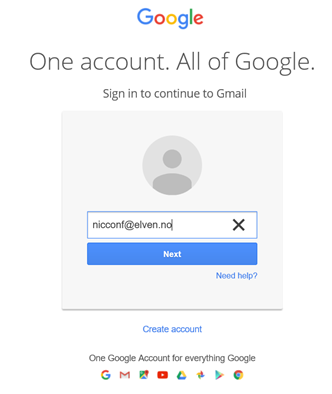
In the demo I created a test user named [email protected], and assigned that user to the Google Apps application.
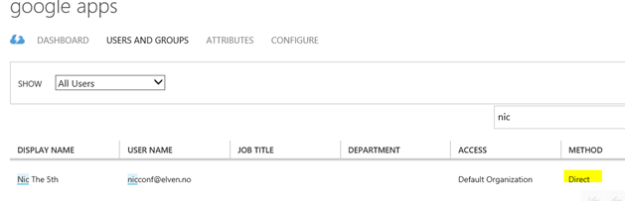
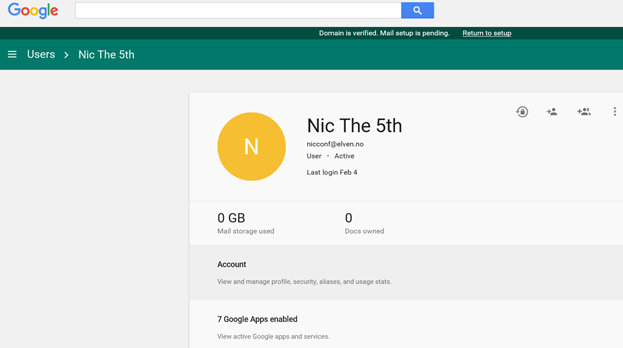
I showed that the user didn’t exist in the Google Apps user directory for my organization, and after a while (new user accounts are provisioned ca every 10 minutes), the user appeared in the Google Apps directory via Azure AD.
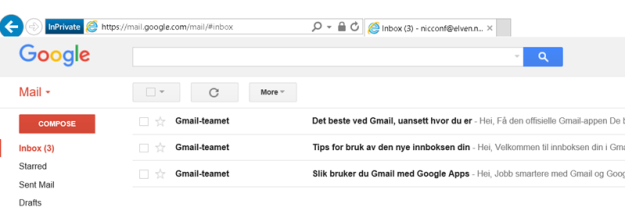
The new user can now use Azure AD SSO when logging into Google:
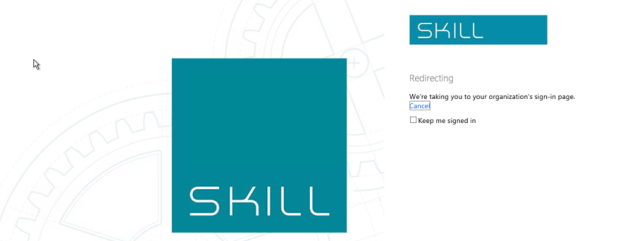
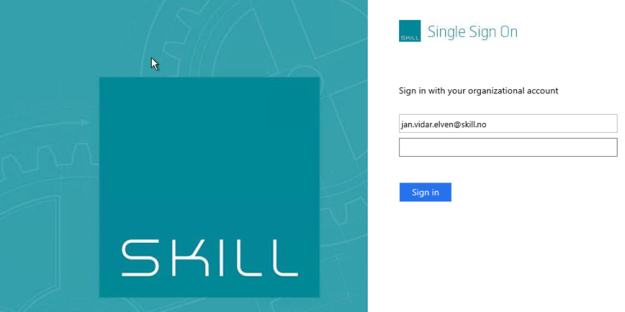
I’m redirected to my Azure AD tenant for signin in:

And then the user is logged in to Google:
Add an application my organization is developing
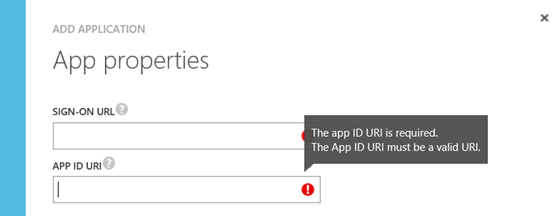
The next part of the publishing scenarios was adding applications that my organization is developing. Most times these applications will be Web Applications or Web API, but it’s possible to publish native client applications also.
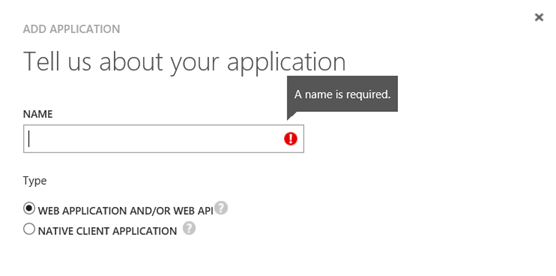
When creating a web application you give it a name, and a sign-on url and unique app id uri:
Keep in mind that creating a web application here only does the publishing part of it, you still would need to create the actual application somewhere, for example as an App Service in an Azure Subcstiption.
You can have the web applications do their own authentication, for example integrating with on-premise Active Directory Federation Services, or you can have the application use Azure Active Directory as SSO provider.
In the session demo we looked at how we could quickly create a Web Application, integrate it with Azure AD for authentication and publish it. These are the main steps:
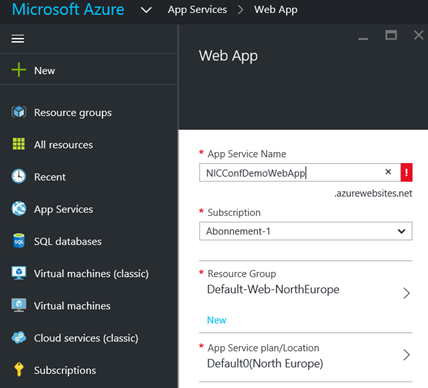
- Create a new Web App in you Azure Subscription. In the new Azure Portal for your subscription, under App Services create a new Web App. The Service Name must be unique, and you select either an existing resource group or create a new, and specify an App Service plan.
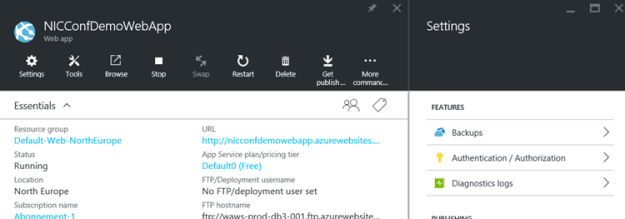
- After the Web App is created, open the application properties and under Settings find Features and Authentication / Authorization:
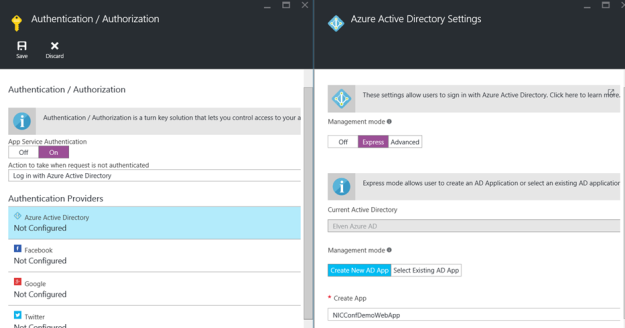
- Enable App Service Authentication and log in action. Enable Azure Active Directory as authentication provider and configure Express settings. PS! Here we can create and publish a new AD App (or select an existing one) also. We created a new one for our demo:
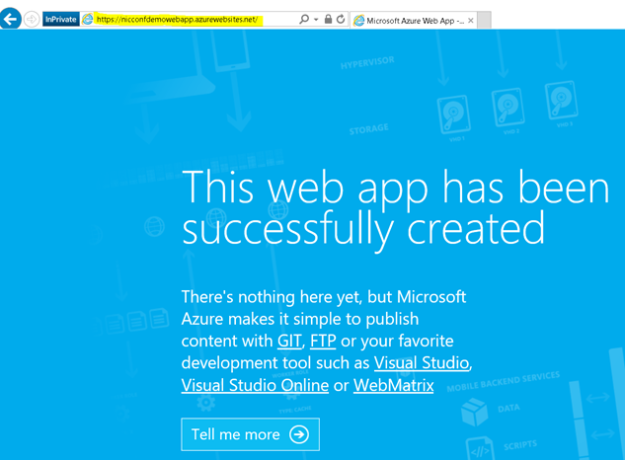
- Remember to save the Web App and the first part of the demo is done. A this point you can go to http://nicconfdemowebapp.azurewebsites.net, and be prompted to sign in with a Azure AD account from the directory the application was configured for. There is no content in the application, and every user in the Azure AD directory can access the application as long as they authenticate:
- The next part of this demo was to change some configuration settings for the published web application which is now published to Azure AD:
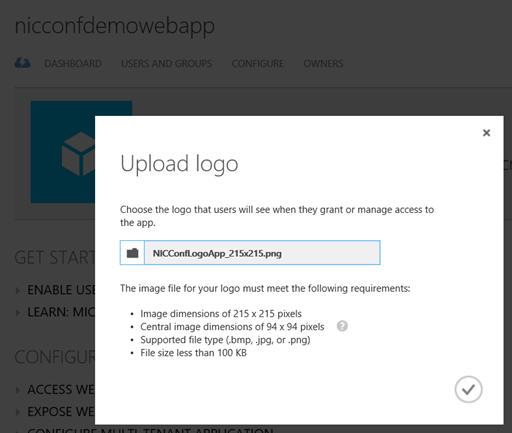
- I want to upload a custom logo, and configure the application so that only assigned users/groups can access it. First upload a logo:
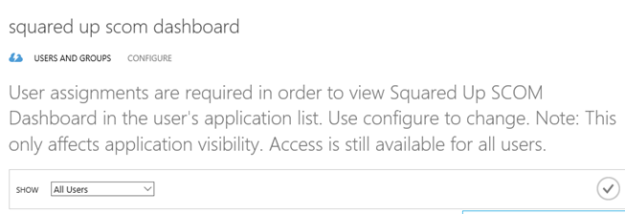
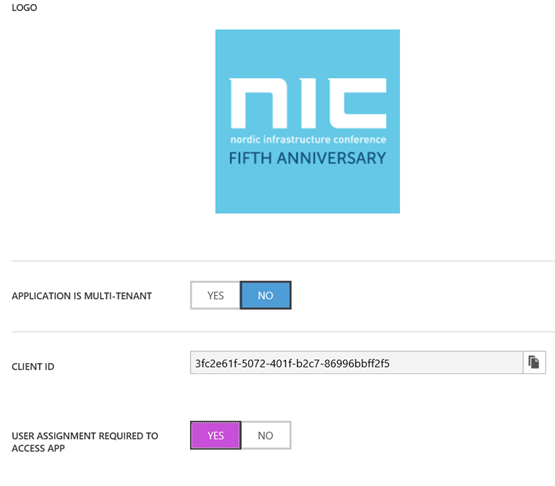
- Then at the Configure page, I select that user assignment is required to access the App:
- Then after saving, I go to the Users and Groups page, and select to assign the users I want:

If you assign individual users the assignment method will be Direct, if you assign Groups the members will assigned by inheritance.
- Now, if I start a new session to the Web App and log in with a user that has not been assigned, I will get this message:

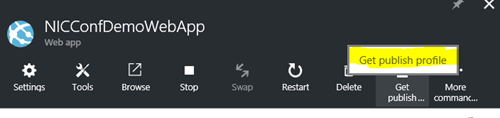
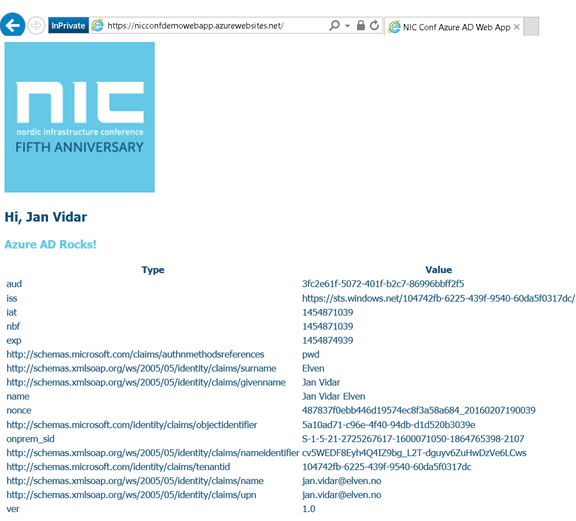
- The final steps of this demo showed how you can create some content in that Web App via Visual Studio. There are several development tools you can use, I have been using Visual Studio 2015, and you can download a Community Edition that is free if you don’t have a license. In my example I created a VB.NET Web App Project, and by using a Publish Profile file and some custom code I was able to show the logged in users claim properties.You can even create App Services directly from Visual Studio, and create and publish Azure AD Web Apps from there. But if you download this file from the Web App:
And import it to the Visual Studio project, you can publish your changes directly.
- This is the result for the demo web application, the code is included at the end of this blog post:
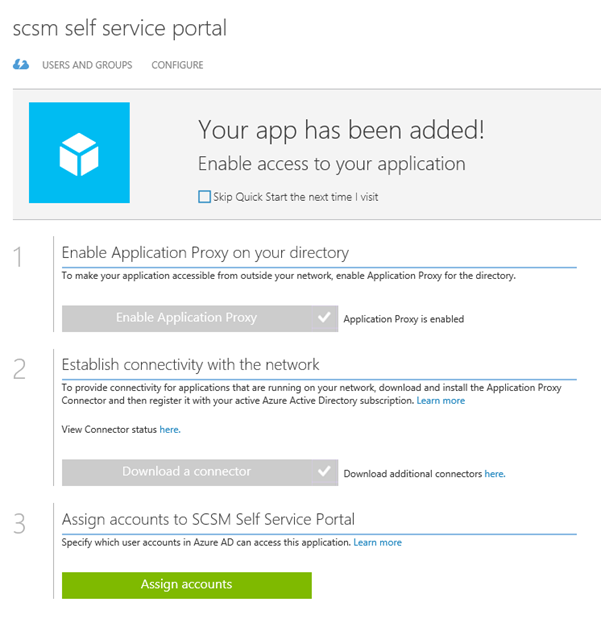
Publish an application that will be accessible from outside your network
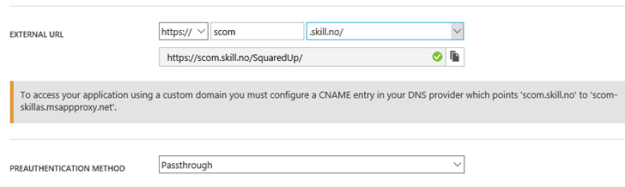
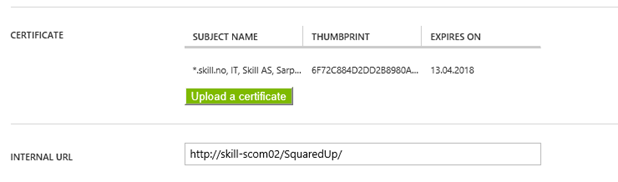
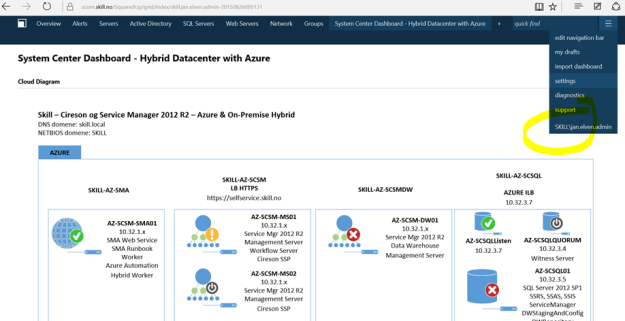
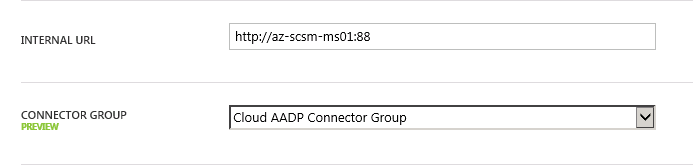
The third scenario for publishing applications with Azure AD is the applications you want to be available from outside your network. These applications are internal web applications like SharePoint, Exchange Outlook Web Access or other internal web sites, you can even publish Remote Desktops and Network Device Enrollment Services (NDES) with Azure AD Application Proxy.
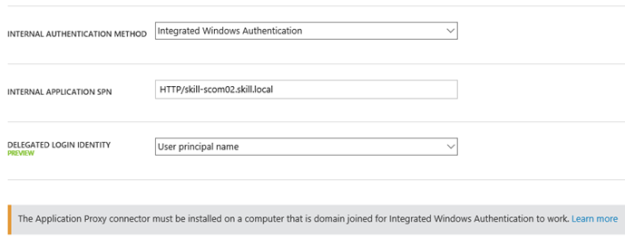
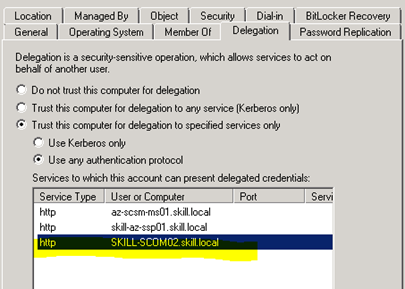
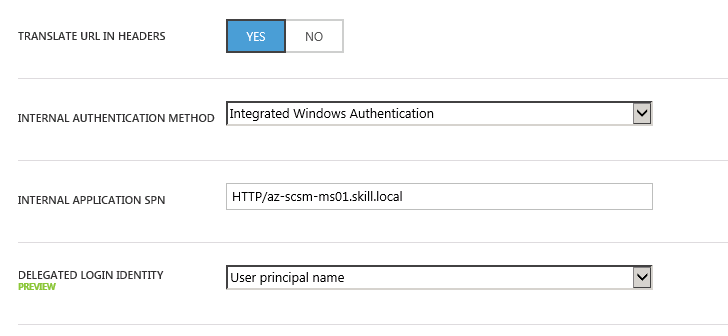
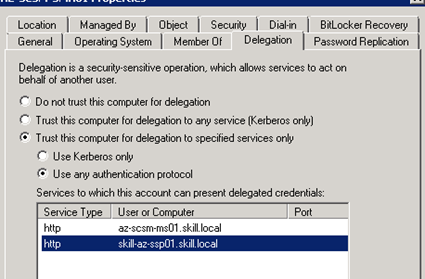
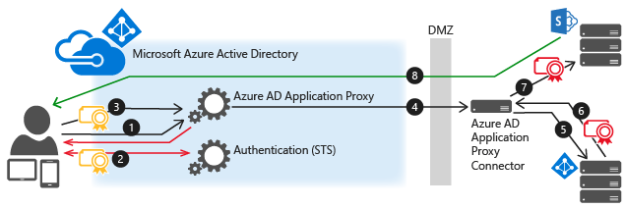
Azure AD App Proxy uses Connector Servers and Connector Groups inside the on premise infrastructure that must be able to connect to the internal URLs. These Connector Servers also can perform Kerberos Constrained Delegation for Windows Authentication, so that you can use Azure AD Single Sign-On to those internal applications.
A sample diagram showing the communication flow is shown below:
In the demo we looked at how you could install and configure a Connector installation, and organize Connector Servers in Groups for the applications to use. Here are some of the steps required:
- First the setting for enabling Application Proxy Services for the Azure AD Directory must be enabled, and Connectors downloaded for installation.

- You create and manage connector groups:
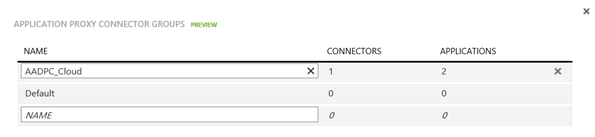
- And organize the installed connectors in those groups:

- When these requirements are in place you can start publishing your internal web applications.
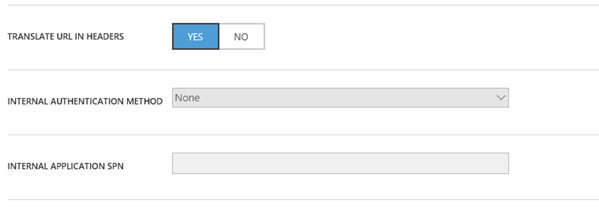
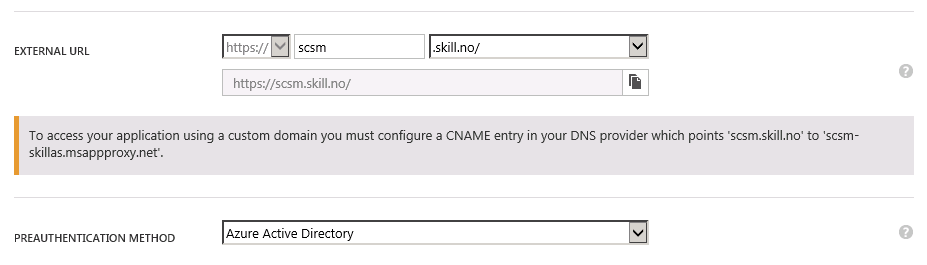
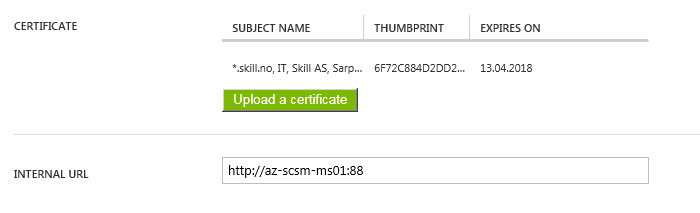
For each internal published web application, you can configure authentication method, custom domain names, conditional access and self-servicing options. For details on how to do these different configurations, see previous blog posts I have published on this subject:
Consumption, Self Service and Troubleshooting
The last part of the session focused on the user experience for accessing the different published Azure AD applications.
User can access Azure AD published applications via:
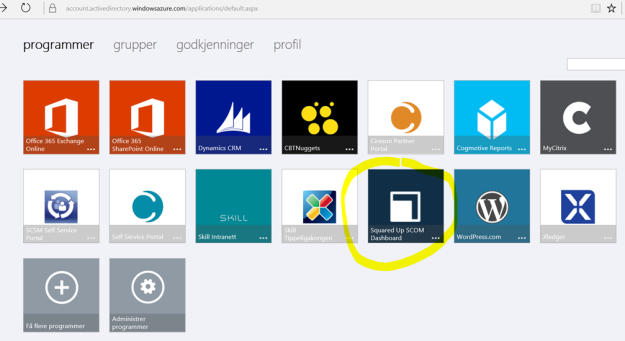
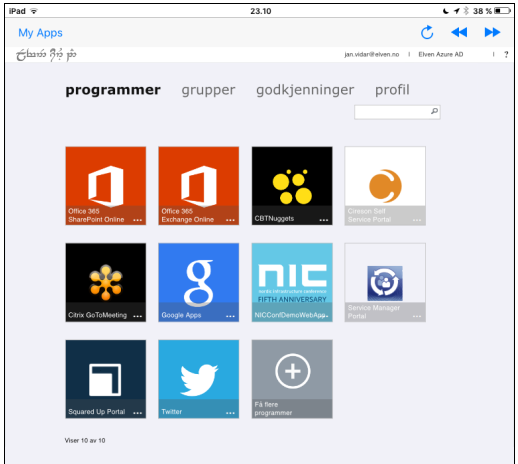
- Access Panel, https://myapps.microsoft.com
- My Apps (iOS, Google Play)
- App Launcher in Office 365
- Managed Browser App with My Apps
- Directly to URL
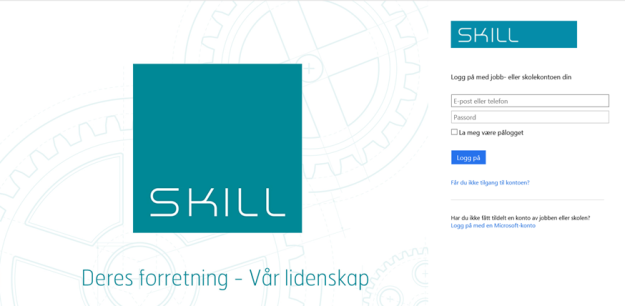
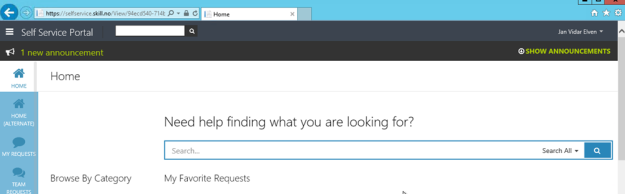
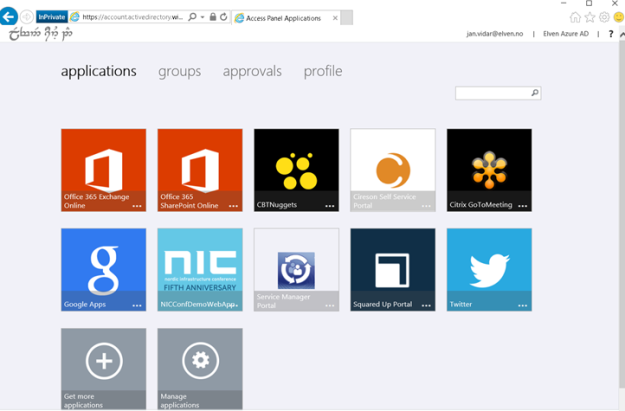
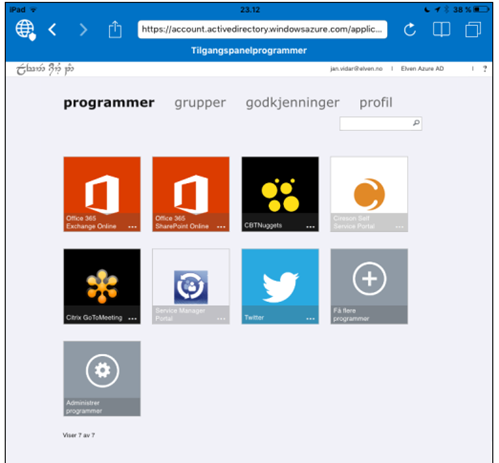
The Access Panel is a web-based portal that allows an end user with an organizational account in Azure AD to view and launch applications to which they have been assigned access. The Edge browser in Windows 10 is not fully supported yet, so you need to use either Internet Explorer, Chrome or Firefox for all supported scenarios. In addition, an Access Panel Extension needs to be installed for accessing Password SSO Applications.
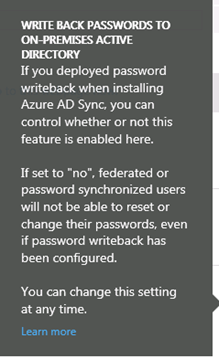
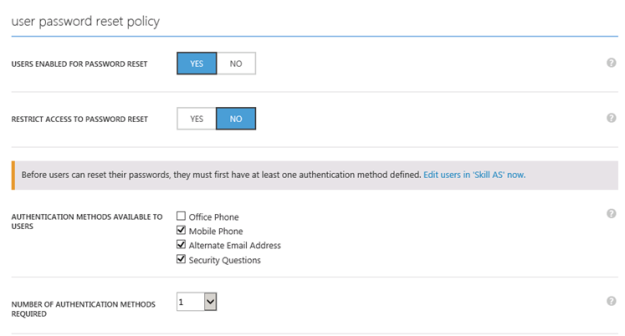
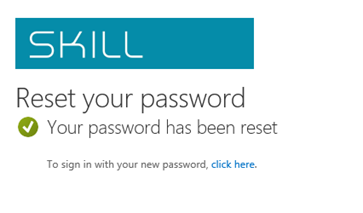
The Access Panel is also where users can view account details, change or reset password, edit multi-factor authentication settings and preferences, and if you are using Azure AD Premium self-manage Groups.
The Access Panel via Internet Explorer:
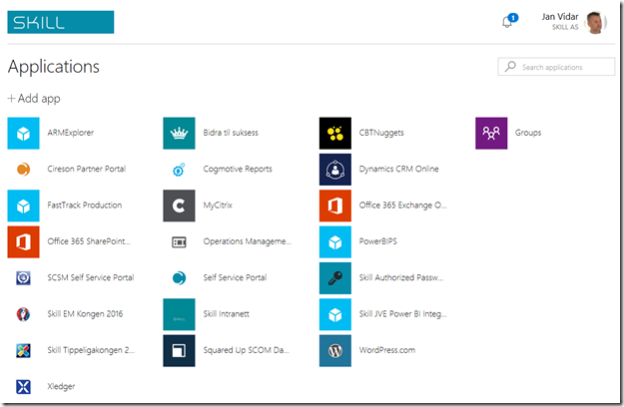
The Access Panel via My Apps and Managed Browser Apps:
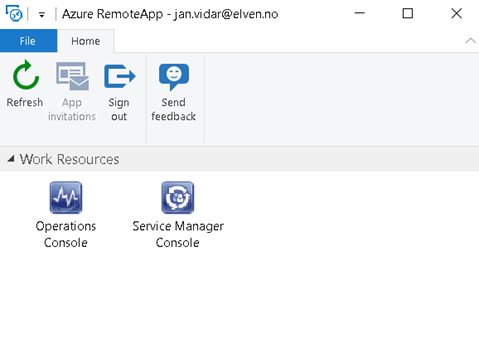
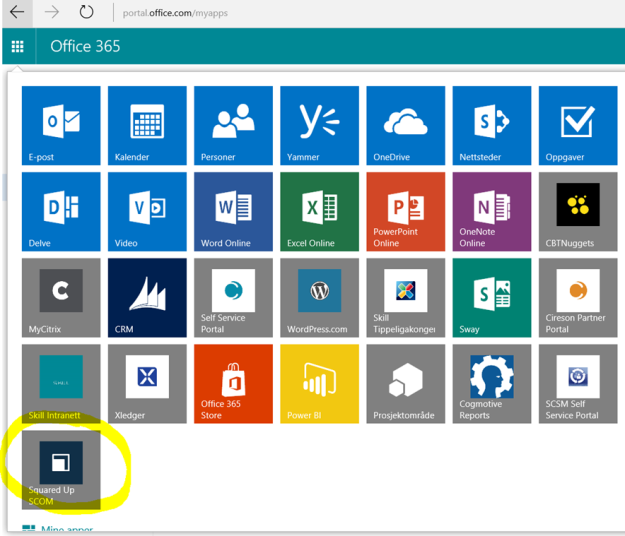
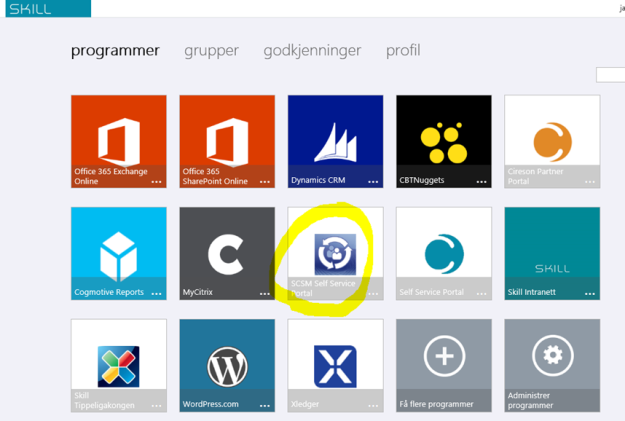
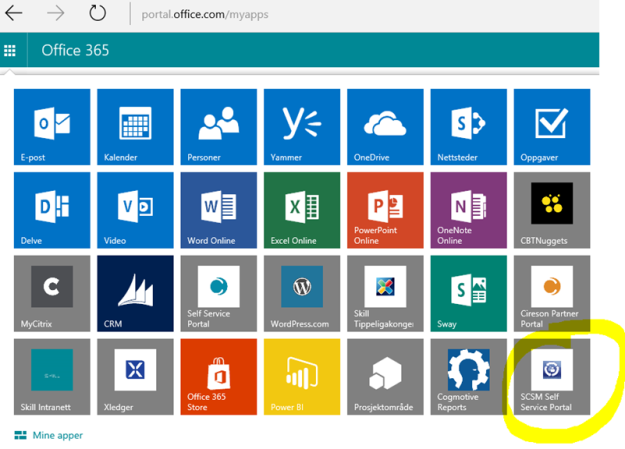
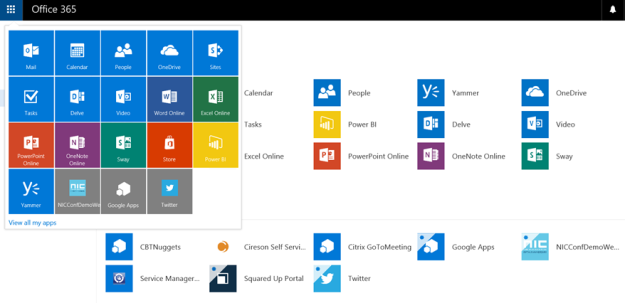
If the user is licensed for Office 365, the published applications are available via the App Launcher and URL https://portal.office.com/myapps:
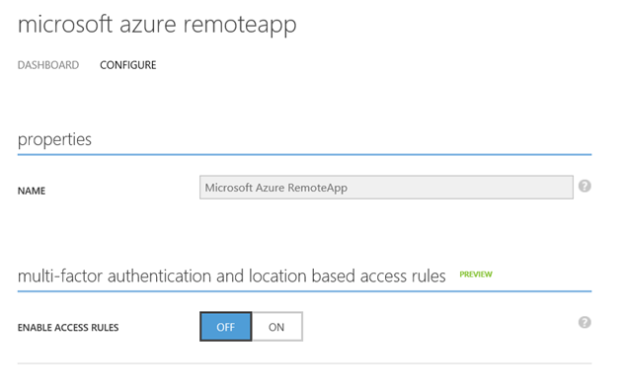
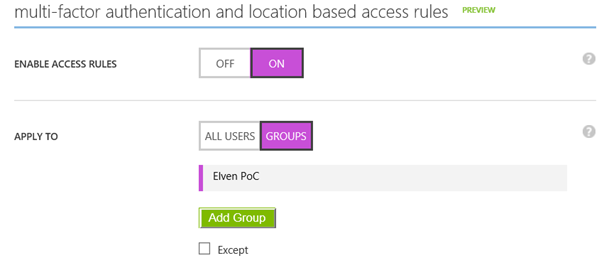
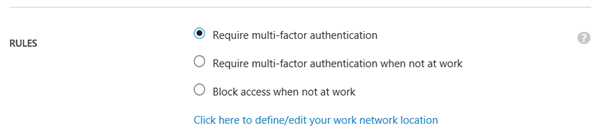
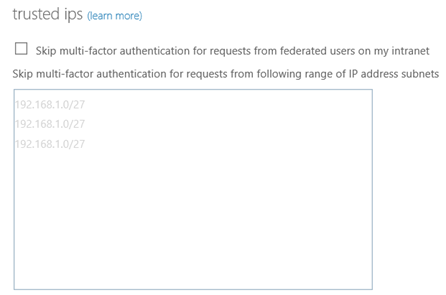
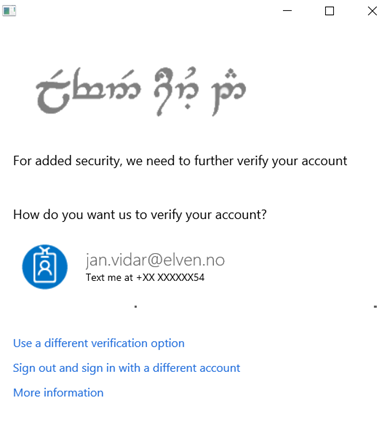
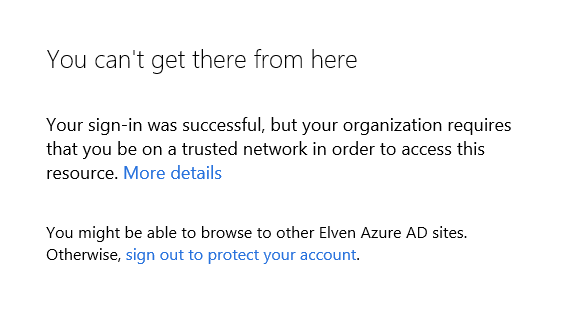
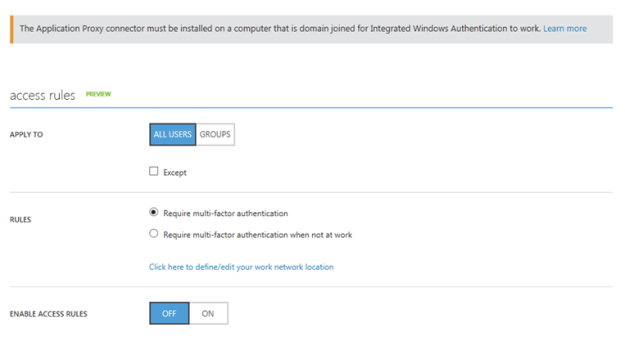
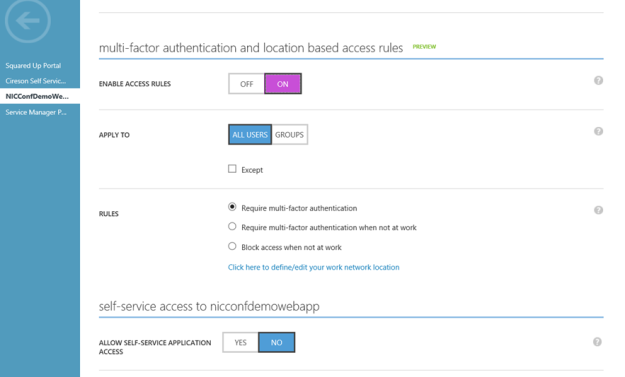
Conditional Access, which is an Azure AD Premium licensed feature, can be configured for each published Azure AD Application. These settings consist of enabling Access Rules for All Users or selected Groups, and optionally with exceptions to those users/groups. The access rules settings are requiring multi-factor authentication, require MFA when not at work, or block access when not at work. For the location based rules to work there must be configured IP addresses/subnets for the company’s known IP address ranges.
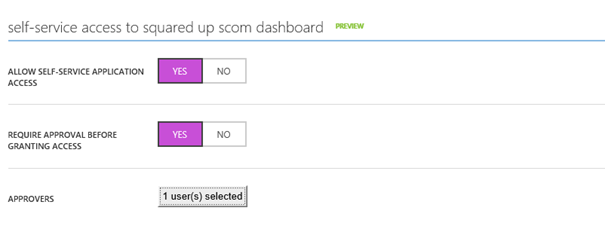
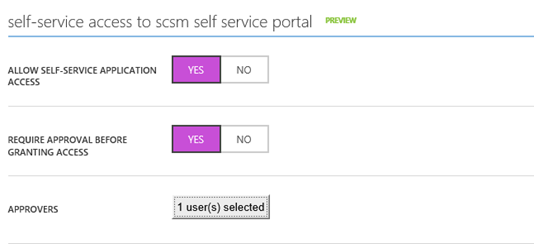
Instead of Assigning Users and Groups you could also let users manage self-service access to the published applications. When configured a group will be automatically created that application, and optionally you could configure 1 or more Approvers:
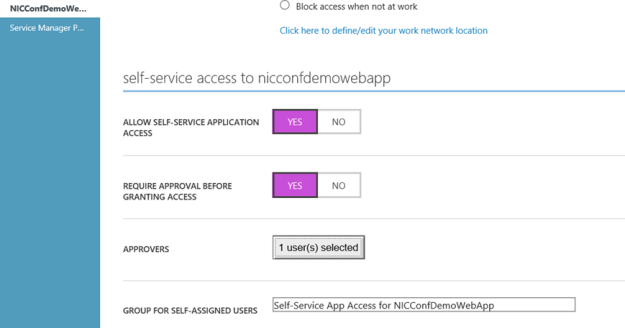
The end user will access this self-servicing via the Access Panel:
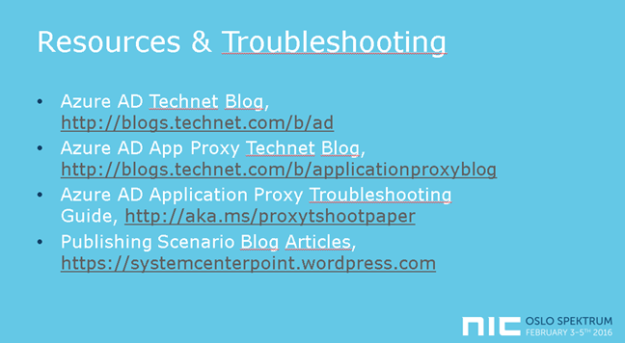
The session was wrapped up with some links to troubleshooting and more resources:
Presentation and files downloads
The presentation and files used in the demos can be downloaded from this link: http://1drv.ms/1Q429rh
Thank you for attending my session and/or reading this recap!