Recently I came across a personal scenario where I use Hugo and GitHub Pages as a team site for a Soccer team I’m coaching and wanted to automate some updates to the web site. I’ve written a blog post previously on how I organized trainings at home using Power Platform: How I as a Soccer Coach…. | GoToGuy Blog, and I am now using Github Pages and Hugo for publishing some statistics and more for that scenario.
In this blog post I will show how I:
- Created an OAuth Application for Github API.
- Created a Custom Connector in Power Platform for connections to that OAuth Application.
- Created Operations for getting content, updating content and triggering workflows for Github Actions.
- Connected to Github API using my Azure AD account and user impersonation.
- Created a Power Automate Cloud Flow for using the Custom Connector and the defined operations.
Lets get started!
Create OAuth Application for Github API
Start by logging in to your GitHub account and go to Settings. Under Settings you will find Developer Settings where you can access OAuth Apps. You can also go directly to the following URL https://github.com/settings/developers.
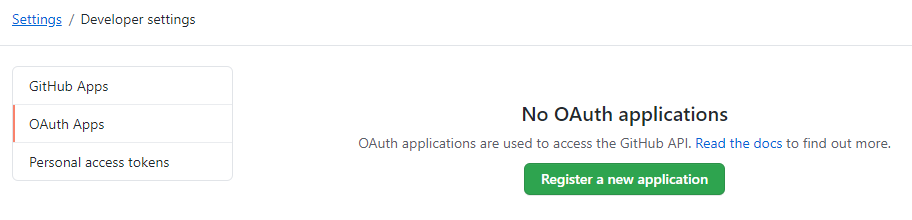
Click to Register a new application, and fill in something like the following:

As the above image shows, give the application a descriptive name for your scenario, you can type any homepage URL, this is not important in this scenario. The authorization callback URL is important though, as this will the callback to the Custom Connector we will create later. We can verify the URL later, but use https://global.consent.azure-apim.net/redirect.
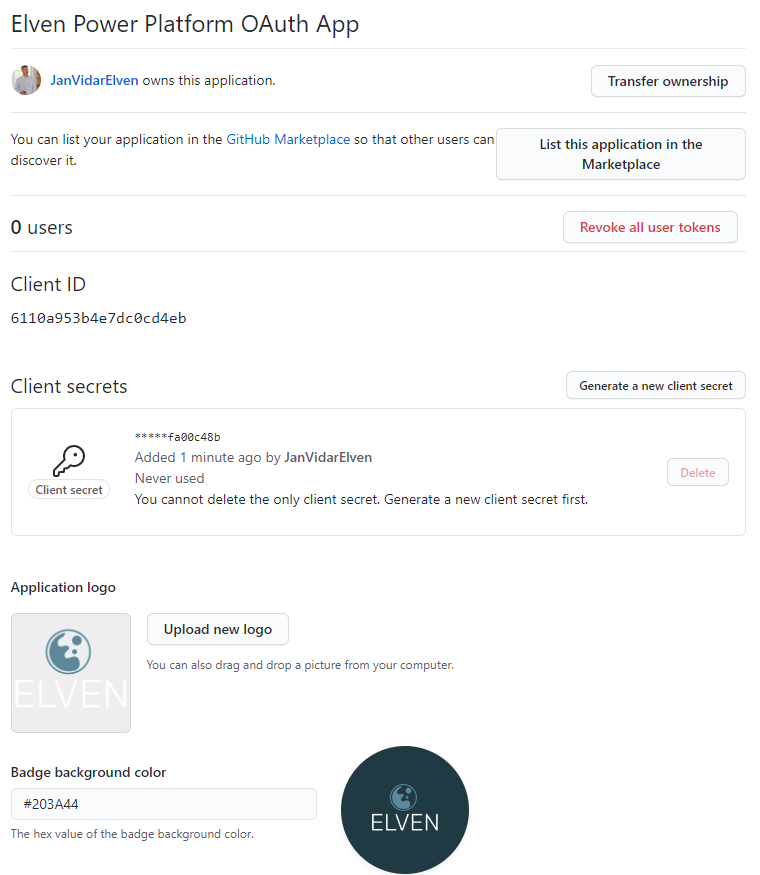
Register the application. Next you can change the settings for the registered app. You will have to copy the Client ID, we will need that later. You also need to create Client Secret, make sure to copy that as well, you will only be able to see this once. You can also change some settings like name, logo and branding if you like. This is how my Github App registration looks like now:
We can now proceed to Power Platform to create the Custom Connector.
Create Custom Connector to Github API in Power Platform
Log in to your Power Platform environment, and go to Custom Connectors under Data. Click to create a New custom connector. You can select to create from blank if you want to follow along the steps in my blog post here, or you can select to import an OpenAPI for URL, as I will provide the swagger file at the end of this blog post.
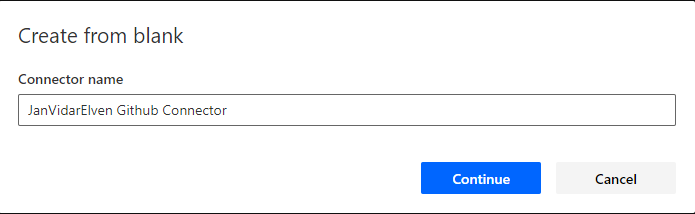
Give the connector a name of your choice and continue:
Next you need to specify “api.github.com” as host. You can also optionally upload a connector icon, as I have done here:
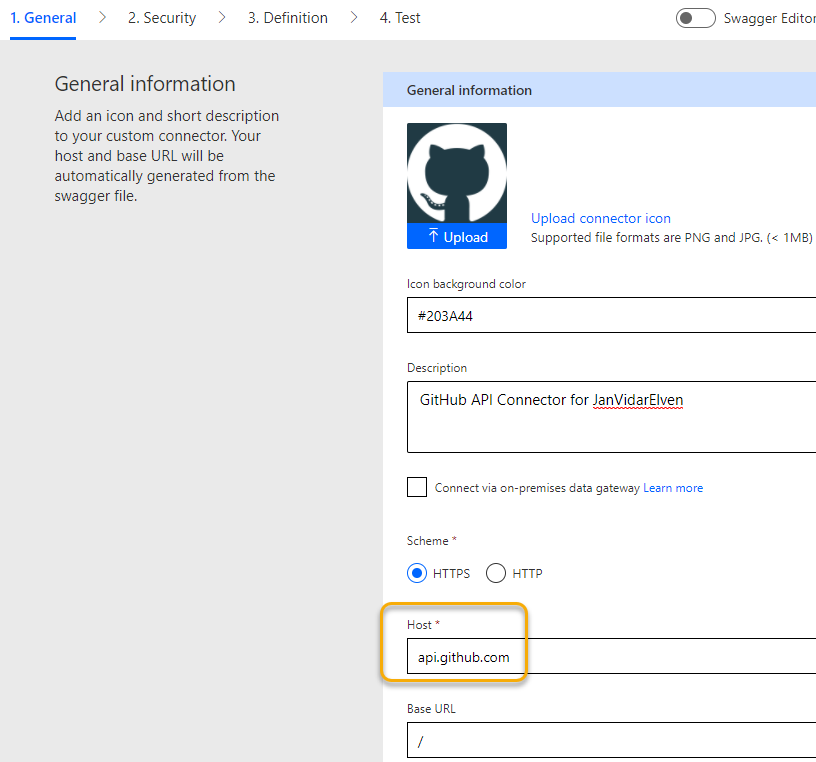
(You can grab the mark logo used above from here, GitHub Logos and Usage, note the usage requirements).
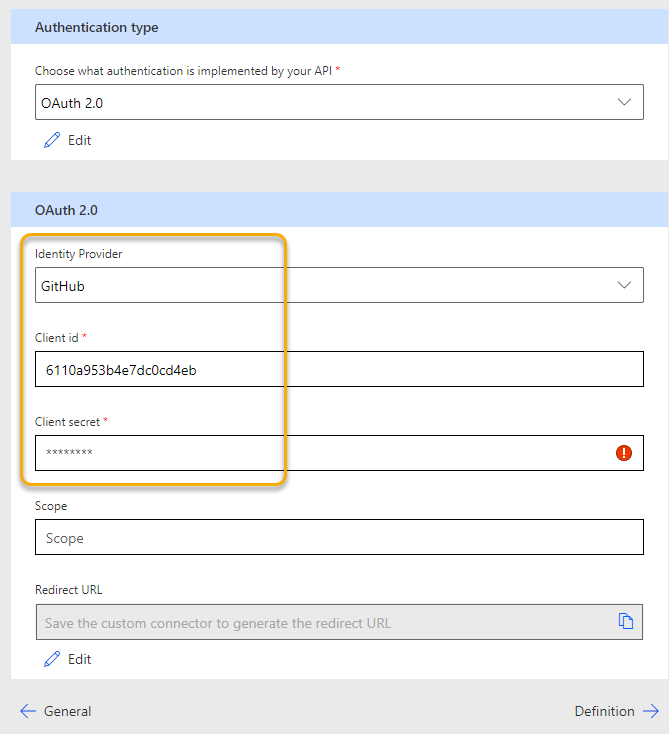
Next, go to Security. Select OAuth 2.0 as authentication type, and then selec GitHub as Identity Provider.
(PS! You can select Generic OAuth 2 also, but it will fall back to GitHub as Identity Provider eventually after all).
Add your Client ID and Secret from the Github OAuth application registration:
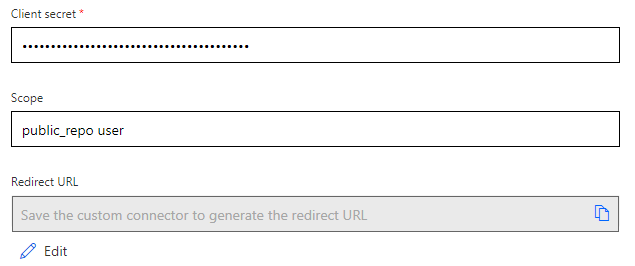
It is important to configure the correct scope (or scopes) as this will authorize the client for accessing the API. If you leave the scope blank, you will only get public read only access. You can read more on available scopes here: Scopes for OAuth Apps – GitHub Docs
In my case I want to have full read and write access to public repositories, as well as read write to user profile, so I set the scope to “public_repo user” (use space delimiter for multiple scopes):
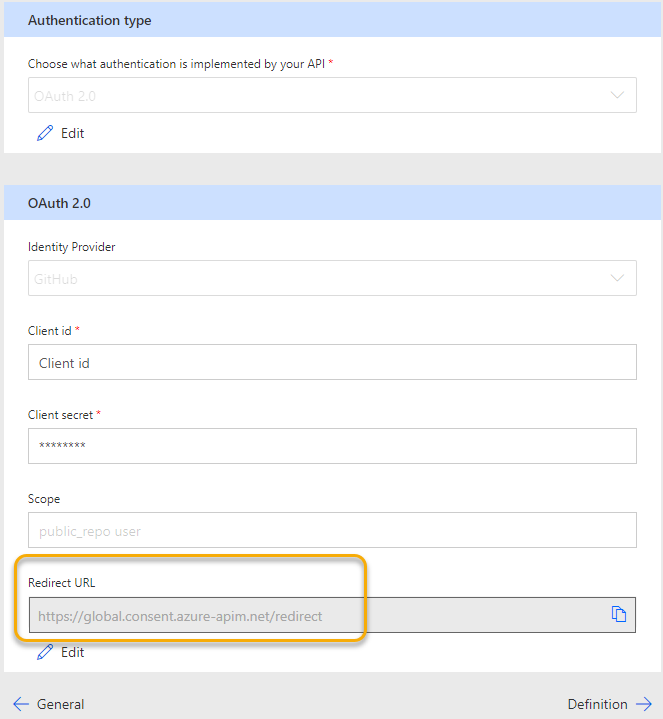
I can now click “Create connector”. After creating the security details are now hidden/disabled, and I can verify the Redirect URL to be the same as the Callback URL from the GitHub OAuth app registration:
We can now start defining the operations for the actions I want to do against the GitHub API.
Create Operations for sending requests to GitHub API
When querying and sending request to the GitHub API you need to know the API details and required parameters for what you want. The following link is for the official GitHub Rest API reference: Reference – GitHub Docs.
In my example I want to define the following 3 operations in my Custom Connector:
- Get repository content: https://docs.github.com/en/rest/reference/repos#get-repository-content
- Create/update file content: https://docs.github.com/en/rest/reference/repos#create-or-update-file-contents
- Create a workflow dispatch event: https://docs.github.com/en/rest/reference/actions#create-a-workflow-dispatch-event
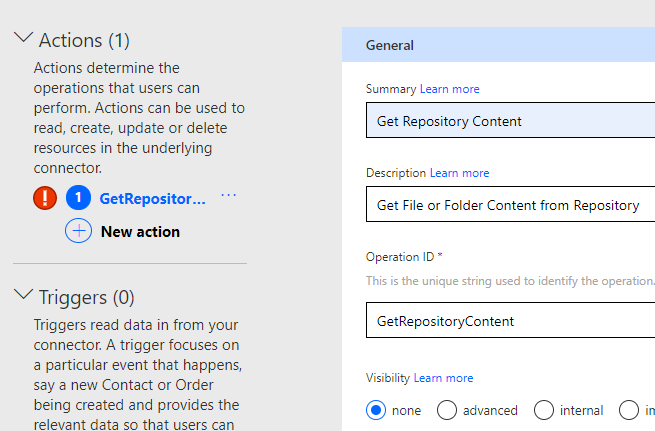
Under 3. Definition, select to create a New action, and call it something like “Get Repository Content” with the Operation ID set to “GetRepositoryContent”:
Then, under Request, click Import from sample. Select the Verb GET, and under URL type https://api.github.com. The rest of the query we will get from the GitHub API docs. Copy the following fra the REST API reference docs:
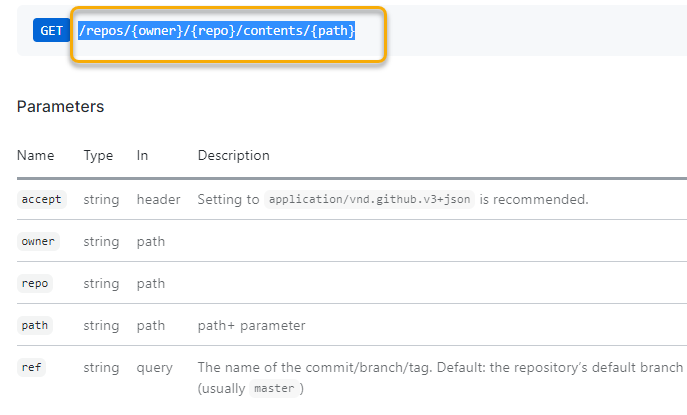
So that your sample request now looks like this, remember to add the recommended Accept header:
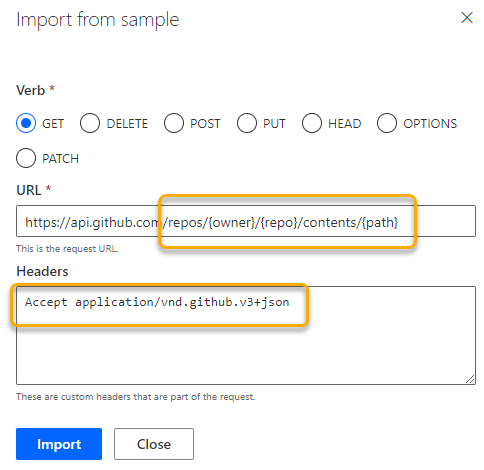
Click Import. The request will now ask for owner, repo and path as parameters:

Next, click the default response. Here you can copy the sample response from the REST API docs, I’ve copied the sample response for getting file contents:
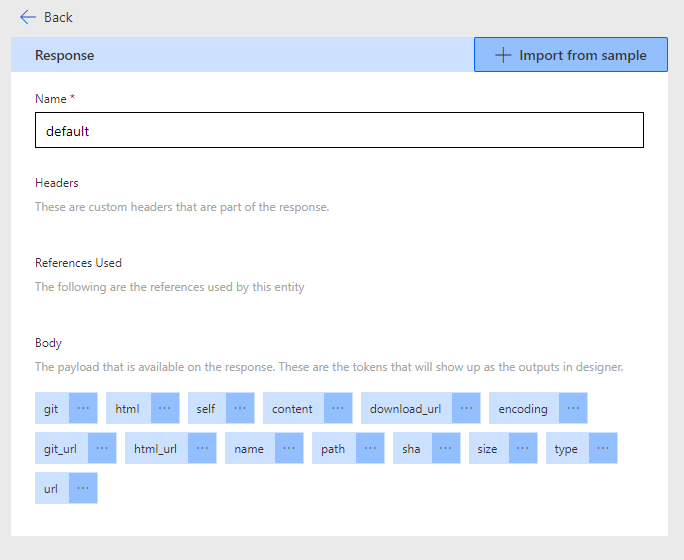
After that click “Update connector” and we have the first action operation defined.
Click New action again, this time for updating file contents:
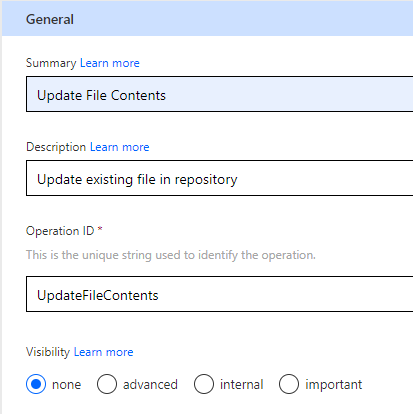
For the sample request the Verb is PUT, the URL is the same as when getting file content, but now we need to specify a request body as well:
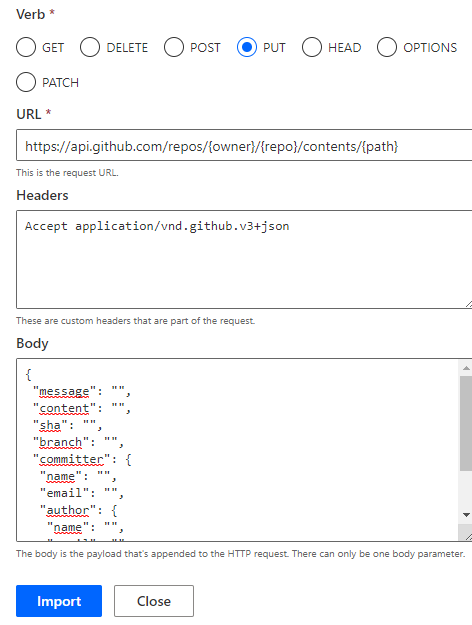
I’ve created the sample request body based on the docs reference, with just empty placeholder values for the parameters needed. Some of these can be omitted, but message, contents, sha and branch is required for updating an existing file:
{
"message": "",
"content": "",
"sha": "",
"branch": "",
"committer": {
"name": "",
"email": "",
"author": {
"name": "",
"email": ""
}
}
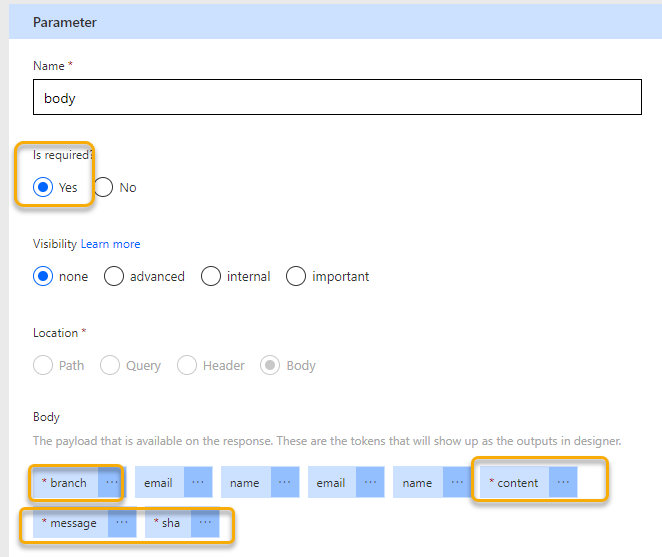
}After importing the sample request, you can click into the body parameter and change to required for the body itself, as well as the payload parameters that you always want to include from below:
Add a sample default response as well, I’ve copied the example response for updating a file from the docs.
Click “Update connector” again and we are ready to add the third action:
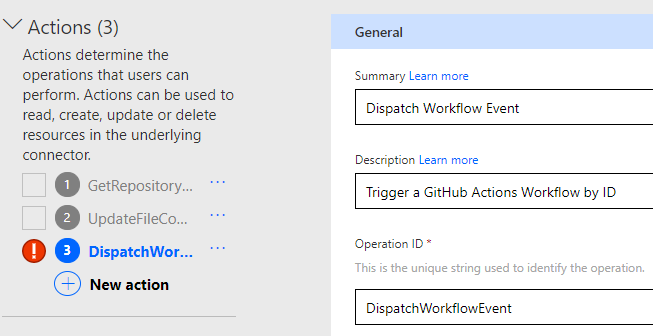
This will be a POST request, with the following URL and request body:
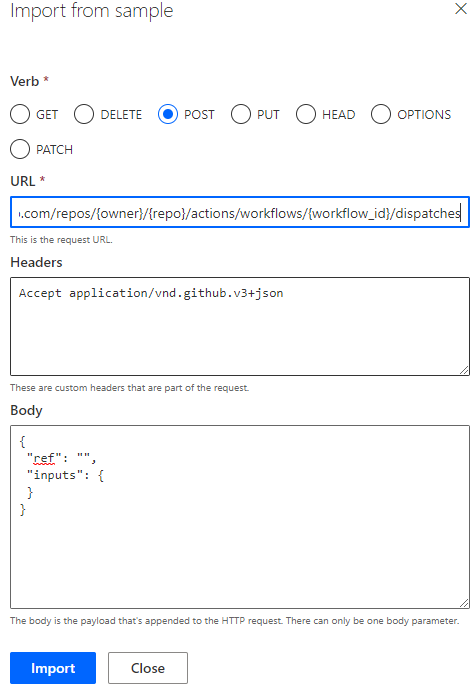
Note from above that “ref” needs to be referencing a branch or tag name as is a required parameter. “Inputs” is an object, depending on your GitHub Actions workflow if incoming parameters is defned, so in many cases this can be empty.
You can leave the default response as it is, as API will return 204 No Content if request is successful.
Click on “Update connector” again, and you should now have 3 actions successfully configured.
We can now proceed to create a connection and authenticate to GitHub API using this custom connector.
Connect to Github API using my Azure AD account and user impersonation
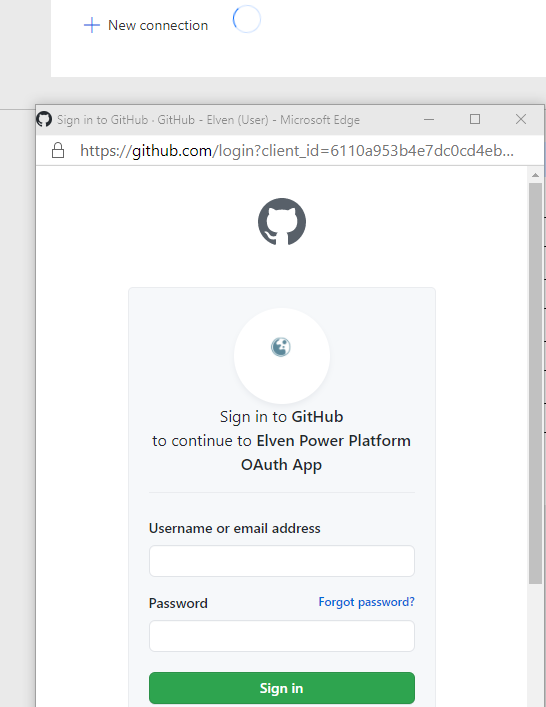
Go to “4. Test”, and click to create a “New connection”. This will create a new authentication popup, and if you’re not already logged in to GitHub you must log in first. Note the correct reference and branding to the “Elven Power Platform OAuth App”:
After logging in I’m prompted to authorize the OAuth app to access data in my account. Note that the scopes “public_repo” and “user” is shown in the authorization request:
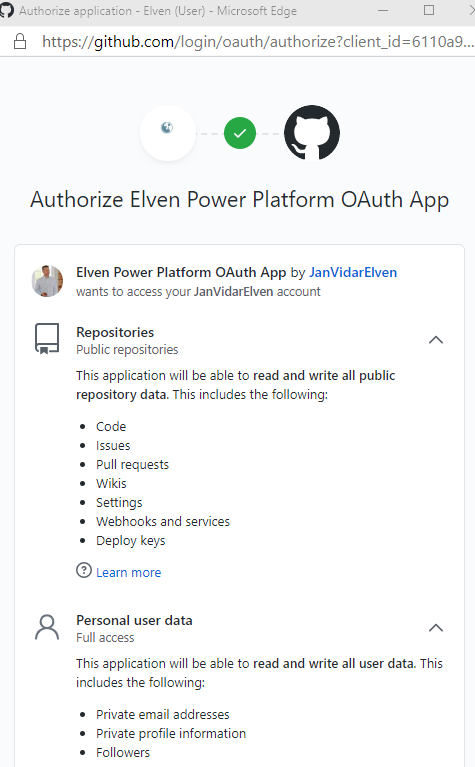
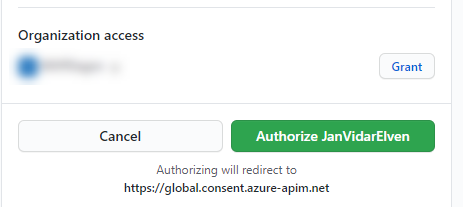
If you own other organizations you can grant access to that as well. Click Authorize “OwnerName”: as shown below:
After authorizing you will be redirected back to the Connections, and you should be able to successfully get a new connection object.
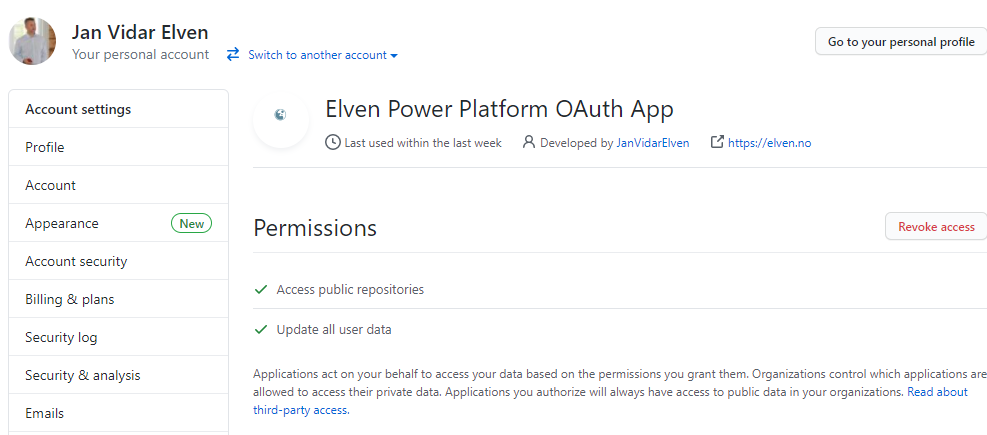
Let’s take a look at GitHub settings again, under https://github.com/settings/applications. You should see the OAuth App and the correct permissions configured if you click into details. You can also revoke the access if you need to remove it or reconfigure the scopes for example:
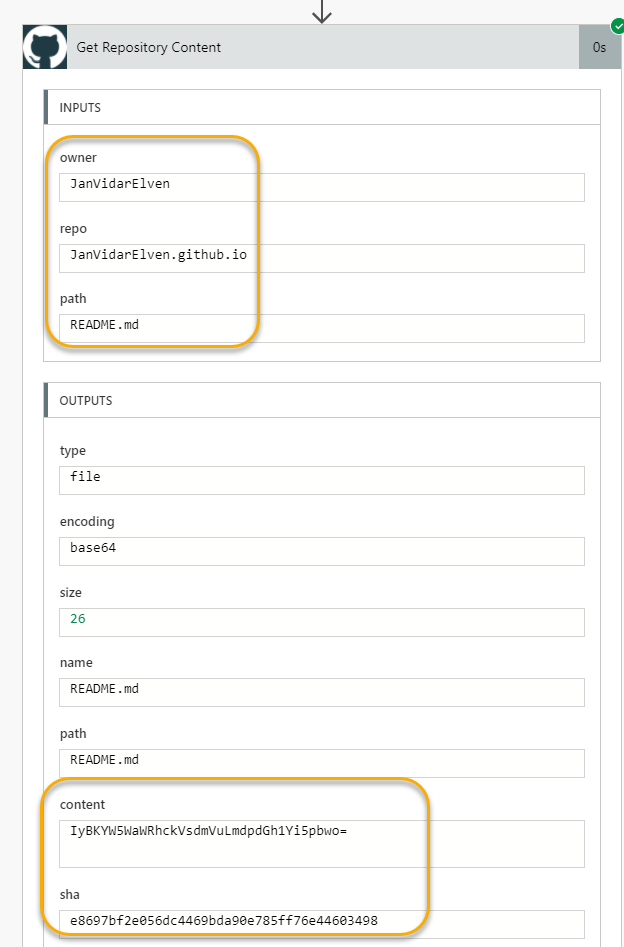
Let’s do a test from the Custom Connector and see what we get. Click on the GetRepositoryContent, and provide the paramaters for “owner” (your GitHub account name), “repo” (any repository, I’m using my GitHub Pages repo here), and a “path” to an existing file in that repo (I’m just testing against my README.md at root, but this can be any subfolder\file also). Click Test operation and see:
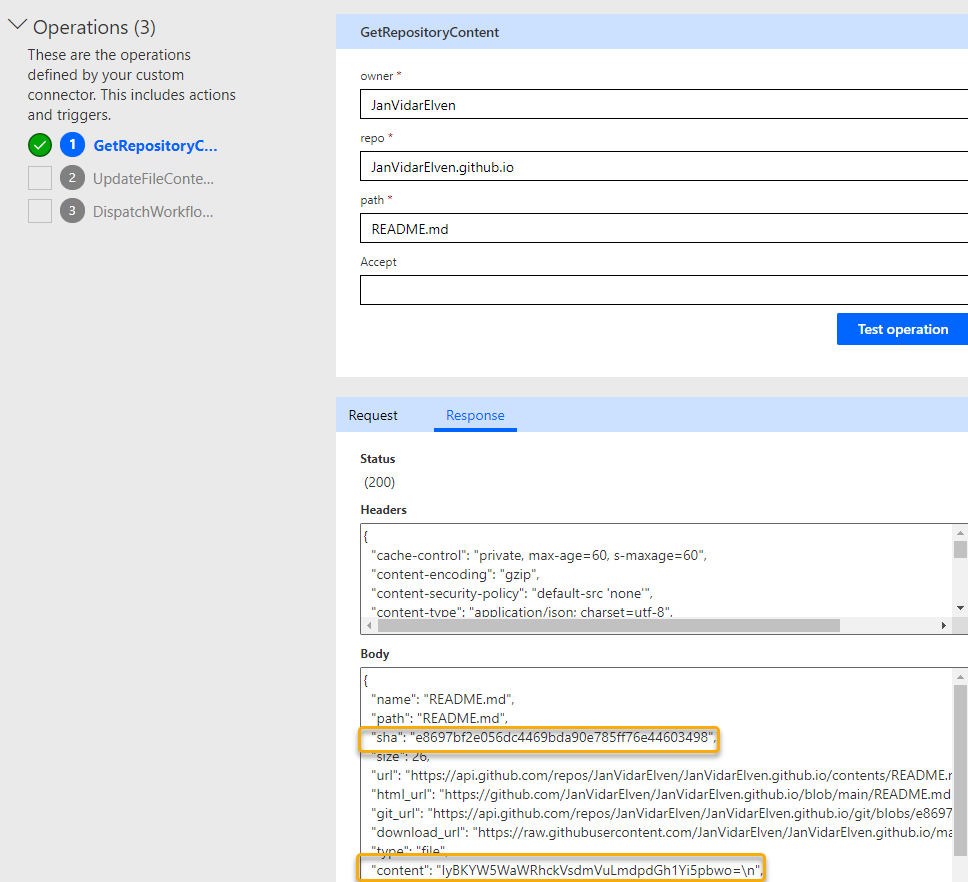
This should be successful, note that the response contains a couple of important values for later, the “sha” for the existing file, and the “content” which is a base64 representation of the current contents of the README.md file.
Click on the Request tab, and you will see a preview of how the request was constructed. You will also see the Authorization Header with the Bearer Token:
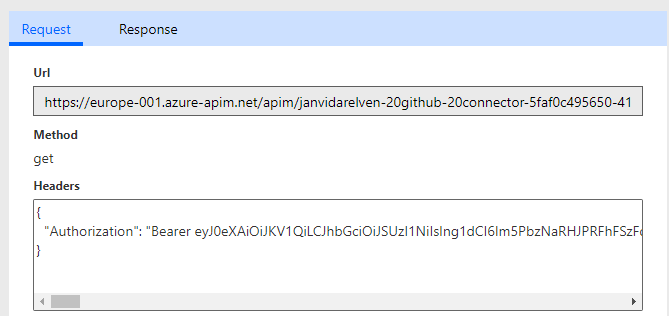
A couple of important things to note:
- The request uses an API gateway in Azure APIM, not GitHub directly.
- The Bearer Token in the Authorization Header is for the Azure API GW audience, so it cannot be used directly against GitHub API.
Copy the entire token value, from after “Bearer <token……>”, and paste it into a JWT debugger like jwt.io. From there we can look at the decoded payload:
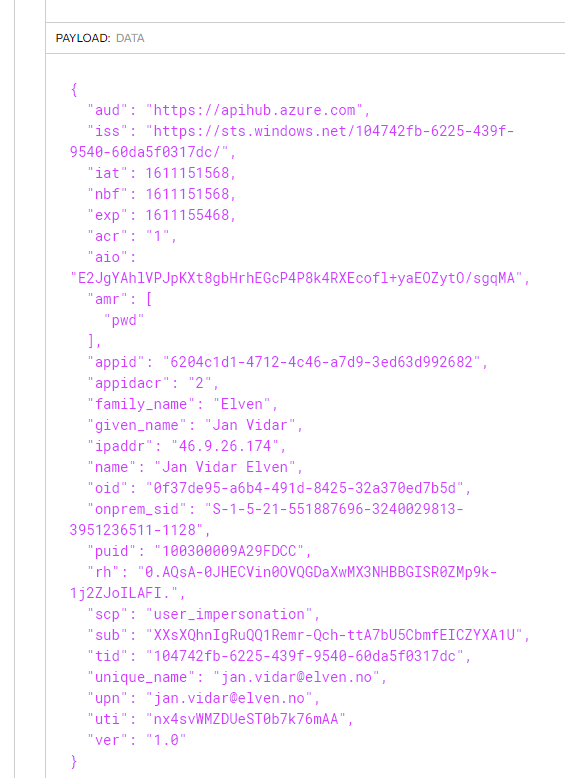
From that payload it’s clear that the Token has been issued by my Azure AD tenant and for my logged on user in Power Platform. The scope is user_impersonation, so this will be used in a on-behalf-of flow scenario via the audience defined as apihub.azure.com, which in turn will request from GitHub API resources on my behalf via the APIM gateway used by Power Platform.
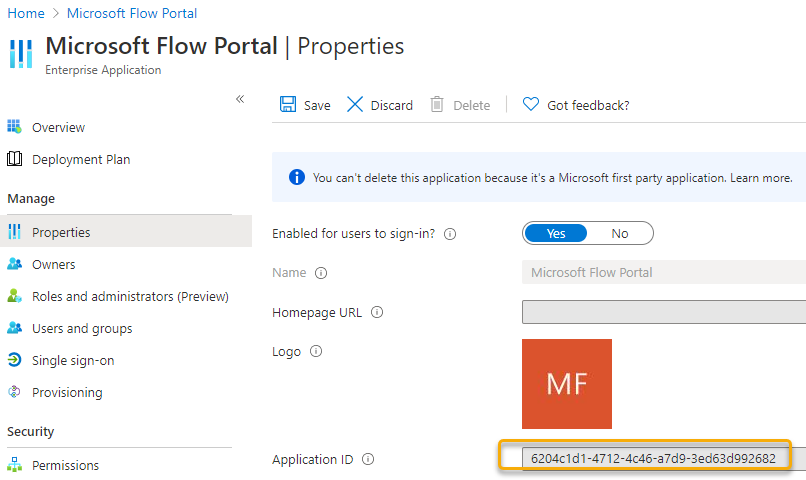
You can also lookup the appid from the Token in the Azure AD tenant, and you will find the following Enterprise Application, from where you can enable or disable it on an organization level, or you can examine the sign in logs:
We can test the other operations as well, but let’s create a Flow for that scenario.
Create a Power Automate Cloud Flow for using the Custom Connector to Get and Update File Content
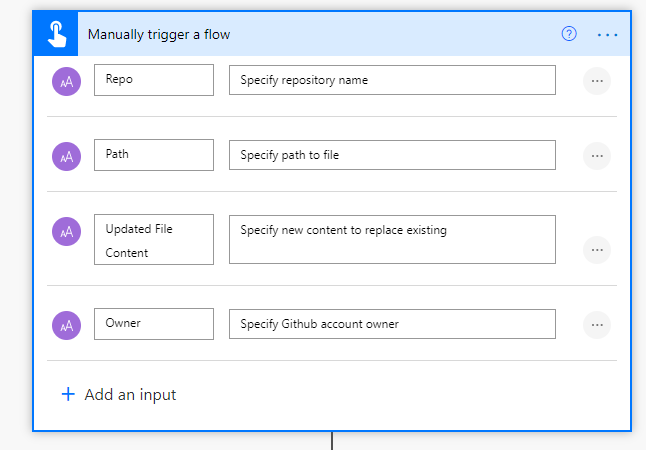
Create a new Cloud Flow, using an instant trigger for manually triggering a flow. Add some inputs like shown below:
Next, add a new action and from under Custom find the GitHub Custom Connector:
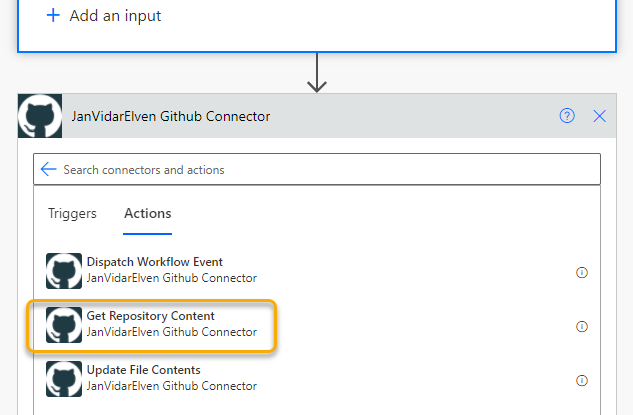
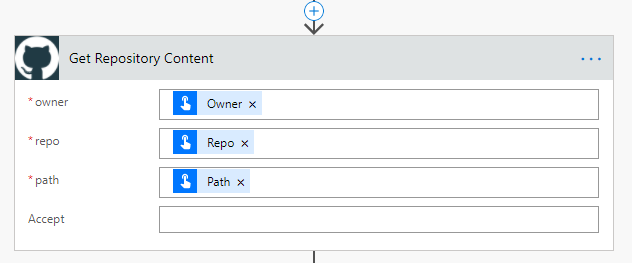
Add the “Get Repository Content” action and then fill in the inputs like below:
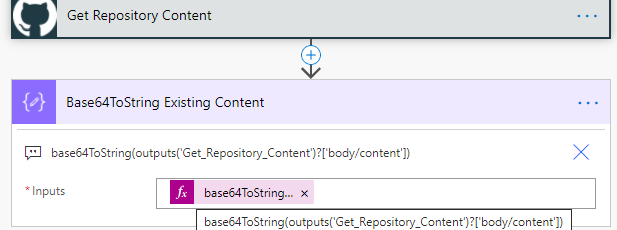
Next, add a Compose action, with the following dynamic expression:
base64ToString(outputs('Get_Repository_Content')?['body/content'])
This is just for checking what the existing file contents is:
We can do a quick Save and then Test Flow so far, from the Run history I should get the correct inputs, and when finding the existing file the outputs will include the sha value of the existing file, as well as the base64 encoded value of the content:
And when looking at the decoding of the content I can see that the readme.md file content is shown correctly:

Go into Flow edit mode again, and add another Compose action, this time we need to base64 encode the new content I want to update the file with:
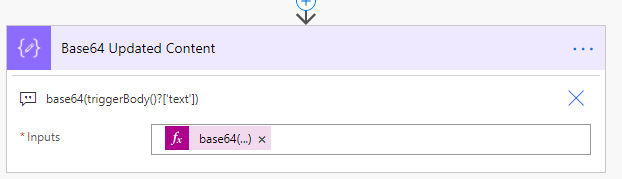
Note that the base64 function uses for parameter the input trigger of base64(triggerBody()?['text']), as this is the first text parameter of the trigger.
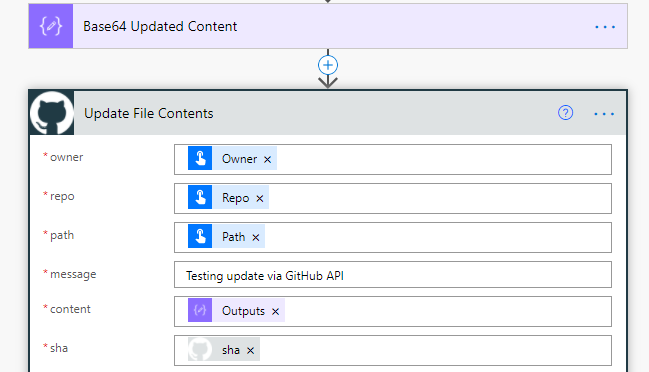
Add a new action, this time for the Custom Connector again, and the Update File Contents. Specify the owner, repo and path as previously input values, type a custom message for the message, and select the outputs from the “Base64 Updated Content” action, and use the sha value from the “Get Repository Content”. The rest of the values (committer, author objects) are optional:
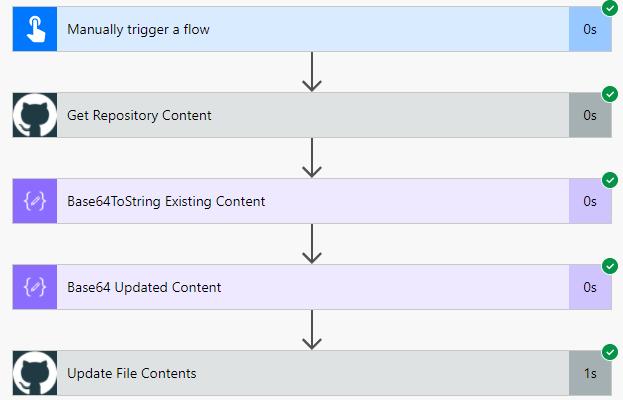
Save and then do another test, for example like the following to update the README.md file:
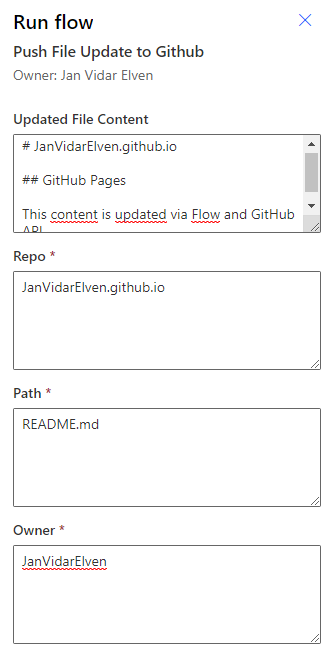
And the test should be successful:
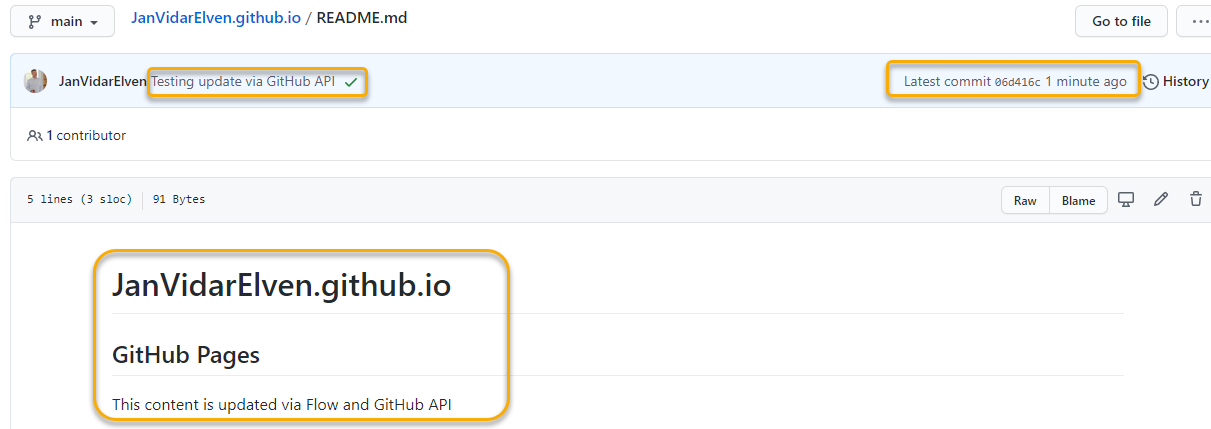
I can also verify this at my repository and check the file has been updated. Note also the commit message:
Triggering a GitHub Actions Workflow
The last thing I wanted to go through in this blog post is using the Power Platform Custom Connector to trigger a GitHub Actions workflow. My use case for this is to start a Hugo build when I have dynamically updated files for my static website, but for now I will keep it simple.
I have via a basic template created a simple workflow like this:
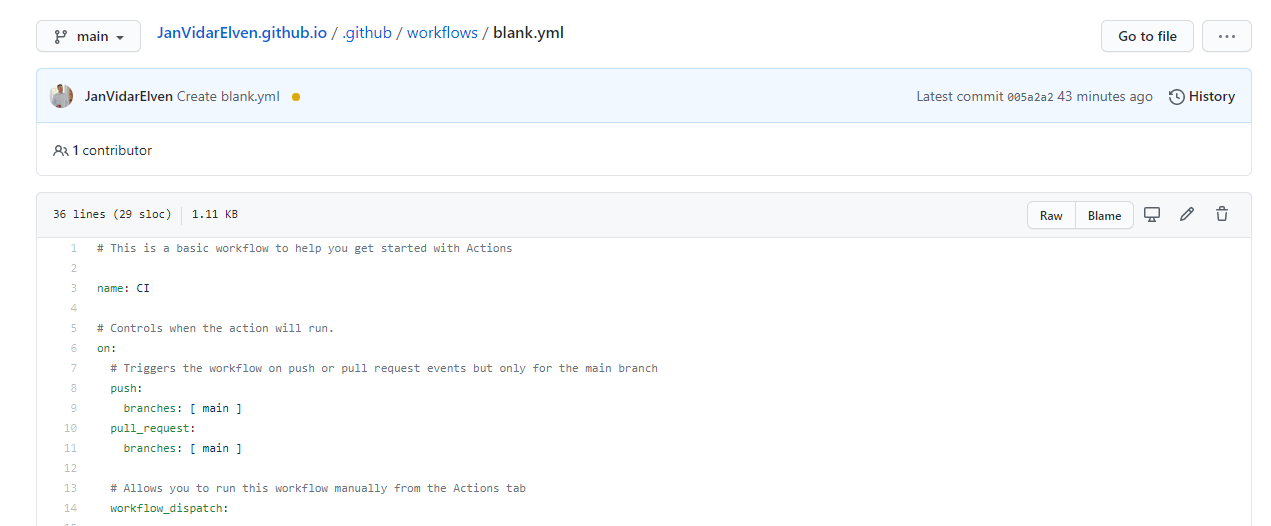
This workflow can also be triggered manually using workflow_dispatch, so let’s use that to verify that I can call it from Power Platform.
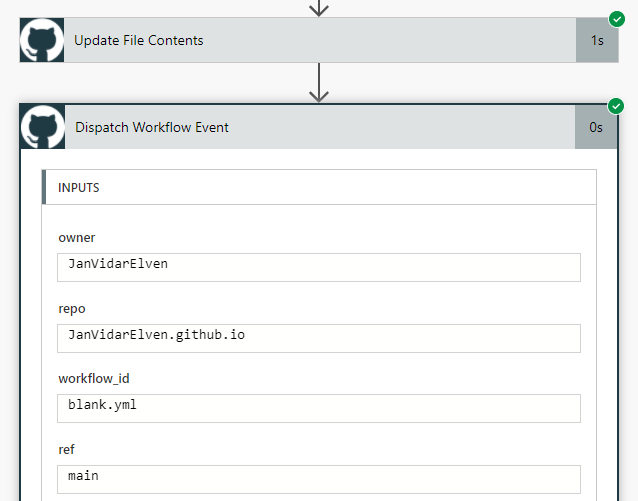
Add a new action at the end of the Flow, adding the Custom Connector action for Dispatching Workflow event:
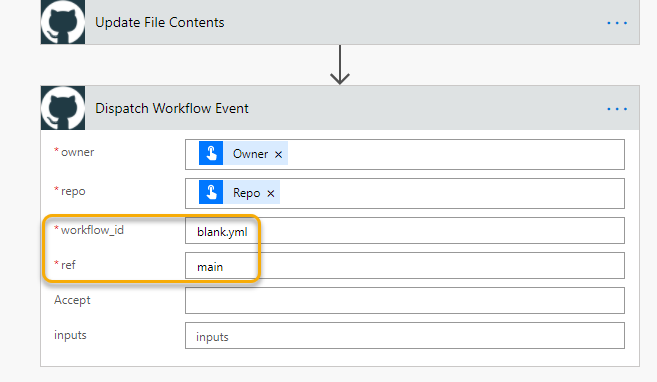
Specify Owner and Repo from inputs, and for workflow id either specify ID or the name of the workflow file, in this case blank.yml. The ref parameter is either a branch or tag name, so in my case I use main branch. I leave the other parameters blank as I don’t have any inputs to supply, and use the default Accept header.
Save and Test the Flow again, supplying an updated file content, owner, repo and path similar to what we did previously. When the Flow runs it should complete successfully:
If I go to my GitHub repository, and under Actions, I can see that this workflow has been triggered:
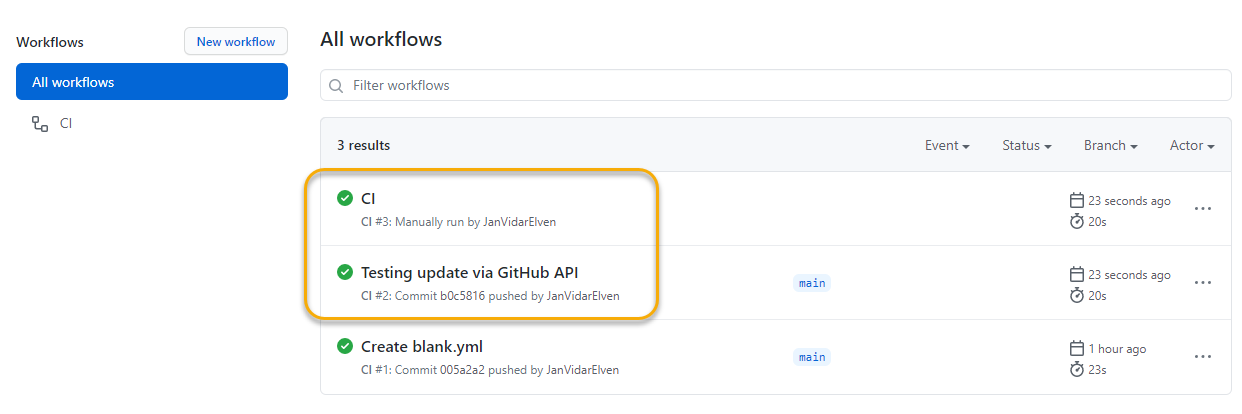
Actually it has been triggered twice, as the first trigger is automatic for the push commit on the file update, and the other (named “CI” in results) is the actual workflow dispatch from the Flow.
Basically this means that I can select some different logic to when my workflows will trigger, either as a push or pull trigger, or as a trigger event based on my Flows. But of course I won’t normally run both triggers 😉
I now have what I need for working further with my personal Hugo and GitHub Pages project, my plan is to update data and assets files from my Power Platform environment, and then trigger a Hugo build for my website. I might blog more on that process later.
Summary and some last thoughts
In this blog post I wanted to show how you can work with the GitHub REST API via a Power Platform Custom Connector. This way you can basically achieve anything that the GitHub API has available, provided the correct scope/scopes has been authorized.
I do want to mention however that there is a GitHub Connector you can use directly in Power Automate, Logic Apps, or Power Apps also: GitHub – Connectors | Microsoft Docs, where you can create a direct connection to your GitHub account. You should take a look at that if that can server your needs.
In my case I needed the API to get or update file contents directly, as well as when using impersonation people in my organization can use their own Azure AD accounts if I share the Custom Connector with them, they don’t need their own GitHub accounts as long as the OAuth App has been authorized on my behalf.
If you want a quickstart on creating the Custom Connector your self, below is the Swagger definition. Thanks for reading, hope it has been useful!

Hi Jan,
thanks a lot for this tutorial, it helped a lot.
Wondering if you’ve ever managed to create a gist with it.
I’m getting 403 “message”: “Resource not accessible by integration” – error.
Scopes are set and I can retrieve all my gists alright, so I don’t think that this is actually an authentication issue on my side. But – just guessing…
I haven’t tried that specifically myself, my case was just for triggering a workflow, but I’ll let you know if I get to test that later.
I have followed your steps in order to trigger Github workflow from Power Automate, however I could not do it, getting some errors. Could you please help me to achieve this.