Managing Microsoft Graph Change Notifications Subscriptions with Power Platform
In a recent blog post, https://gotoguy.blog/2020/07/12/subscribing-to-teams-presence-with-graph-api-using-power-platform/ , I described how you could create a subscription for change notifications for Teams Presence API. In that example, I created a subscription using Graph Explorer. As every subscription has an expiry lifetime, depending on the resource type, you need to have some management over renewing subscriptions before they expire, and re-creating if they have been expired. I also include deleting subscriptions that are no longer needed in that scenario.
In this blog post I’m going to use the Powers of Power Platform to set up this. I’m going to do this from an interactive users’ perspective, using delegated permissions. Many Microsoft Graph API resources supports application permissions, but not all especially those that are in the beta endpoint, so it makes sense for me now to concentrate on delegate permissions.
Lets get started, and as in many scenarios with Microsoft Graph, I will start by creating an App Registration in Azure AD.
Register an App for Managing Graph Subscriptions
Login to your Azure AD Portal (https://aad.portal.azure.com ) and go to App Registrations to create a new.
Depending on the settings in your tenant, users can be allowed to create their own application registrations:
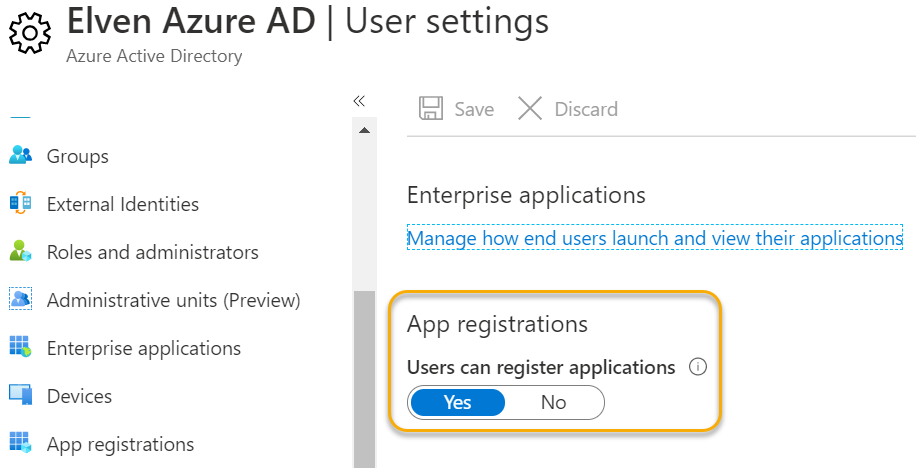
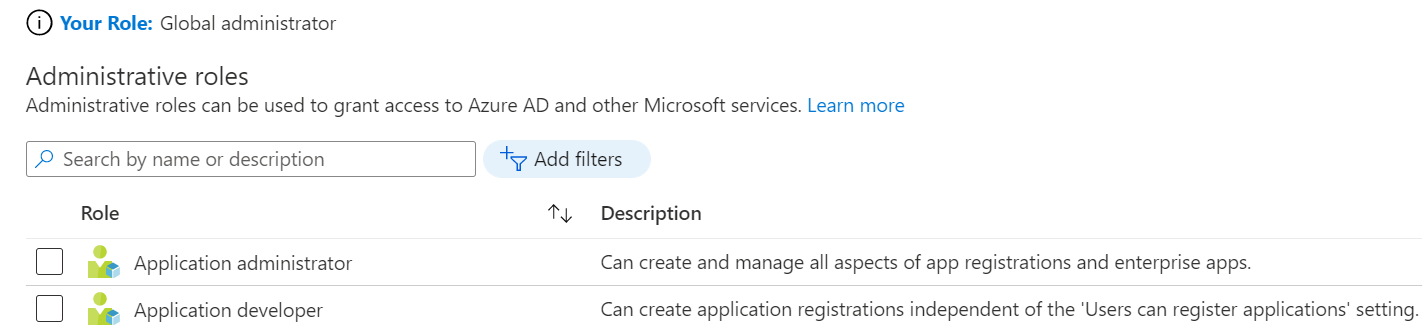
If your admin has set this to “No”, you will need to either be a Global Admin, or been added to one of these roles for creating app registrations:
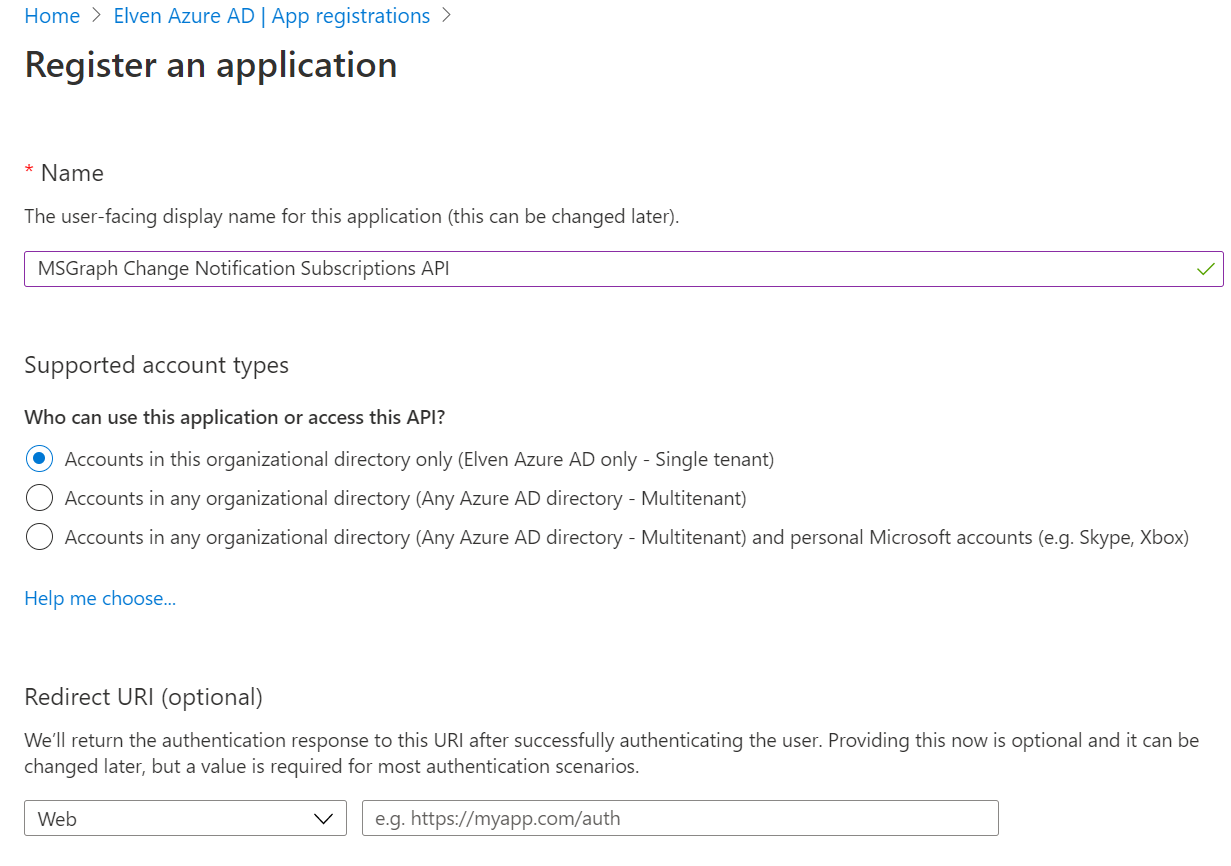
Create the following App registration, just give a name and let the other settings be like default:
Add to the permissions so that you have the following Microsoft Graph delegated permissions:
- Presence.Read
- Presence.Read.All
- User.ReadBasic.All
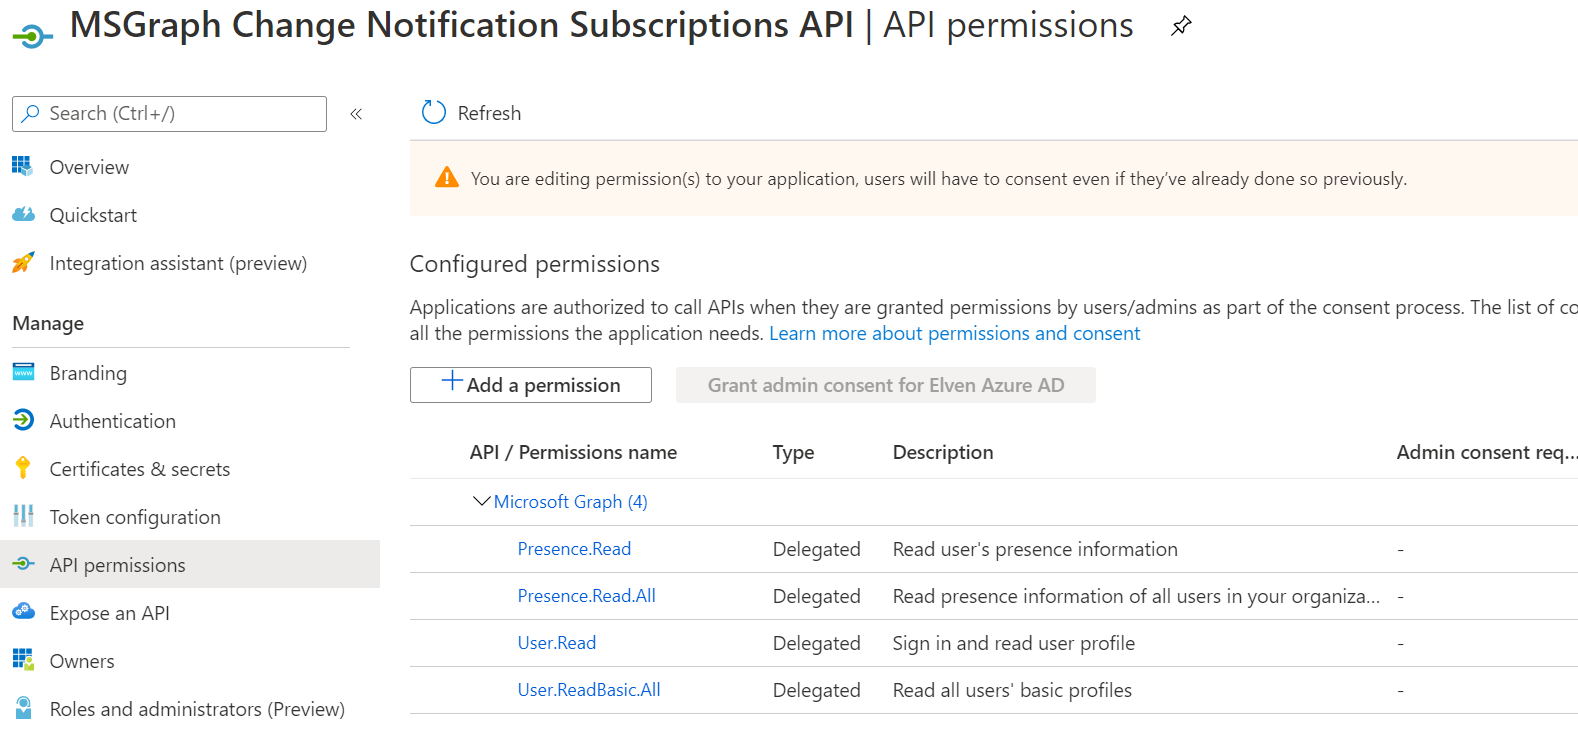
Note that none of these permissions require admin consent. If you later want to manage subsxcriptions to Graph resources that require admin consent, you will need assistance from your Global Admin to consent to any permissions that require this,
Next, on the Overview page, copy the Application (client) ID, you will need this for later. Next go to Certificates & Secrets, and create a new secret:
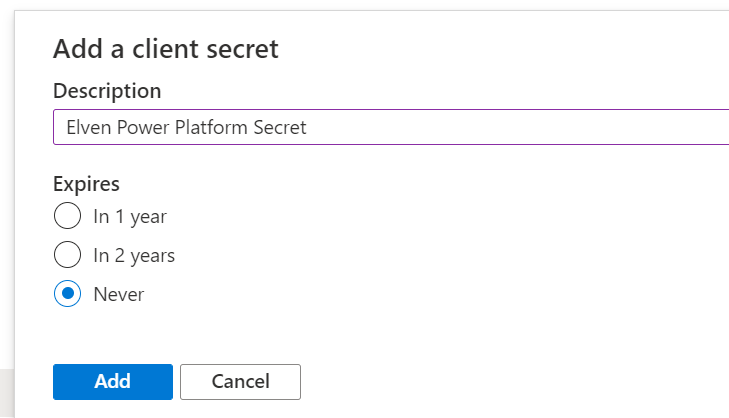
Copy this secret for later.
We will now use this app registration as our API to Microsoft Graph, using a Custom Connector in Power Platform.
Create a Custom Connector for Microsoft Graph
Initial creation and authentication
If you haven’t already, log in to flow.microsoft.com , and go to Data and Custom Connectors. The following procedure includes a lot of manual steps, if you want to import this connector and its actions from my swagger definition file, you will find a link at the end of this section.
Select to create a new Custom Connector, from blank. Give it a name, for example:
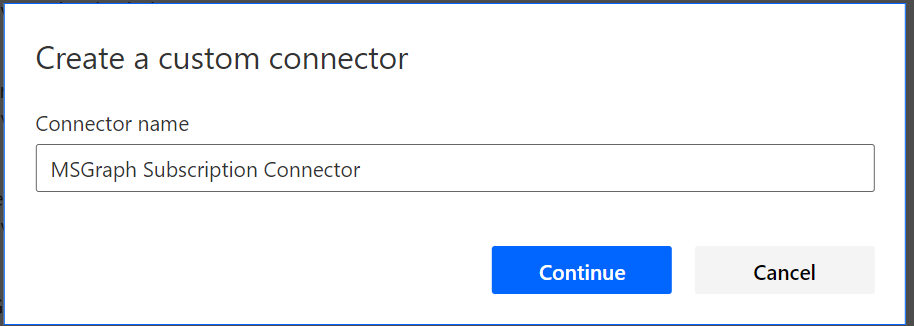
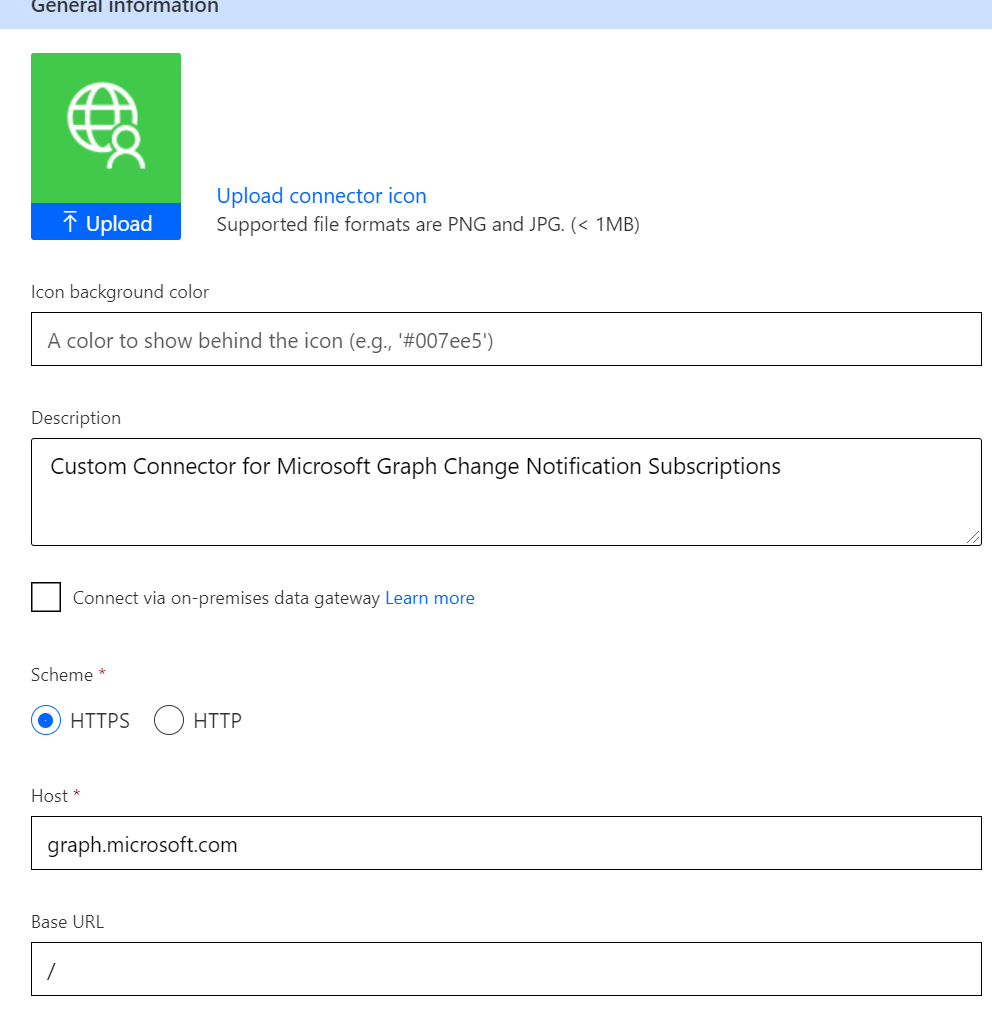
Provide an optional description, and specify graph.microsoft.com as Host:
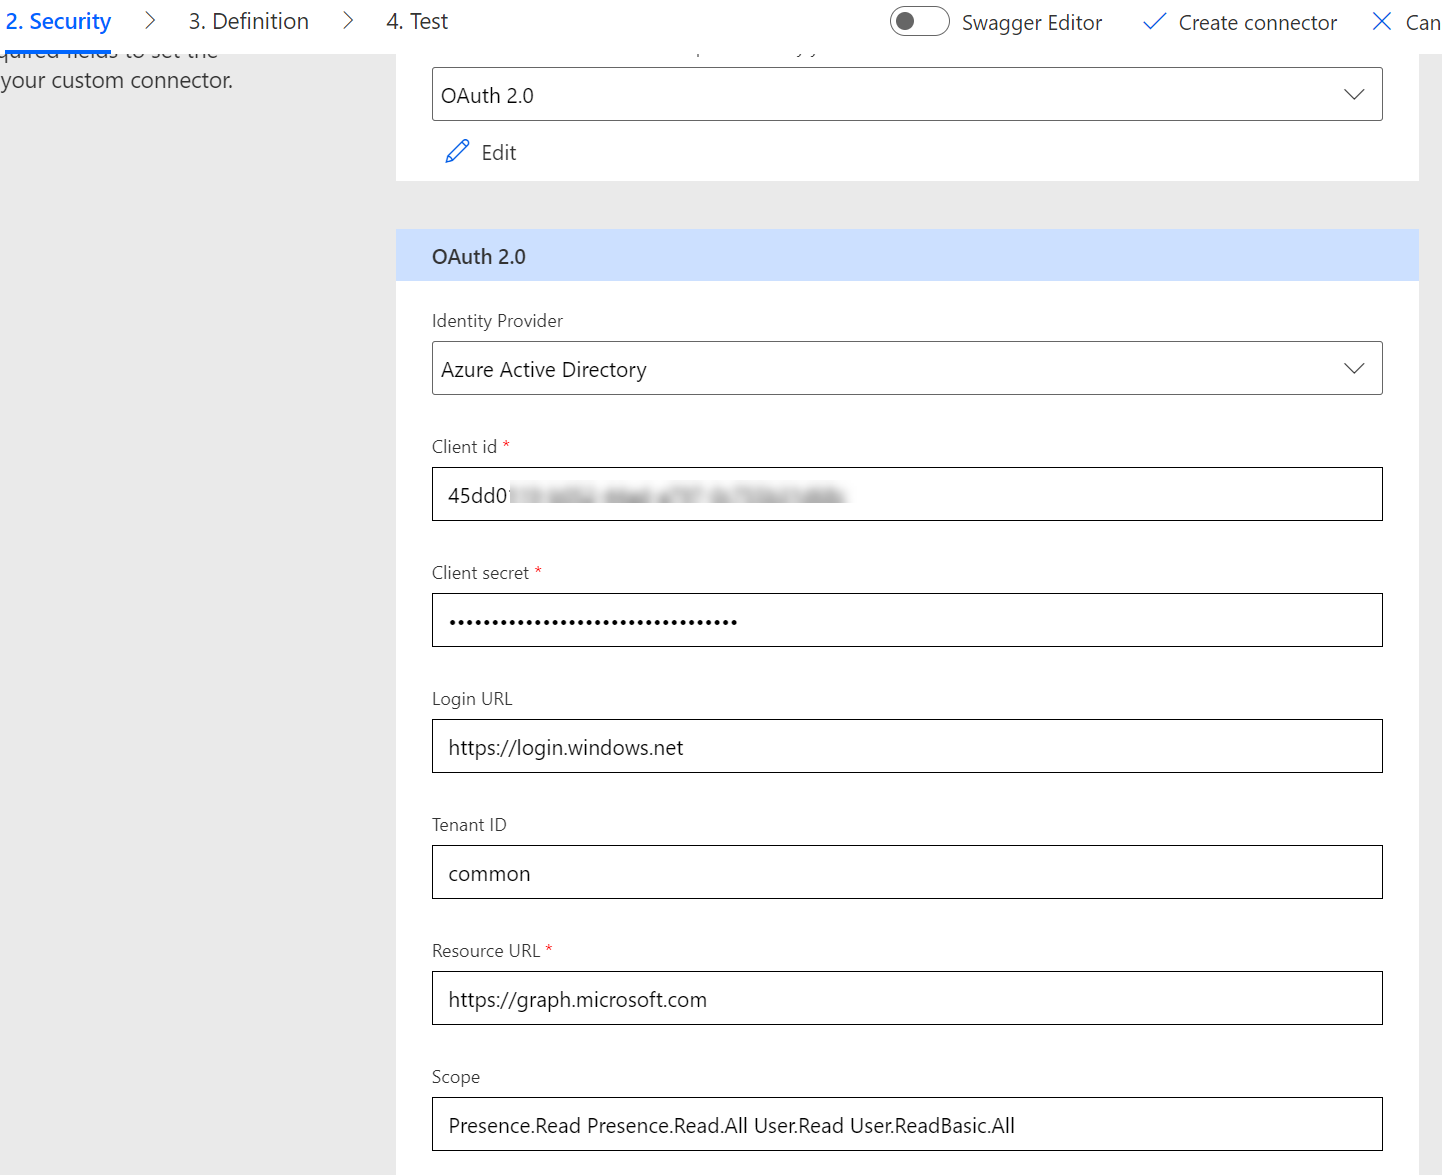
Next, under Security, select OAuth 2.0 for Authentication and select Azure Active Directory for Identity Provider. Add the Application Id for the App Registration as Client id, and the Secret you created earlier for Client secret. Type https://graph.microsoft.com as resource, and add under Scope the permissions you added so that the user can consent to these permissions. Type each permission with a space between:
Now, click on Create Connector and verify that is has been successfully created, by now you will see that the Redirect URL field has been updated, copy this value:
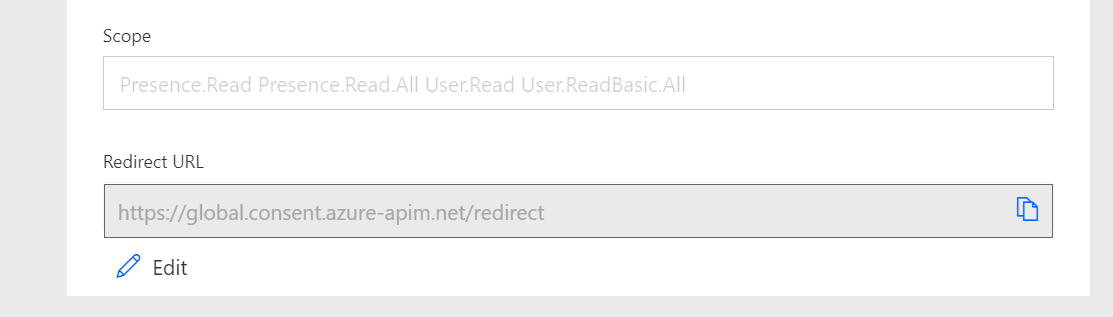
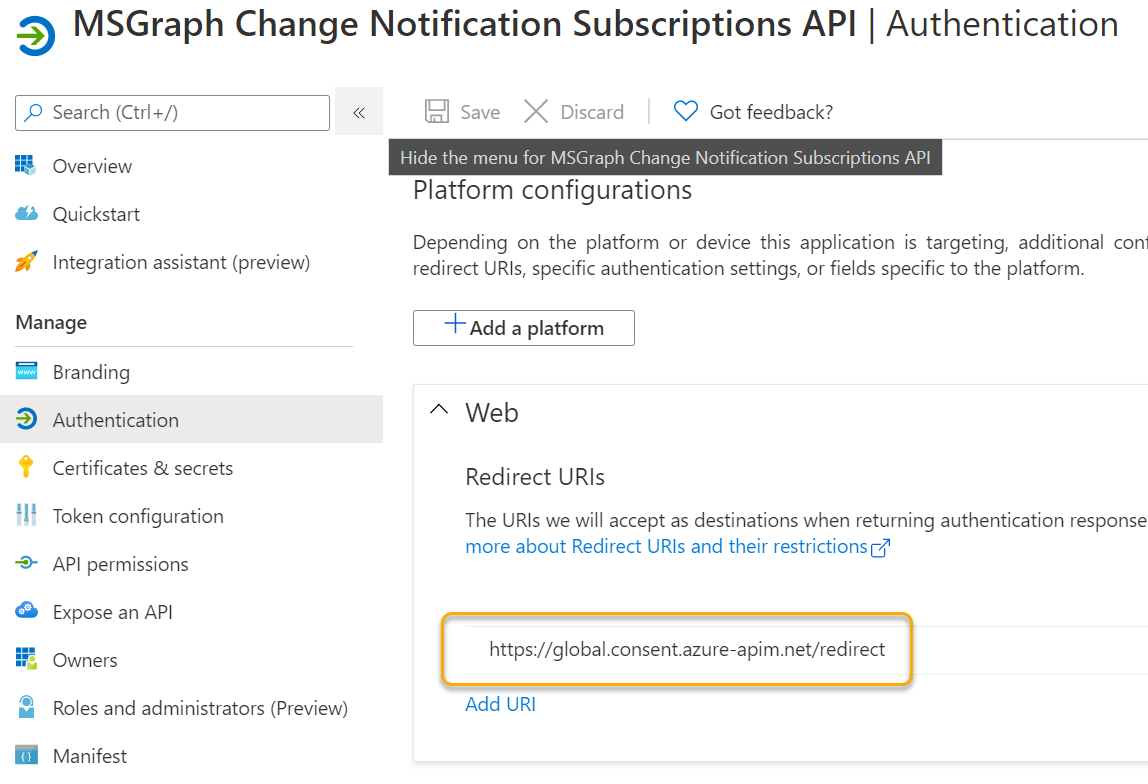
Next, go back to your Azure AD App Registration, and under Authentication add a Web platform with the Redirect URI set to the copied value from the Custom Connector.
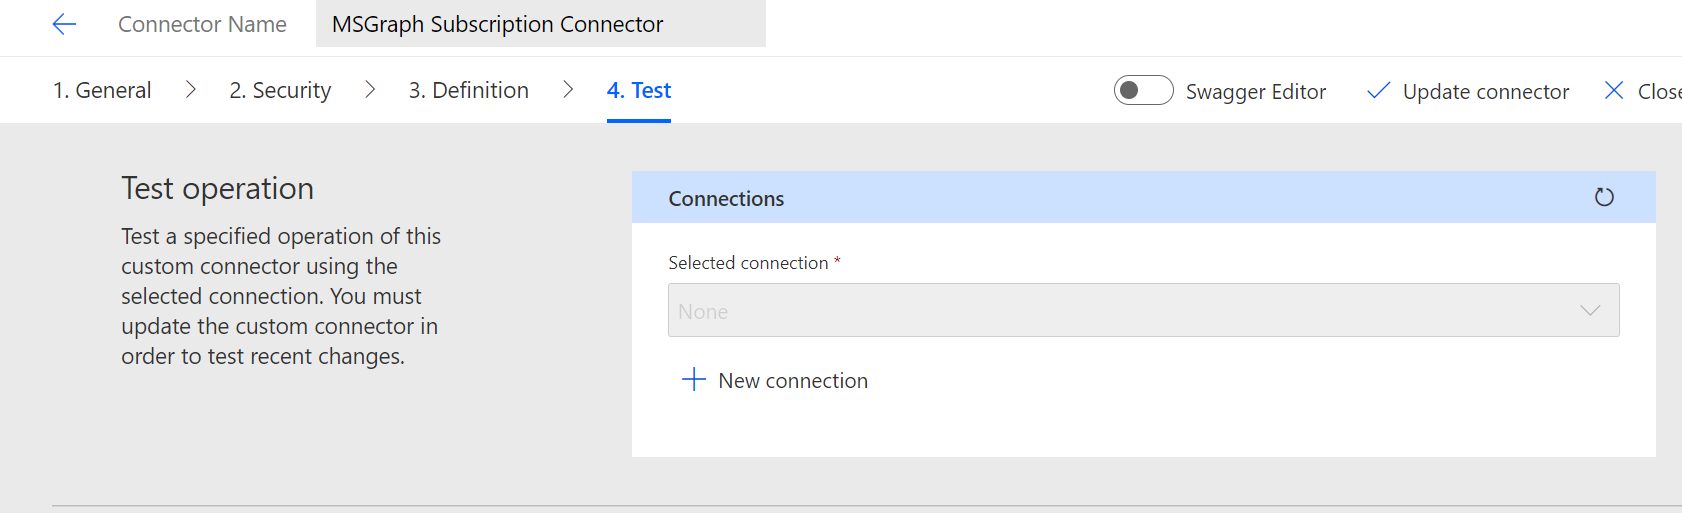
Lets verify the Custom Connector before we go to the operations. Go to 4. Test, and select to create a New connection:
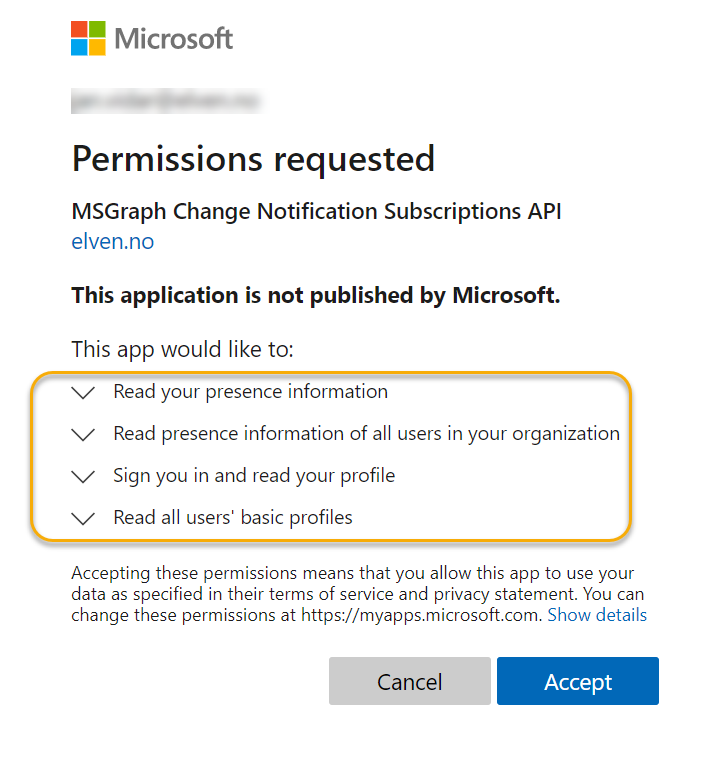
Next, you will be asked to authenticate with your Azure AD user, note that you will have to consent to the permission scopes we defined for the connector:
And you should successfully have a connection to Microsoft Graph, via the Custom Connector and our App Registration:
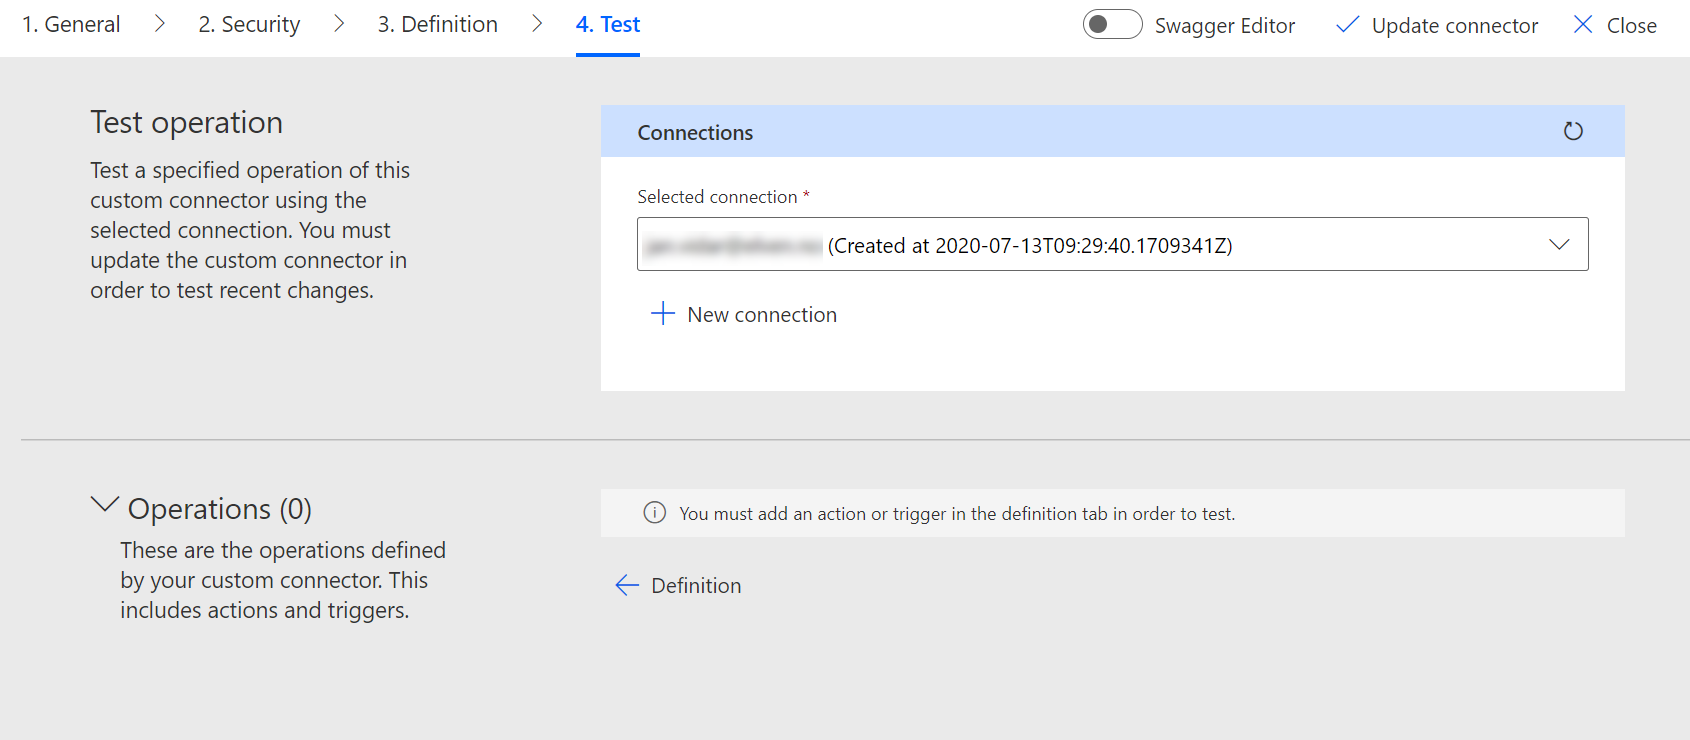
Now, we need to add operations via 3. Definition, this where we will call the Microsoft Graph API for queries regarding creating subscriptions and more.
Define Operations for the Connector
Basically this Connector will be doing the same queries like I did by using Graph Explorer in the preceding blog post plus a few more. A pro tip is to use Graph Explorer for sample requests and response when defining operations. In the following I will set up operations for:
- GET /users/{userUpn}/?$select=id: Get a specific user and id
- GET /communications/presences/{userId}: Get Presence for a specific user by id
- POST /subscriptions: Create a new subscription
- GET /subscriptions: List all my active subscriptions
- GET /subscriptions/{subscriptionId}: Get a specific subscription
- PATCH /subscriptions/{subscriptionId}: Update an existing subscription to renew
- DELETE /subscriptions/{subscriptionId}: Delete a subscription
Get a specific user and id
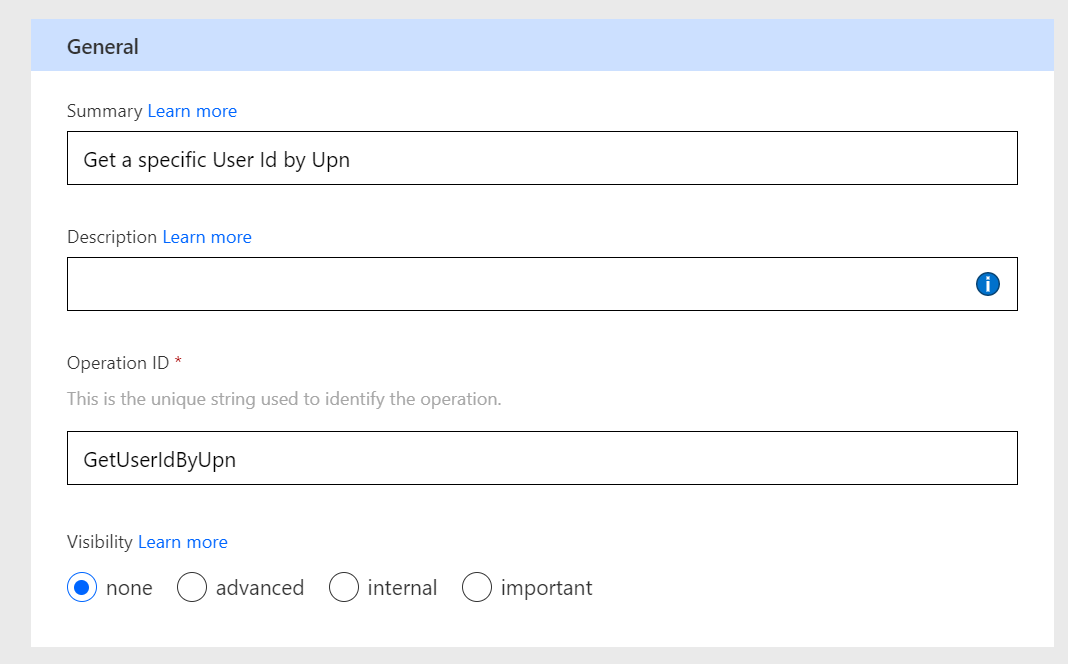
We will start with the first operation. Go to Definitions and add a new Action. Specify a summary and operation id:
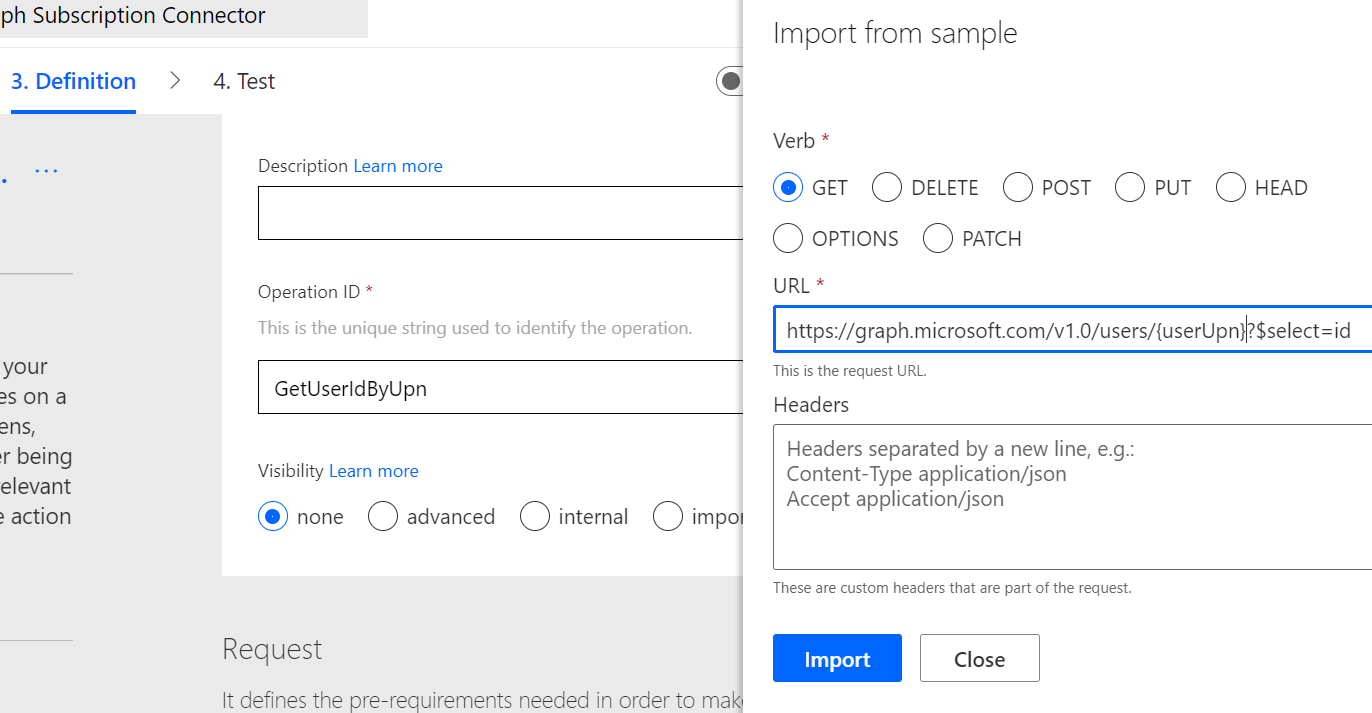
Next under Request, click on Import from sample. Specify a GET query that has the format: https://graph.microsoft.com/v1.0/users/{userUpn}?$select=id , like this and click import:
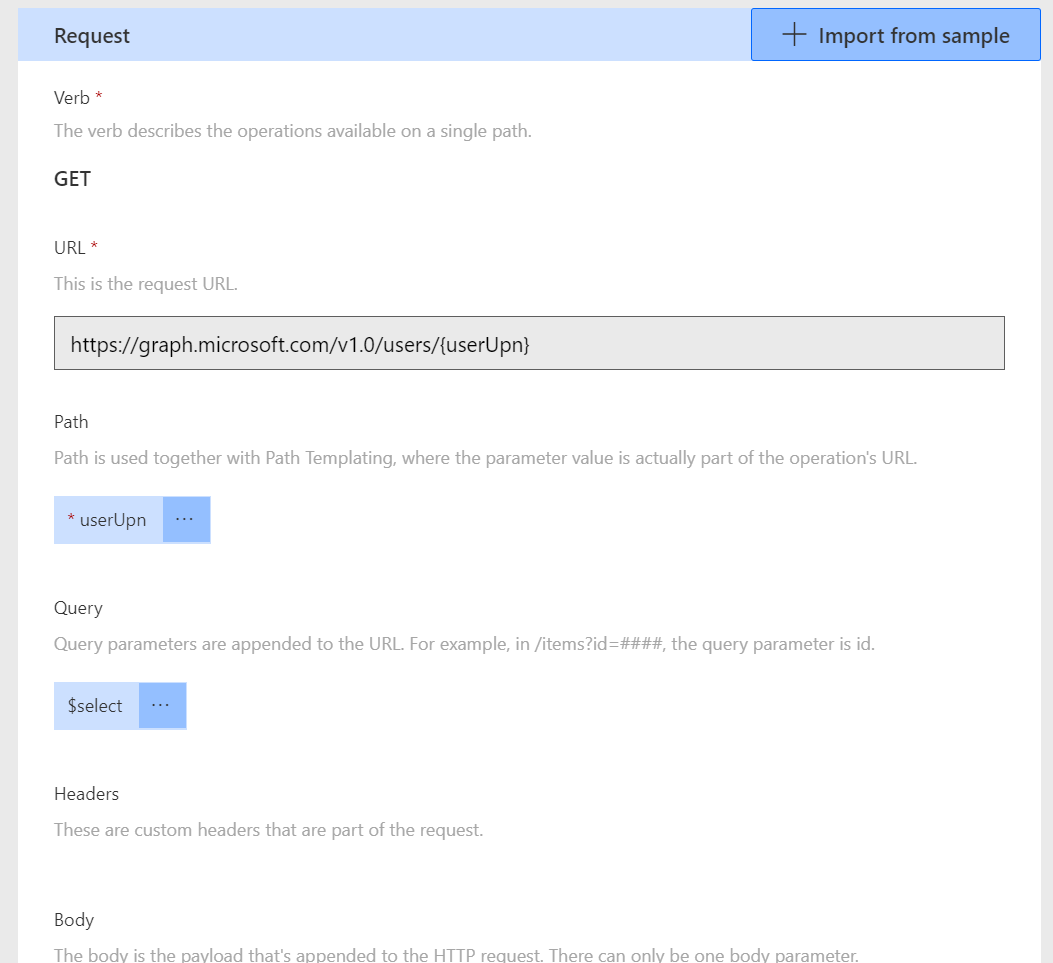
This will interpret the request URL and recognize that userUpn is a Path parameter variable and $select is a query parameter:
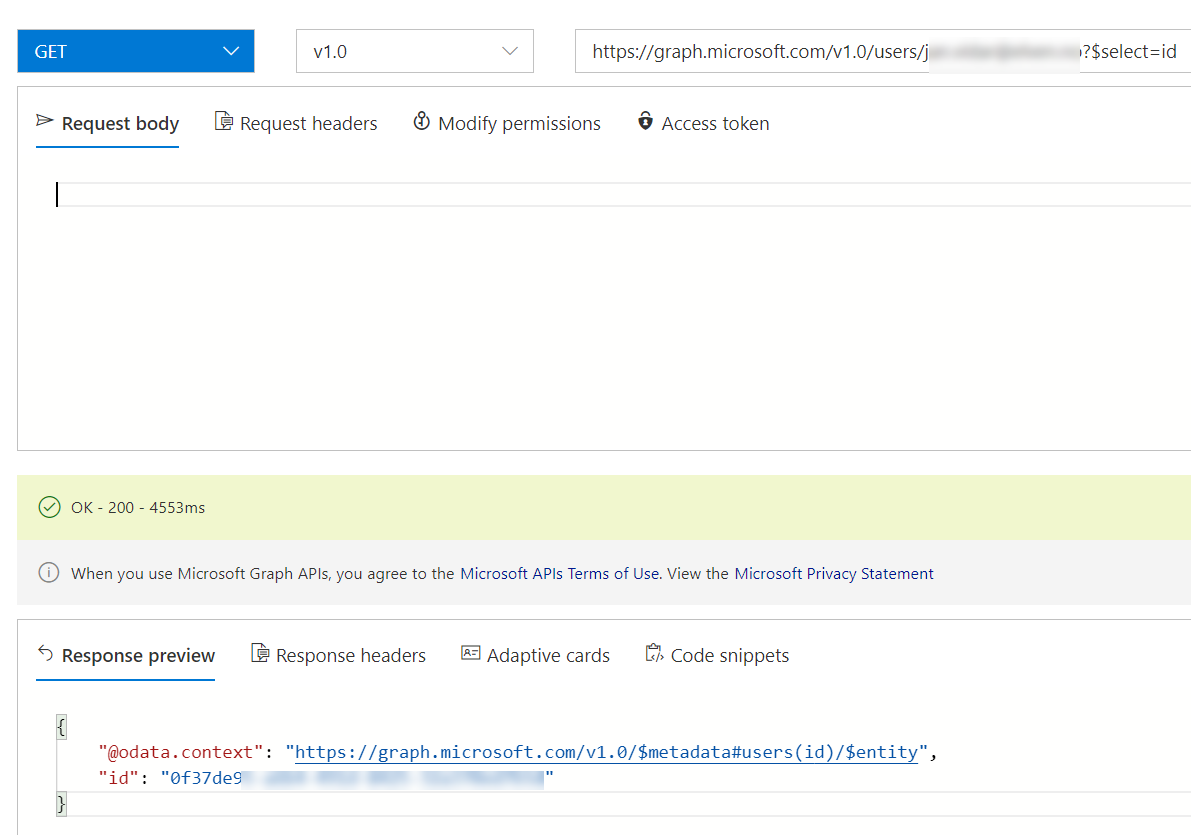
Next, go over to Graph Explorer, and run the same query specifying your own user principal name, copy the response:
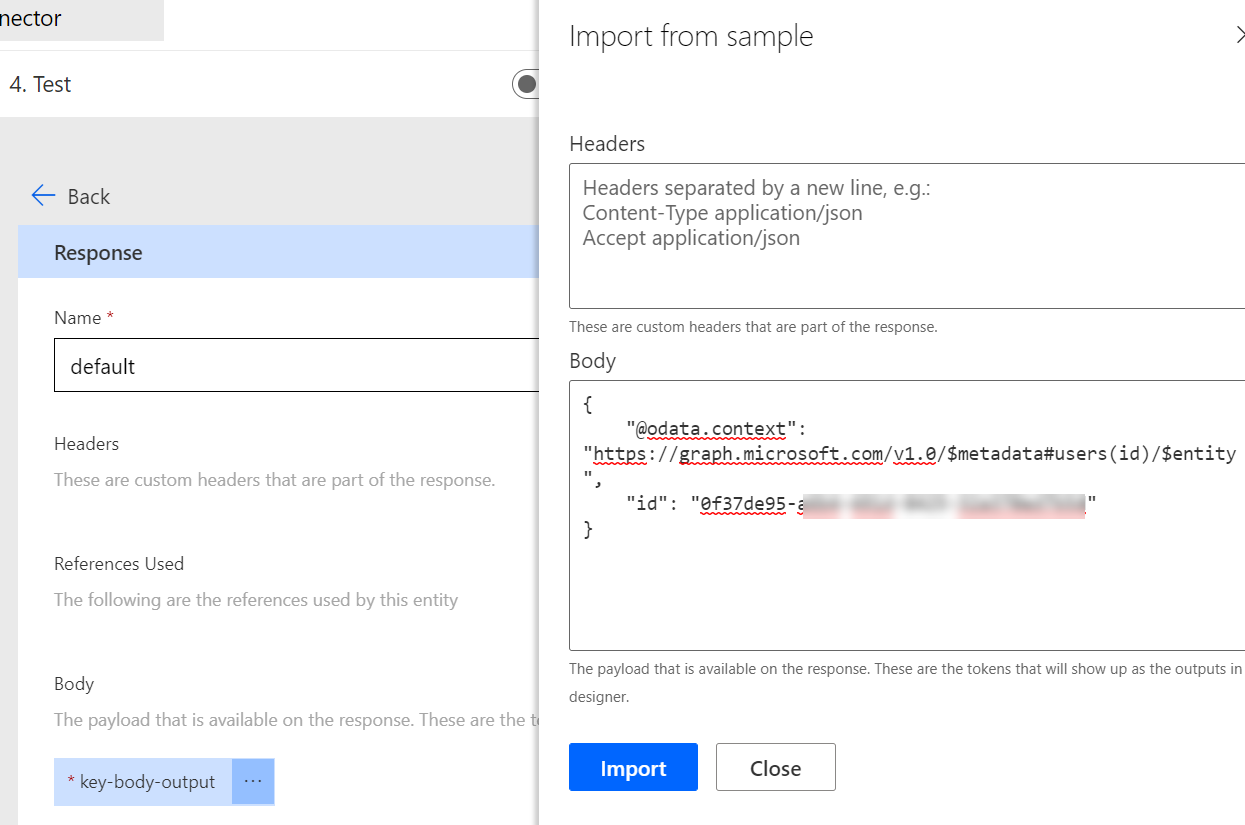
Back in the Custom Connector, under Response, click on the default response and click Import from sample. Paste the response you copied from Graph Explorer and click Import:
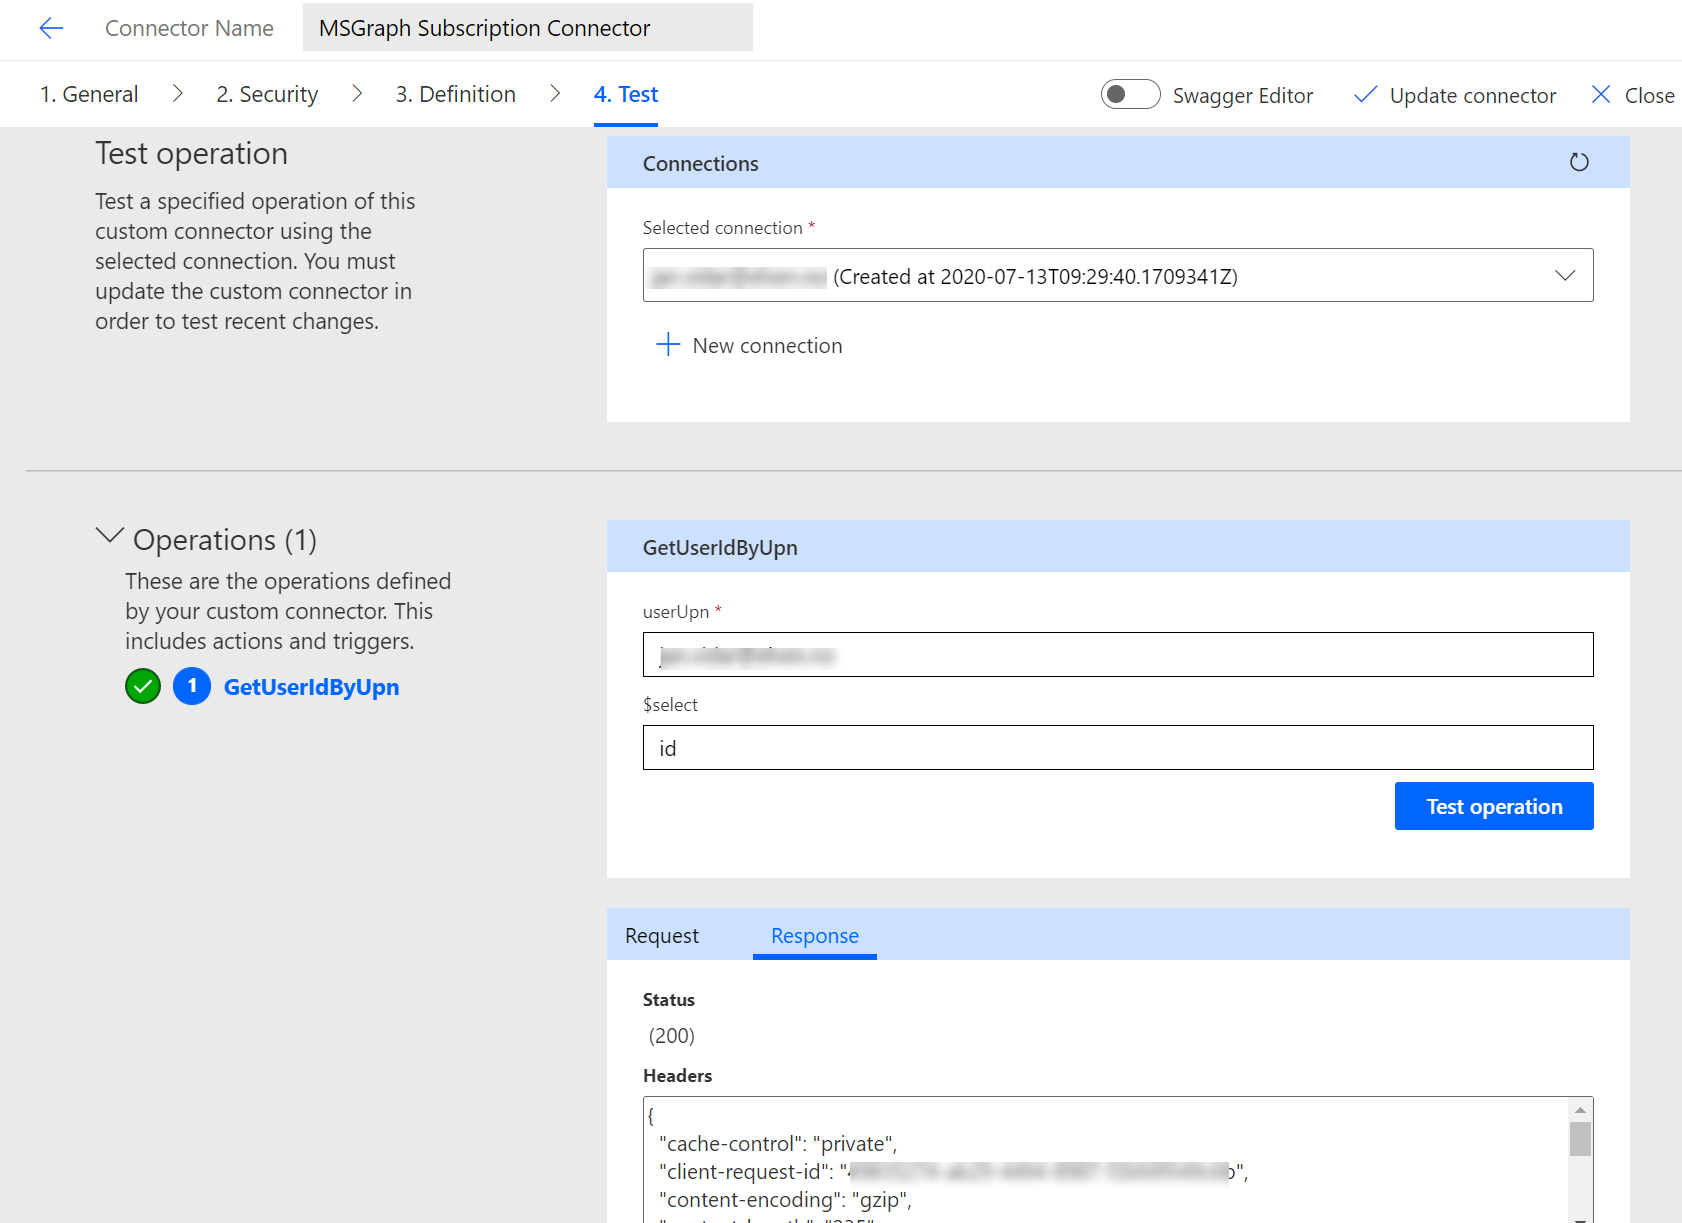
Click on Update Connector to save this action. You can now go to 4. Test. You can use the connection created earlier, and select which operation you want to test, in this case specify your Upn and to select id to be returned. Testing the operation should be successful:
With the first operation added, lets add the remaining. I will skip the screenshots in the following, just follow the same steps using the information below where I summarize the details.
Get Presence for a specific user by id
- Action Summary: Get Presence for User
- Action Operation Id: GetPresenceForUser
- Request Verb: GET
- Request URL: https://graph.microsoft.com/beta/communications/presences/{userId}
- Request Response: (copy example response from running this in Graph Explorer)
Create a new subscription
- Action Summary: Create Subscription
- Action Operation Id: CreateSubscription
- Request Verb: POST
- Request URL: https://graph.microsoft.com/beta/subscriptions
- Request Body:
{
“changeType”: “updated”,
“clientState”: “{MySecretClientState}”,
“notificationUrl”: “{WebhookUrl}”,
“resource”: “/communications/presences/{UserId}”,
“expirationDateTime”: “{ExpiryDateTime}”
} - Request Response: (copy example response from running this in Graph Explorer)
List all my active subscriptions
- Action Summary: Get Subscriptions
- Action Operation Id: GetSubscriptions
- Request Verb: GET
- Request URL: https://graph.microsoft.com/beta/subscriptions
- Request Response: (copy example response from running this in Graph Explorer)
Get a specific subscription
- Action Summary: Get Subscription
- Action Operation Id: GetSubscription
- Request Verb: GET
- Request URL: https://graph.microsoft.com/beta/subscriptions/{subscriptionId}
- Request Response: (copy example response from running this in Graph Explorer)
Update an existing subscription to renew
- Action Summary: Update Subscription
- Action Operation Id: UpdateSubscription
- Request Verb: PATCH
- Request URL: https://graph.microsoft.com/beta/subscriptions/{subscriptionId}
- Request Body:
{ “expirationDateTime”:“2020-07-14T00:00Z” } - Request Response: (copy example response from running this in Graph Explorer)
Delete a subscription
- Action Summary: Delete Subscription
- Action Operation Id: DeleteSubscription
- Request Verb: DELETE
- Request URL: https://graph.microsoft.com/beta/subscriptions/{subscriptionId}
- Request Response: Leave default as is.
Custom Connector Summary
By now you should have 7 actions defined, remember to test to verify that they work as expected:
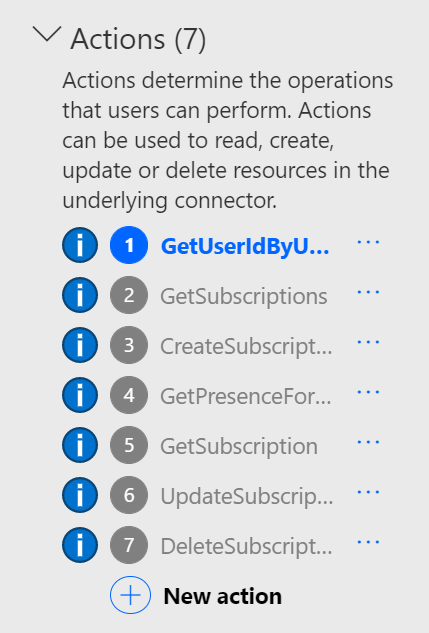
NB! Currently I get an error when running GET /subscriptions/{id}, even though it is a correct subscription id and following offical docs: https://docs.microsoft.com/en-us/graph/api/subscription-get?view=graph-rest-beta&tabs=http . I’ll leave the action in the connector but testing it gives me an “internal storage error” both in Graph Explorer and testing with this Custom Connector.
As mentioned earlier, I’ll provide you a link to the complete swagger definition of this connector and its actions here on my GitHub repository:
The Custom Connector can now be used in Power Automate Flows and Power Apps, so in the next section I will start looking into some logic for managing subscriptions.
Choosing a Configuration Source
First we need to look into some kind of configuration source for your Subscriptions to Graph Change Notifications. Consider the following:
- When you create a subscription, you need somewhere to store the subscription id if you want to be able to update/renew or delete an existing subscription.
- If you want to continuously renew a subscription, you might want to set an end date for how long you want a subscription to exist.
- You will want to store the webhook url for where to send the change notifications, and possibly being able to change that if needed.
- You will want to store the resource/resources you want receive change notifications for and for what type of change.
- It makes sense to store the clientstate secret so that can be re-used when creating/re-creating subscriptions.
The next question is, where should I store this configuration info? There are some options. If you have access to an Azure subscriptions, you could of course store this in an SQL Database or Cosmos DB to name a few common data stores, or maybe Azure Key Vault for some of the secret info. I want to focus on options typically available for end users though, so it makes sense to go more in the direction of Microsoft 365 services. You could use CDS, Common Data Service, part of the Power Platform and using solutions and custom entities, but that would require admin assistance in either configuring this for you, or giving your end-user permission roles to do this yourself. In addition, CDS will available for all users with access to the environment, so creating a dedicated environment should also be part of that.
In this blog post I will go for the simplest option, I will store it in a list, using SharePoint Online Lists. Another alternative could be to use Microsoft Lists. I will do this by creating a dedicated Teams, and go to the SharePoint Online teams site, and create the list from there.
So I have prepared this now, and my list now contains the following columns, subscriptionId, changeType, clientState, notificationUrl and resource all being field type single line of text, and an endDateTime wit field type of Date with Time:
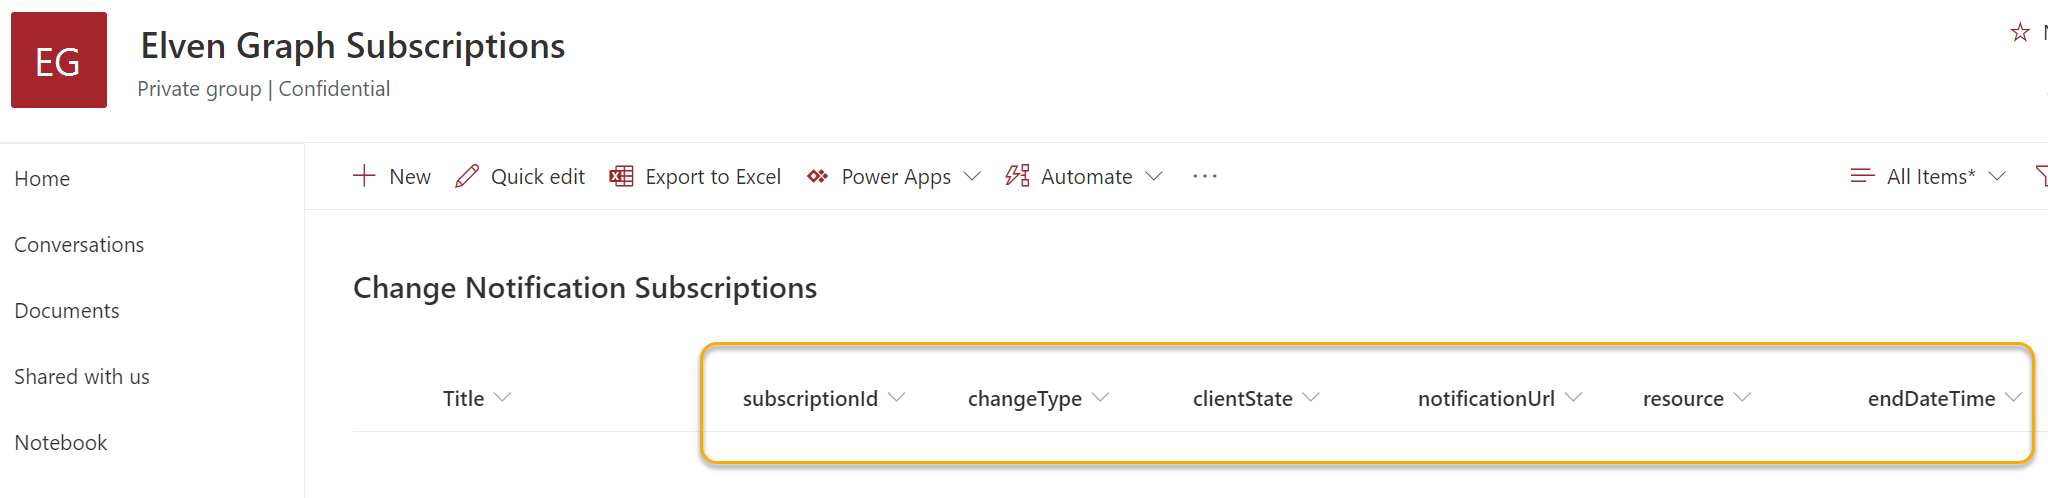
This will be my configuration store for the following Flows and PowerApps that will mange my subscriptions using the Custom Connector created earlier.
Creating the PowerApp for Managing Subscriptions
My main user interface for managing Graph Subscriptions will be a PowerApp. From this PowerApp I will call actions from the Custom Connector directly, or call Power Automate Flows for where I will have more steps and logic.
Note that this PowerApp can be used to manage all sorts of Microsoft Graph Subscriptions you might have, not just for Team Presence API which is the main focus in this example but for other resources also.
Log in to make.powerapps.com to get started, and follow the general steps in the sections below.
Create a blank canvas app and main screen
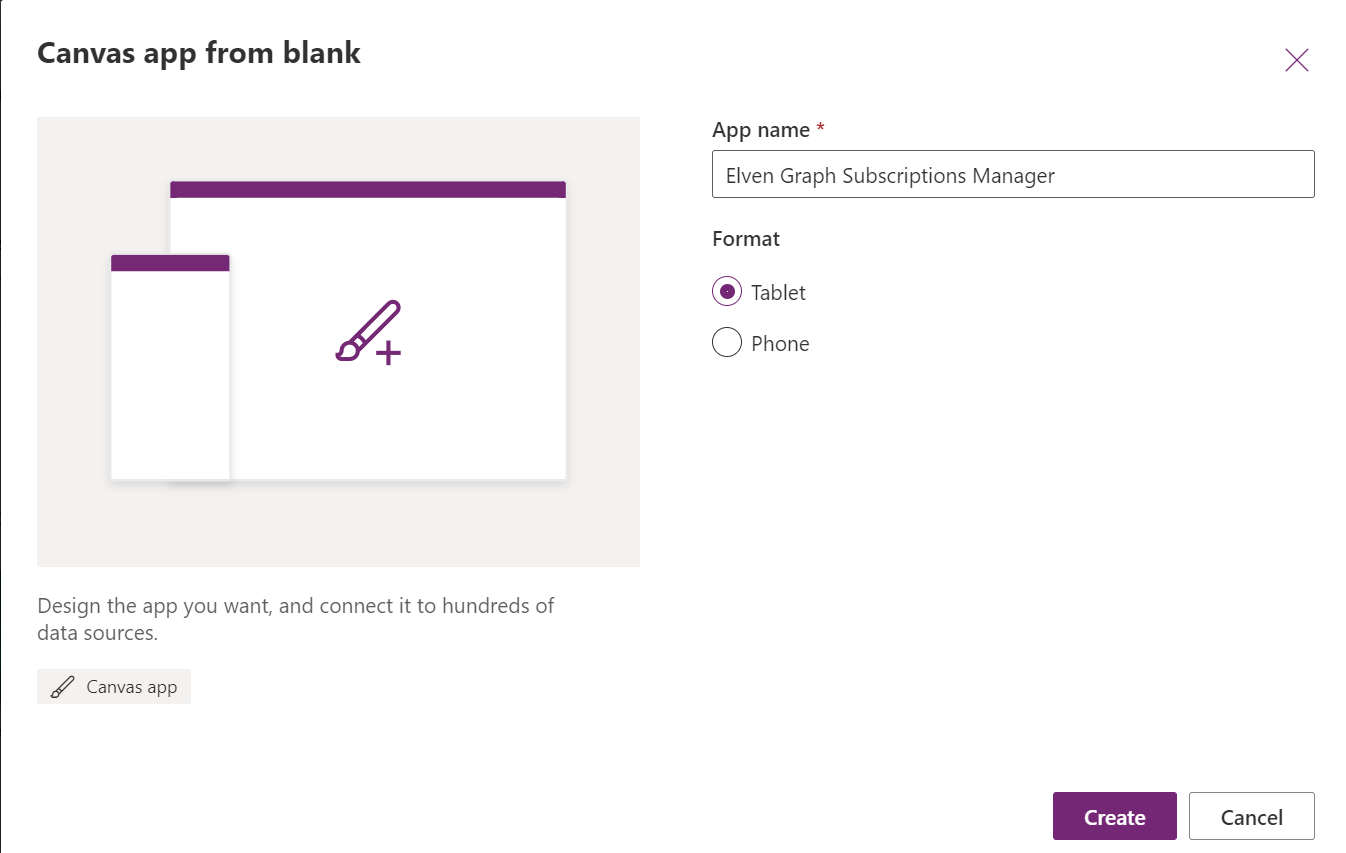
Select to create a new Canvas app from blank, give it a name like below, and select format. I will use Table format because I will mainly use this from my PC:
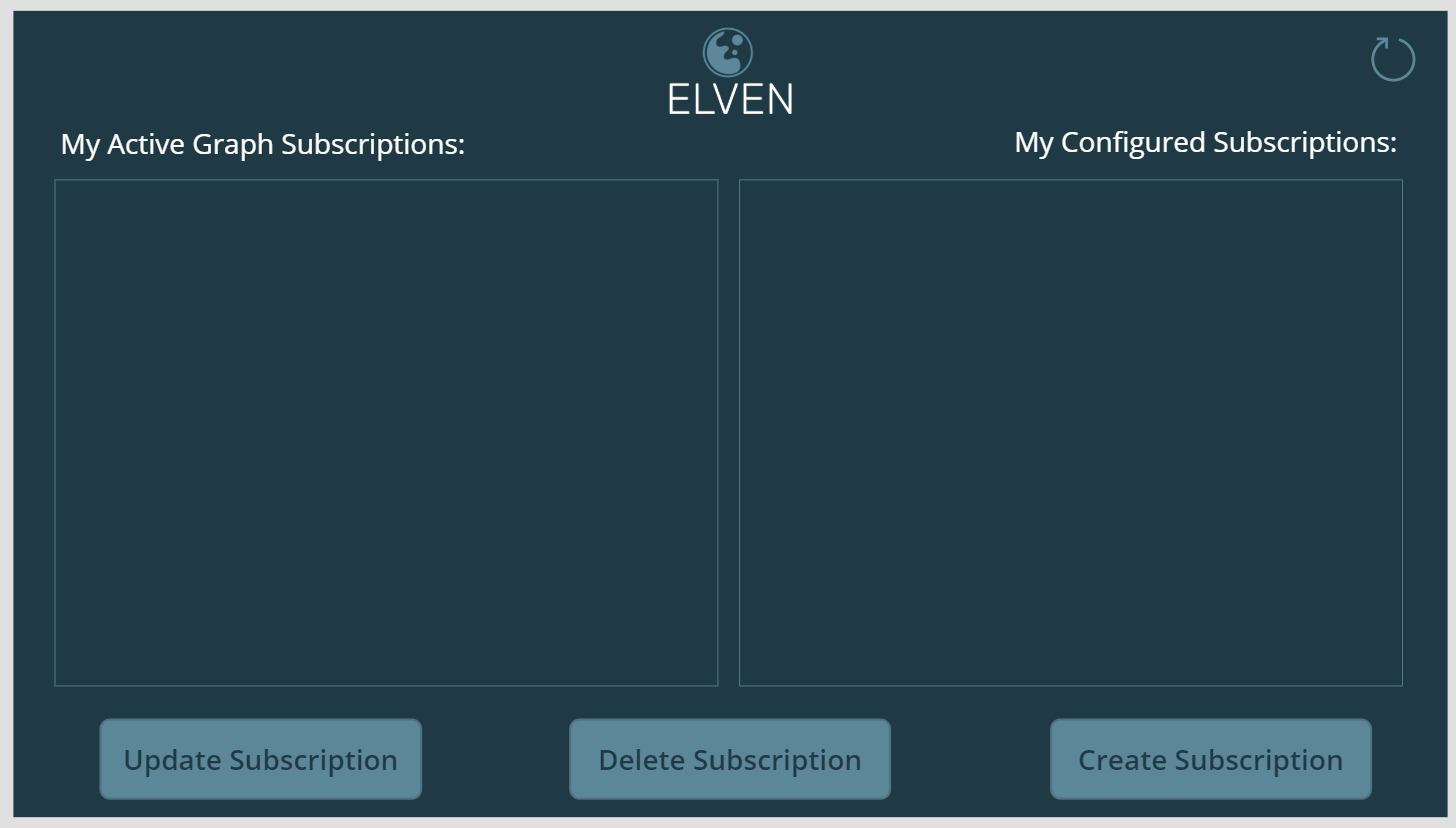
Next in the PowerApps creator studio you can set a Theme for your app, or use your own custom colors and backgrounds. Then you can start adding controls to the canvas. In the below image I have added a custom background, my own logo, some labels for headings and some buttons I will add actions to later. I have also added an icon for later being able to manually refresh.
This main screen will list my active Graph subscriptions on the left part, this will be queried from GET https://graph.microsoft.com/beta/subscriptions . The right part will be from my configuration source, which is the SharePoint list.
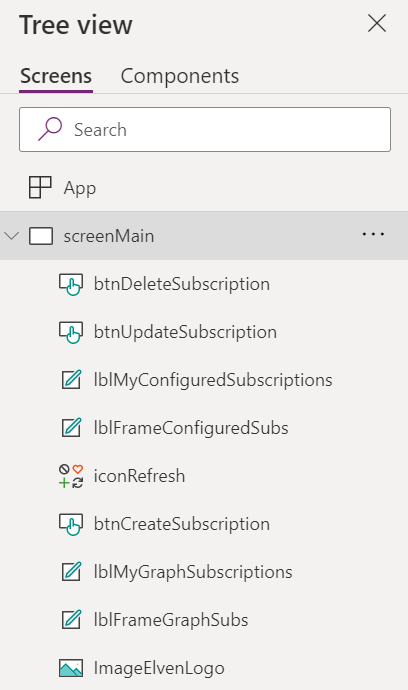
It is also a good practice to name the controls using your own naming convention, this is mine for the screen above:
Add Data sources to the Main screen
Next we will start adding the data sources. Go to the View menu, select Data sources, and click “Add data”. Search for “SharePoint” and add the following data source:
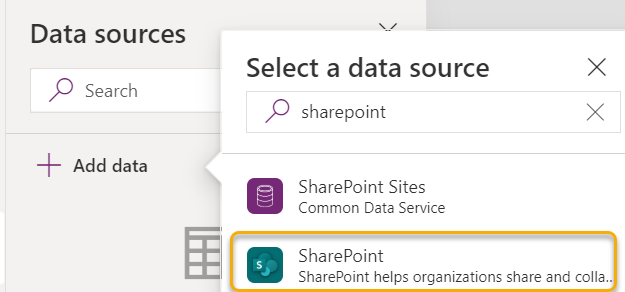
Connect with your user, or create a new connection if needed:
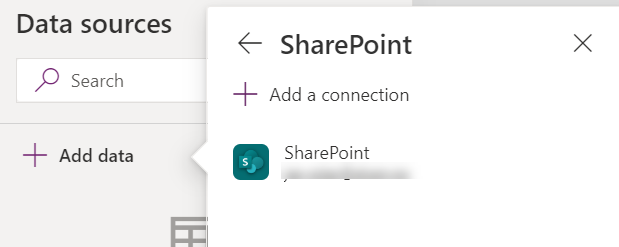
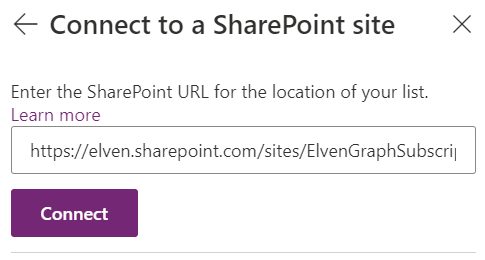
Next paste in the SharePoint URL for the SharePoint site where you created the list earlier, and click Connect:
Choose the list:
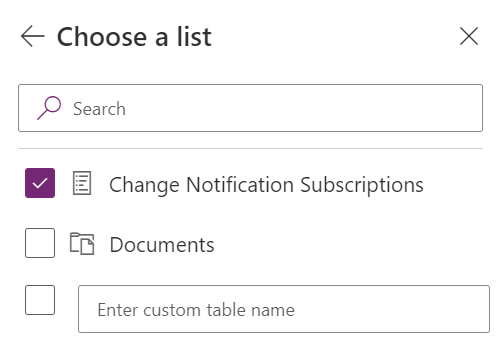
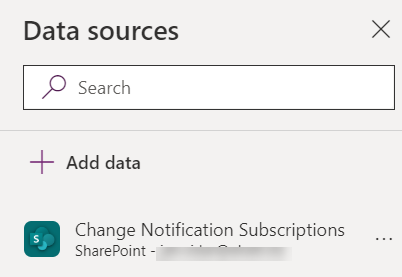
We now have a data source we can use for this list in the PowerApp:
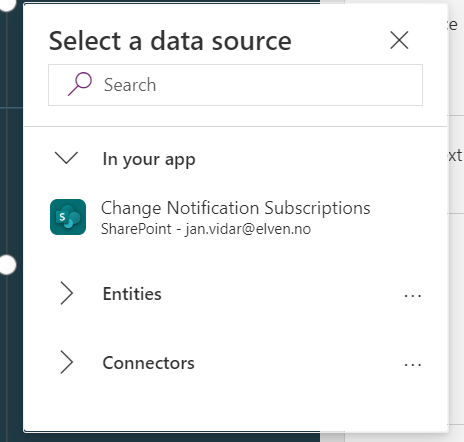
Next, add a new control to your app, click Insert and under Layout find the “Data table (preview)” control. This will then be placed on your canvas, and you are prompted to select a data source. This is where I select the SharePoint list:
The data table control should now be automatically configured with the fields you created in the list:
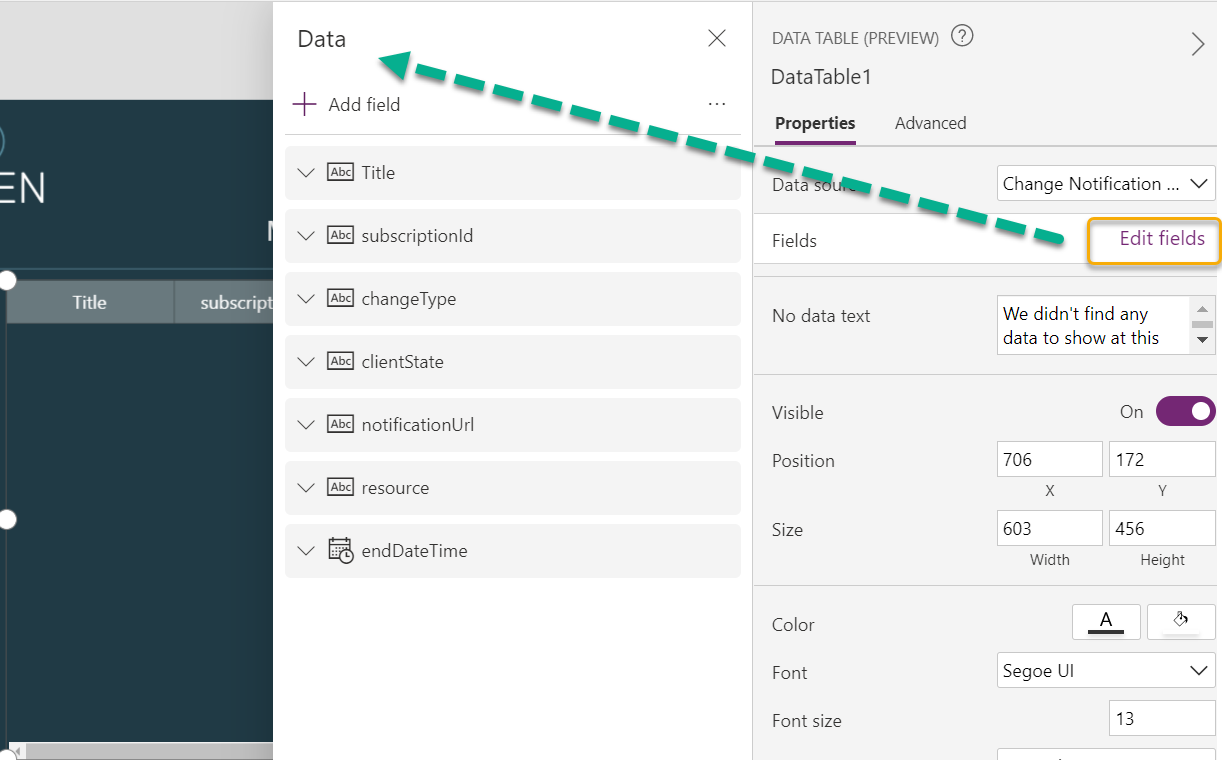
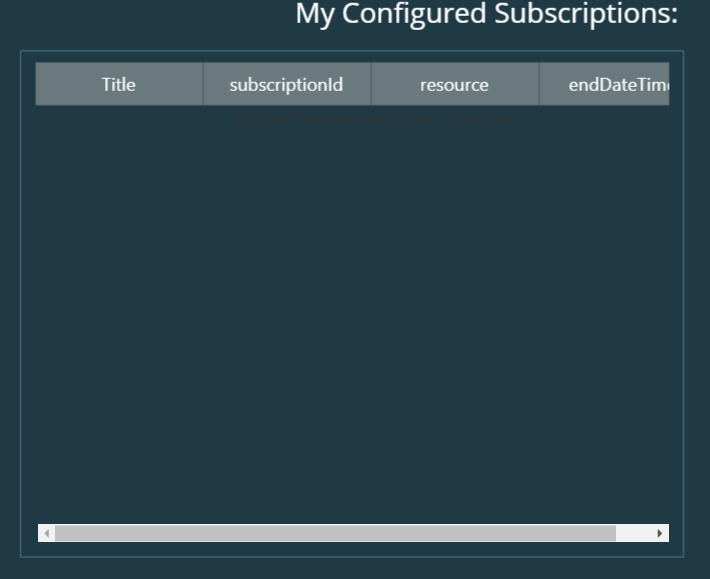
To make the data table smaller I will remove some of the fields to display, I’ll remove changeType, clientState and notificationUrl. This leaves me with the following data table which I place under the configured subscriptions part. The list is now empty, but that will be filled in later when I create subscriptions:
Now lets proceed to get the actual Graph subscriptions. Add a new data source, this time search for the name of the Custom Connector we added earlier:
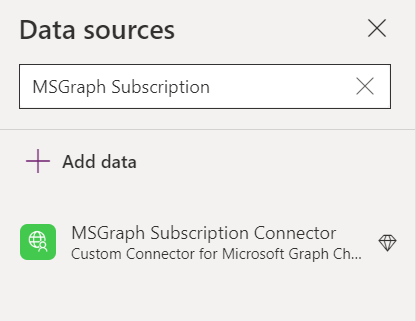
Add that source and choose a connection, and the data source should be added alongside the SharePoint data source:
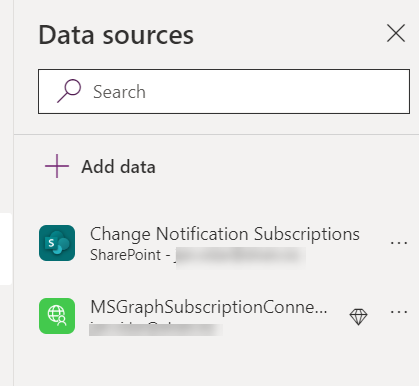
We will add another Data table control to the Canvas, select Insert and Data table, this time selecting the Custom Connector as data source.
The Items property for the Data table needs to be set as: (MSGraphSubscriptionConnector.GetSubscriptions()).value, which will return a data table for every registered Graph subscription. This should look like this:

After that you can configure the fields to display for the data table, I have added the id, resource and expirationDateTime fields, and placed this data table under the “My Active Graph Subscriptions” part:
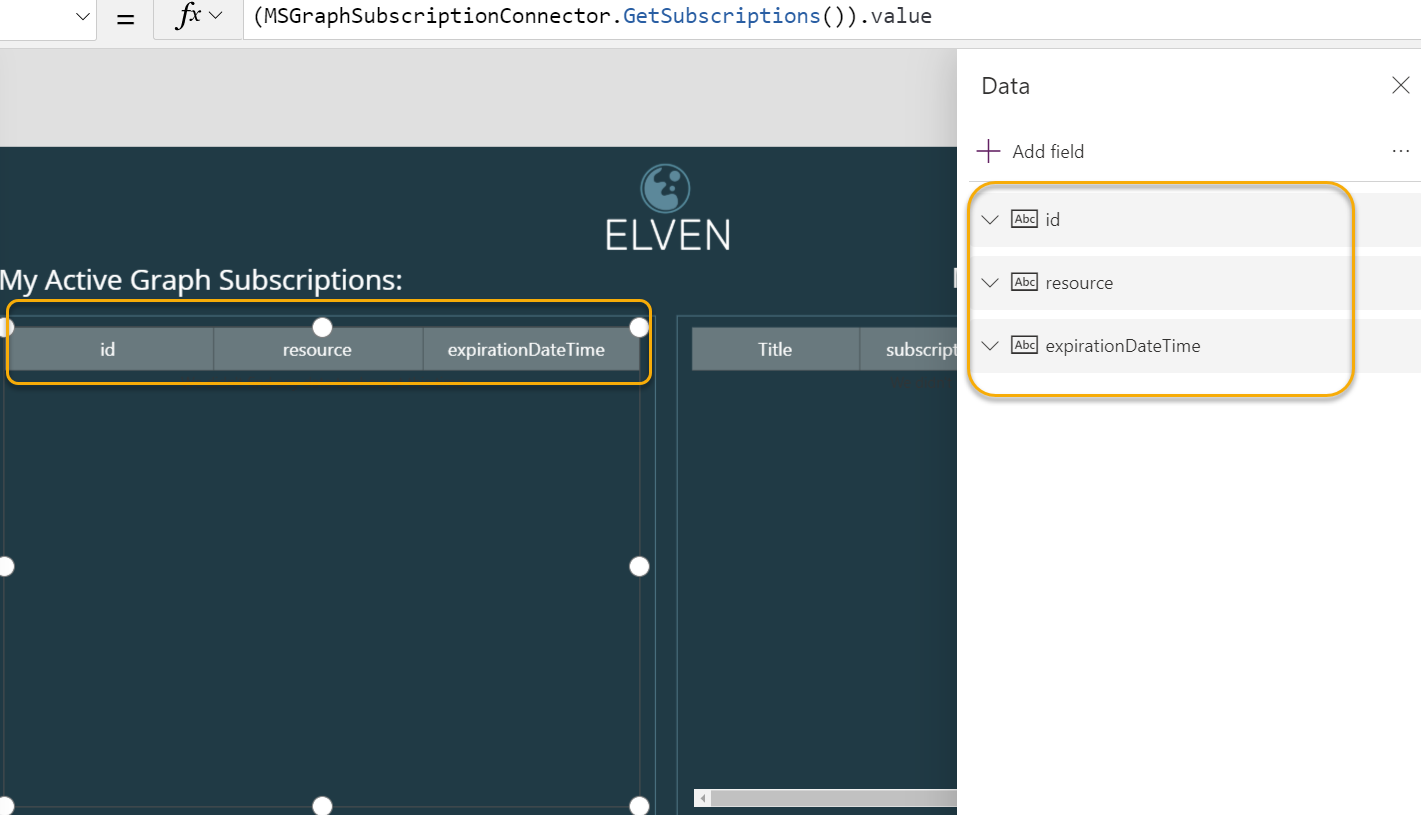
I now have the data connections I need for the main screen. The next part is to add actions to the buttons, but before that I will add another screen for where to specify more details for creating a subscription.
Before you proceed, select the main screen from the Tree view and duplicate screen:
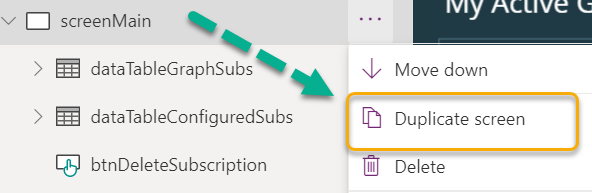
I will use this copied screen as starting point for adding the next set of controls.
Creating a Screen for adding new subscriptions
In this screen I have added controls on the left side where you can type in an user principal name, get the user id and get the presence for that user. In this way I can check that I have the correct permissions required for subscribing to change notifications for the specified user.
On the right part of the screen I have added controls for adding a new Graph subscription.
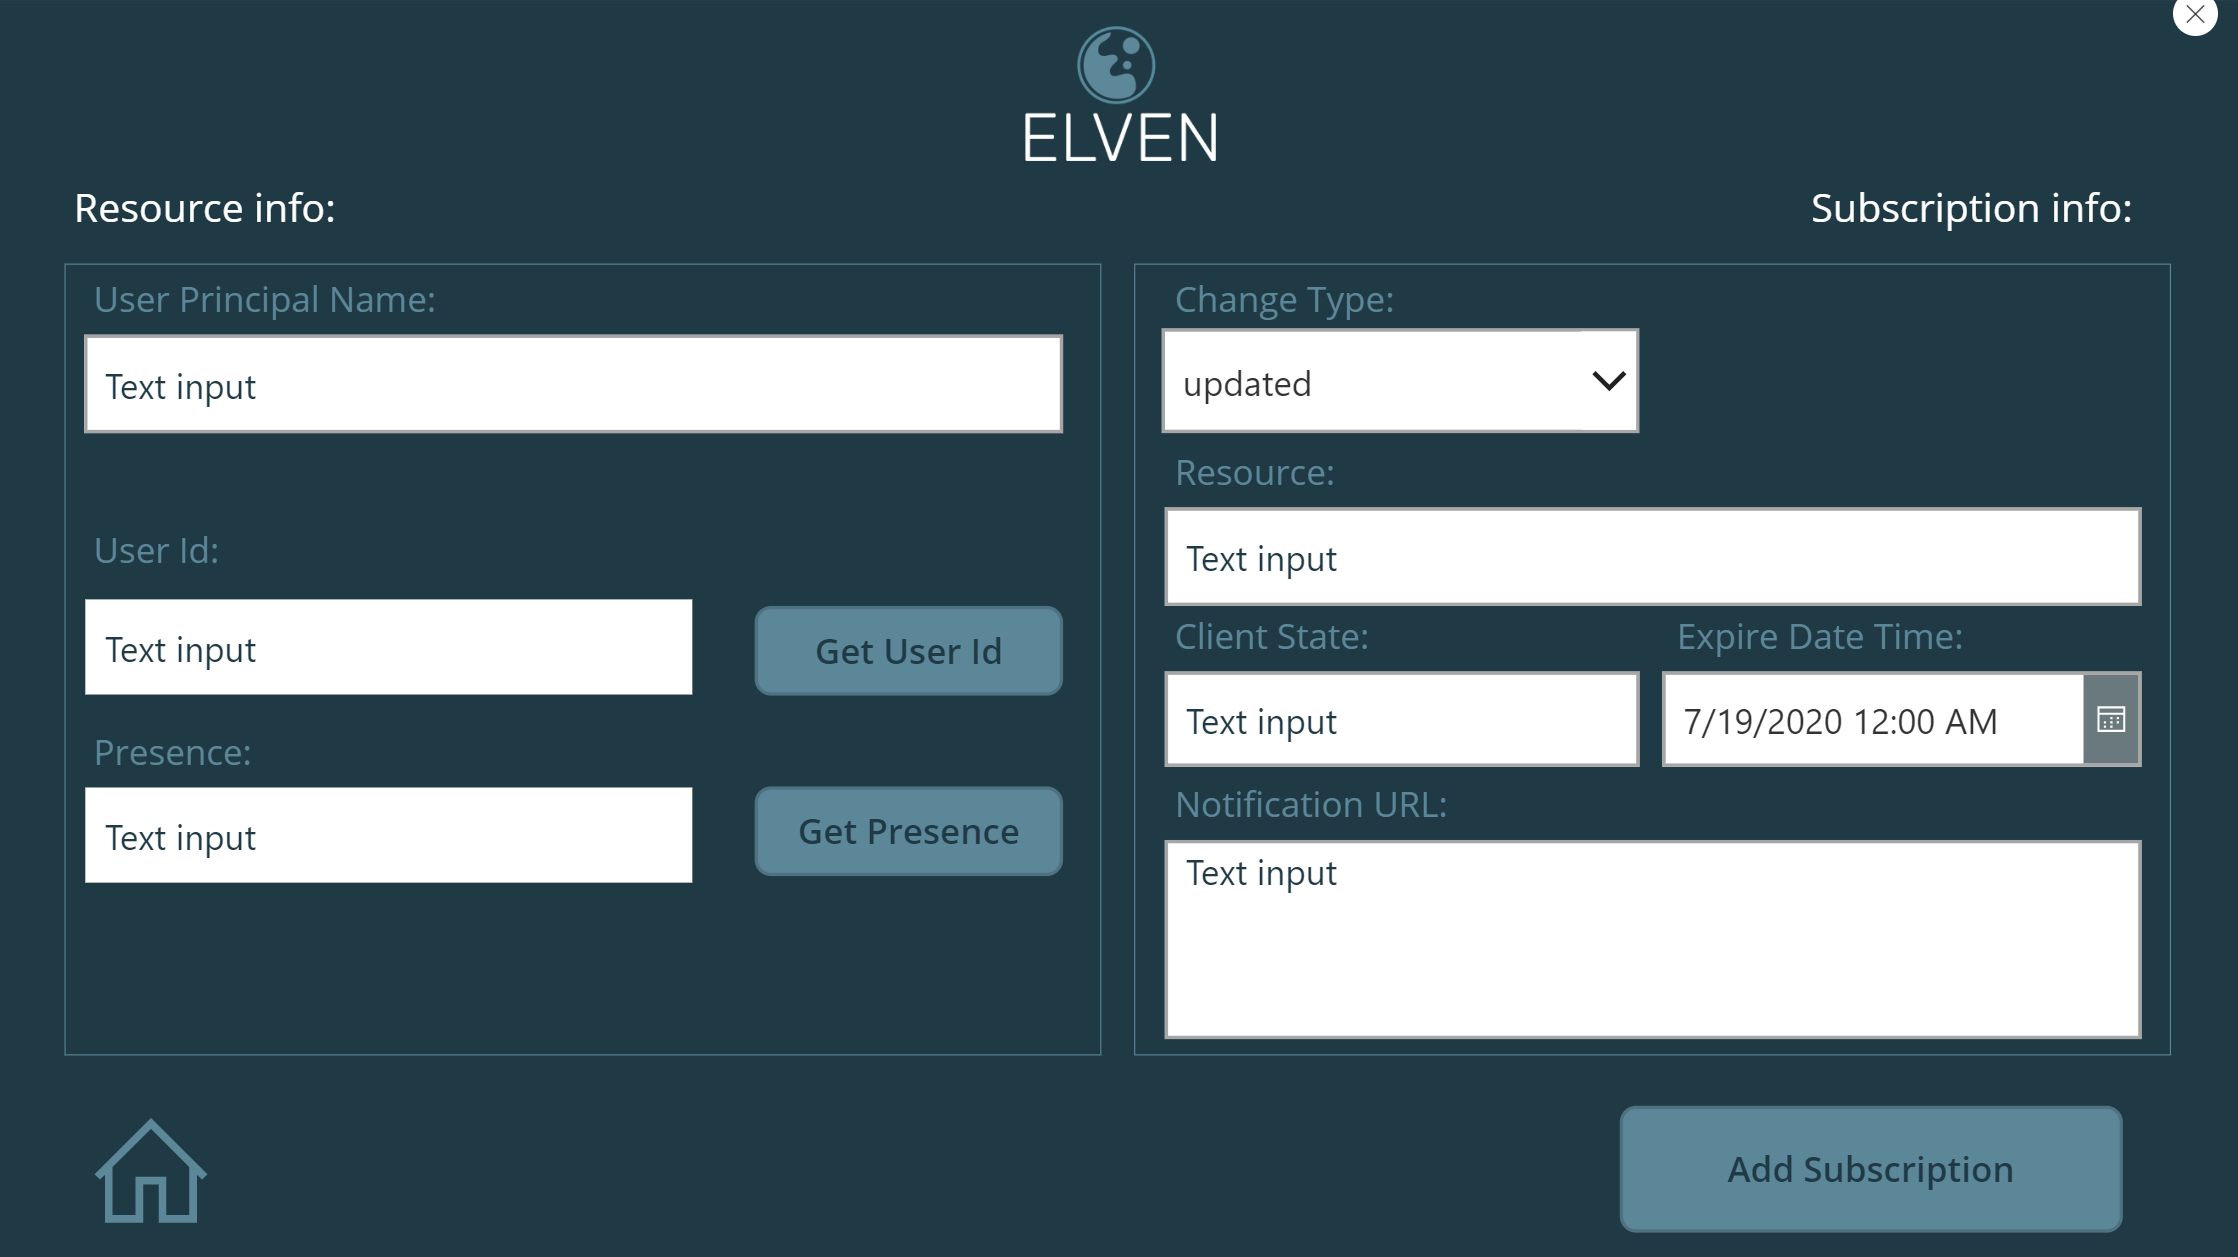
Most of the controls above is label and textbox controls. For User Id and Presence I have change the Display mode to View, and for Notification URL I have changed from single line to multi line.
The change type is a combo box, where I have added to the Items property: [“updated”,“created”,“deleted”]. The expire date time is a date picker control showing date and time in short format.
At the bottom left I have added an icon with a home symbol, and on the OnSelect event for that icon I have added a navigation back to the home screen:

Similarly, on the Home screen I have added a navigation on the “Create Subscription” button to the create subscription screen:

In the next section we will add some actions to the buttons.
Getting User Id and Presence
We will start on the left side of the screen, getting user id and presence for that user. When we created the Custom Connector earlier we created actions just for this scenario.
I will use the UpdateContext function in PowerApps to save the output of the called actions to a variable, and then use that variable for the text input property.
Select the “Get User Id” button, and type the following on the OnSelect event:
UpdateContext({UserId: MSGraphSubscriptionConnector.GetUserIdByUpn(txtUserUpn.Text)})
Like the following:

This will create/update my variable “UserId”, by calling the Custom Connector action GetUserIdByUpn using the input parameter that is the text value from the txtUserUpn text input box. When I click on this button, it will run a query against Microsoft Graph the will return a user record object where I can retreive the .id property.
Next, set the Default propery of the txtUserId text input to UserId.Id:
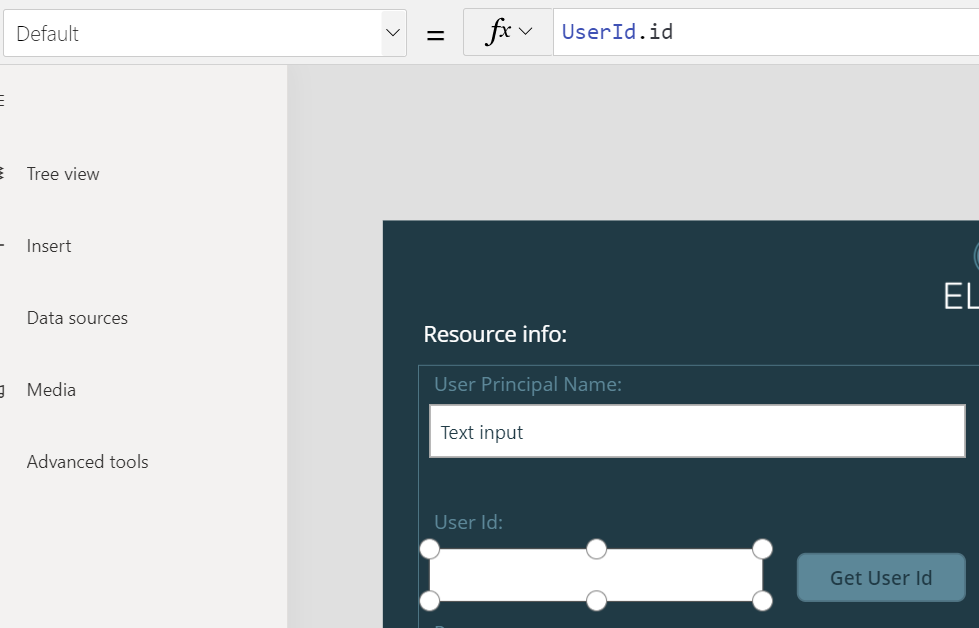
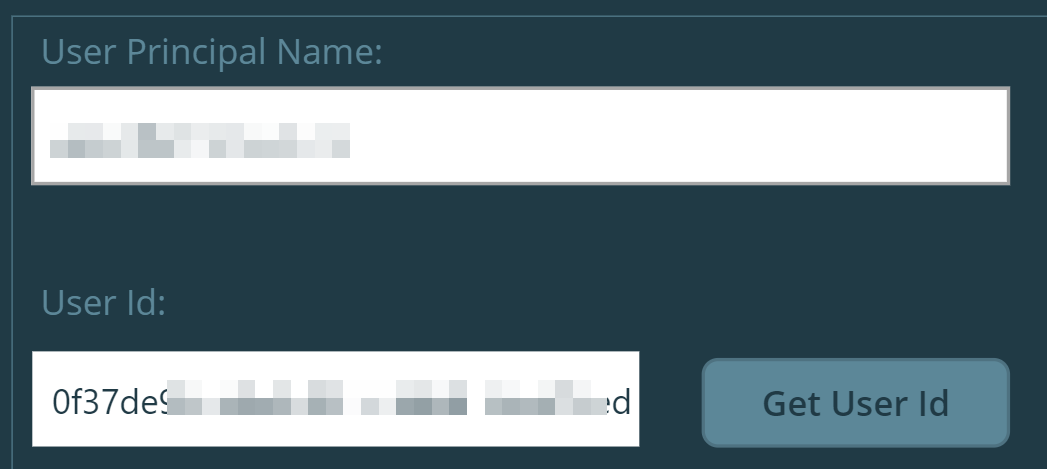
We can test this right away, click on Preview the App (F5), and type in an existing upn, and press the Get User Id button, it should return the id for your user. You can try several different user upn’s also:
We will do something similar on getting presence. On the OnSelect event for the “Get Presence” button:
UpdateContext({UserPresence: MSGraphSubscriptionConnector.GetPresenceForUser(txtUserId.Text)})
Then set the Default property for the Presence text input to:
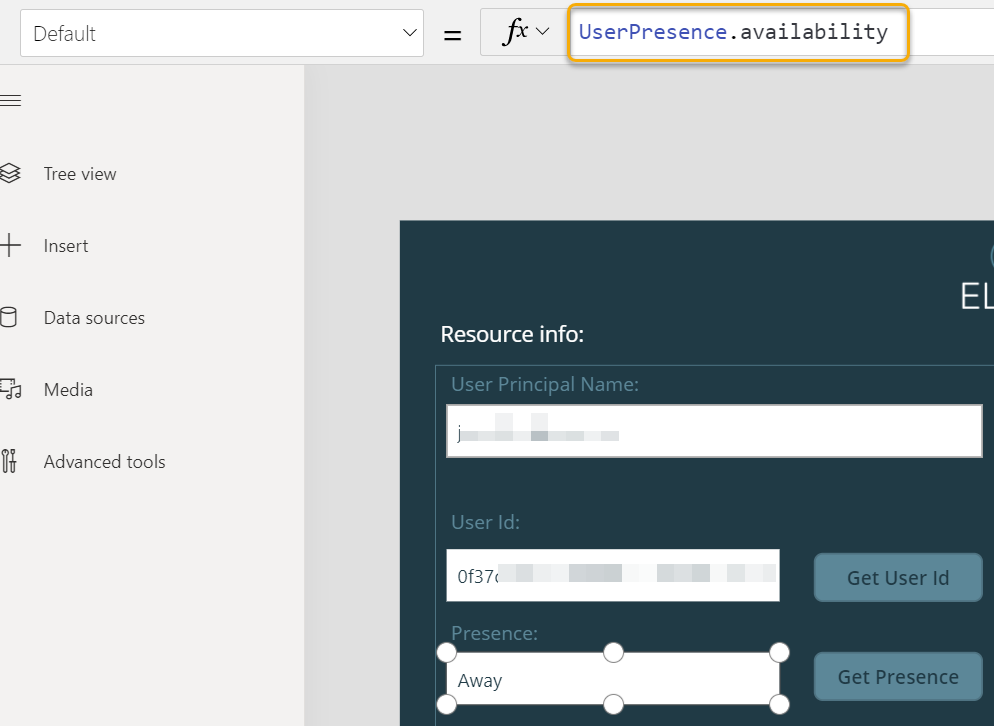
When testing you should be able to get the specified users presence by user id.
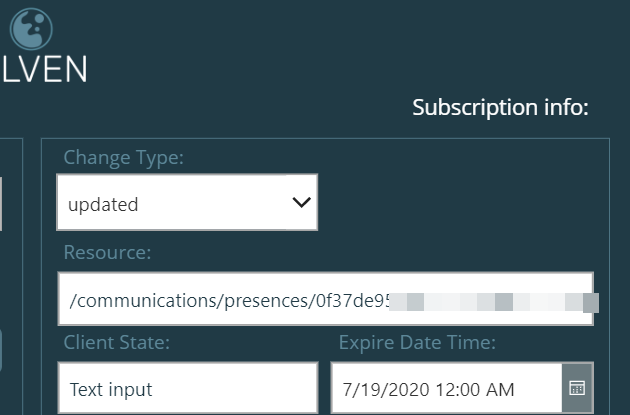
I’ll add one more thing, on the right side of the screen, for the resource text input, add the following to the Default property:

This will pre-populate the resource based on the user I looked up on the left side, which will come in handy when I create the subscription later:
In the next part I will create the logic behind adding a new subscription, and this will be done using a Flow, as I will have several steps in this logic.
Creating Flow for adding new Graph Subscriptions
This Flow will be triggered from the PowerApp above, and use the Custom Connector action for adding a new Graph Subscription. In the same Flow I will also save the configuration of the subscription to my SharePoint list.
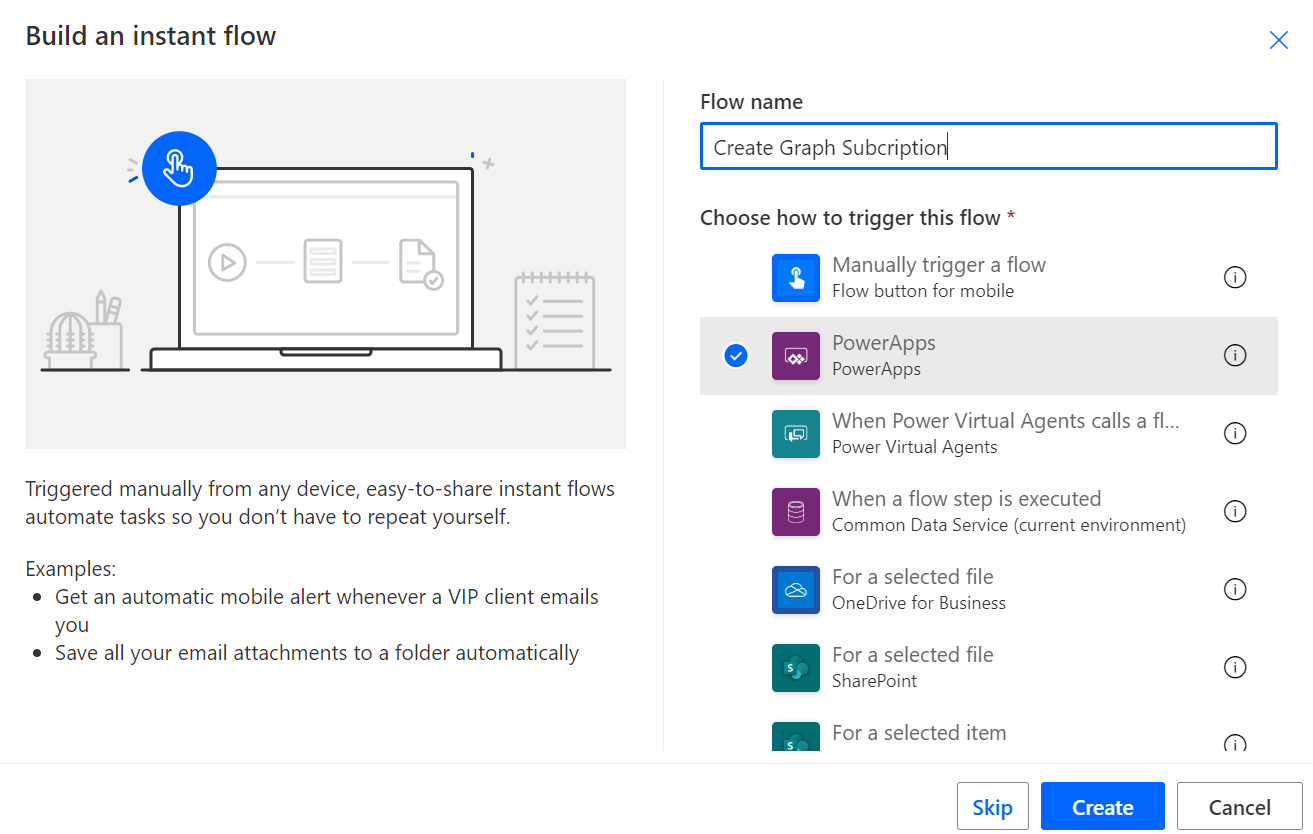
Start by going to flow.microsoft.com , select Create, Start from blank and select Instant flow. Tyoe a name for the Flow, for example “Create Graph Subscription”, and select PowerApps as trigger as shown below:
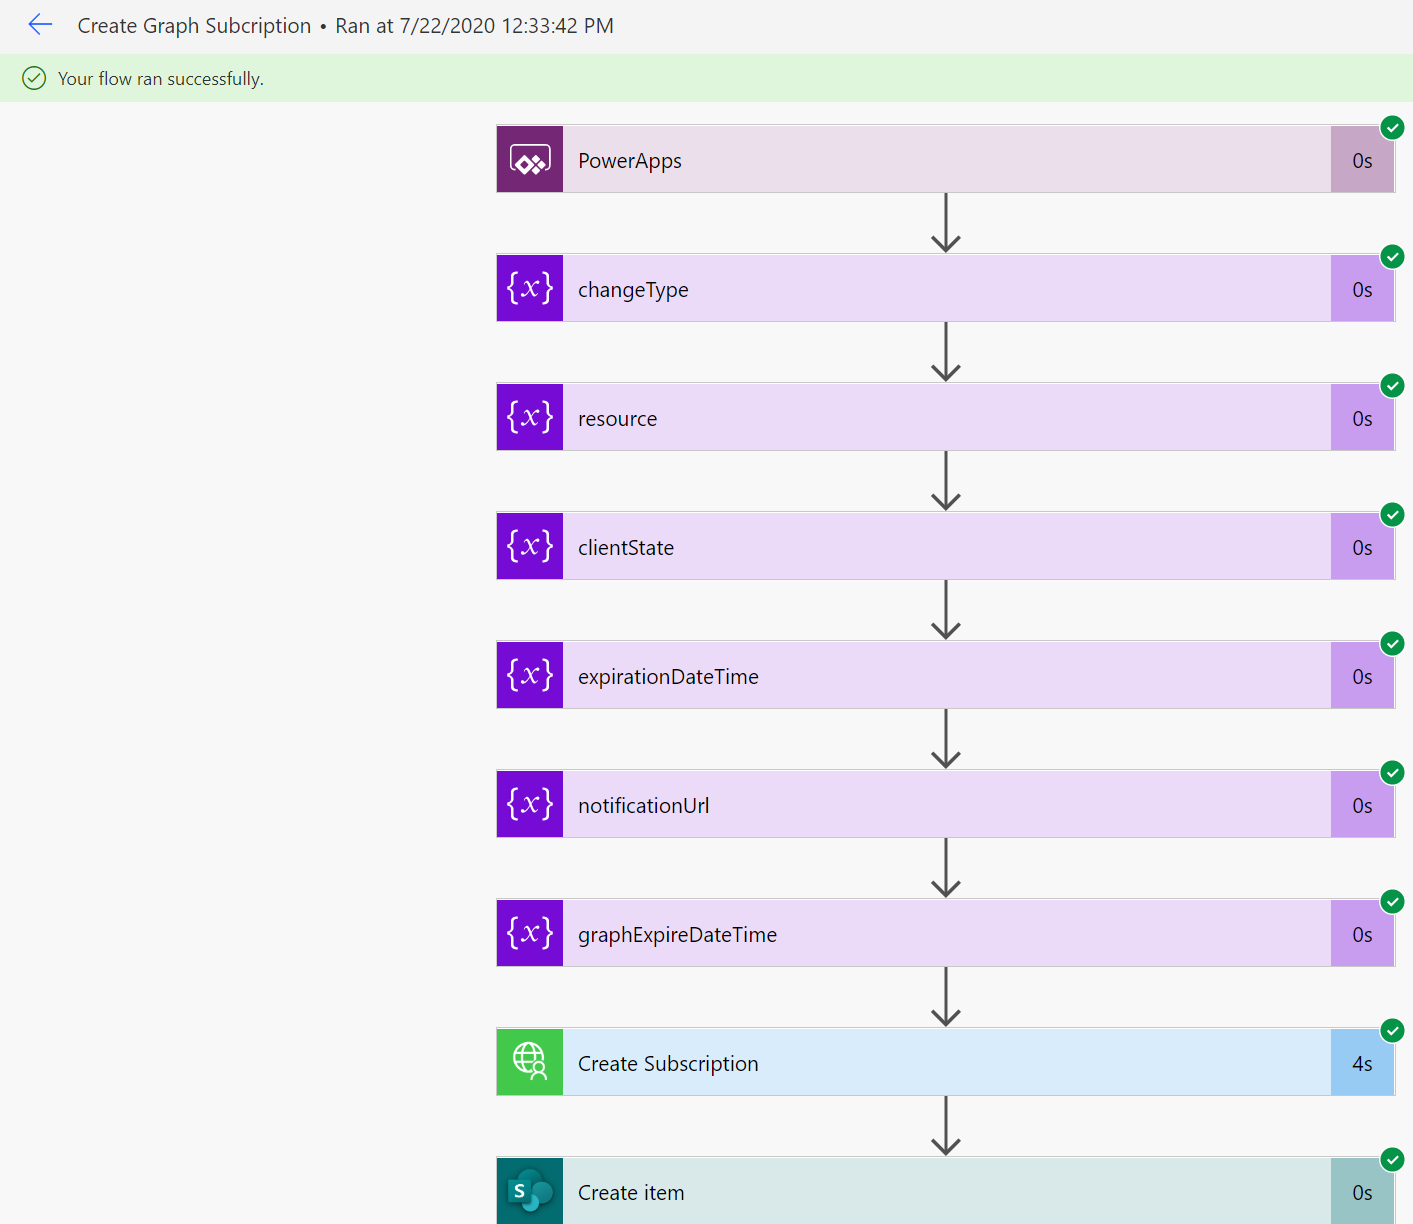
Next, add the action Initialize variable right after the PowerApps trigger. Set the name of the variable and rename the action to the same. Do this 5 times, as we need input of changeType, resource, clientState, expirationDateTime and notificationUrl. Leave the Default value blank at first.
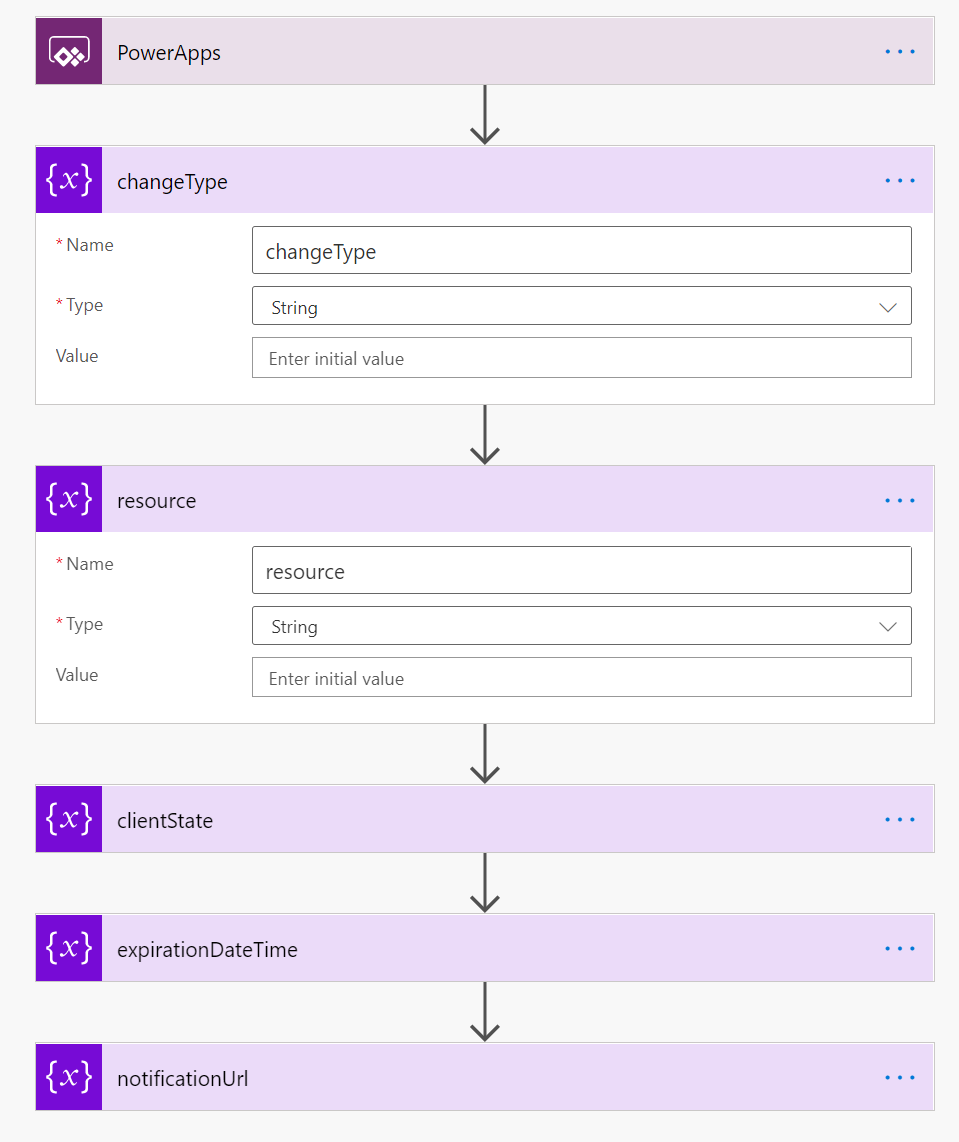
Pro tip: Make sure that you rename the actions before you do the next step: For each variable, for value select Ask in PowerApps:
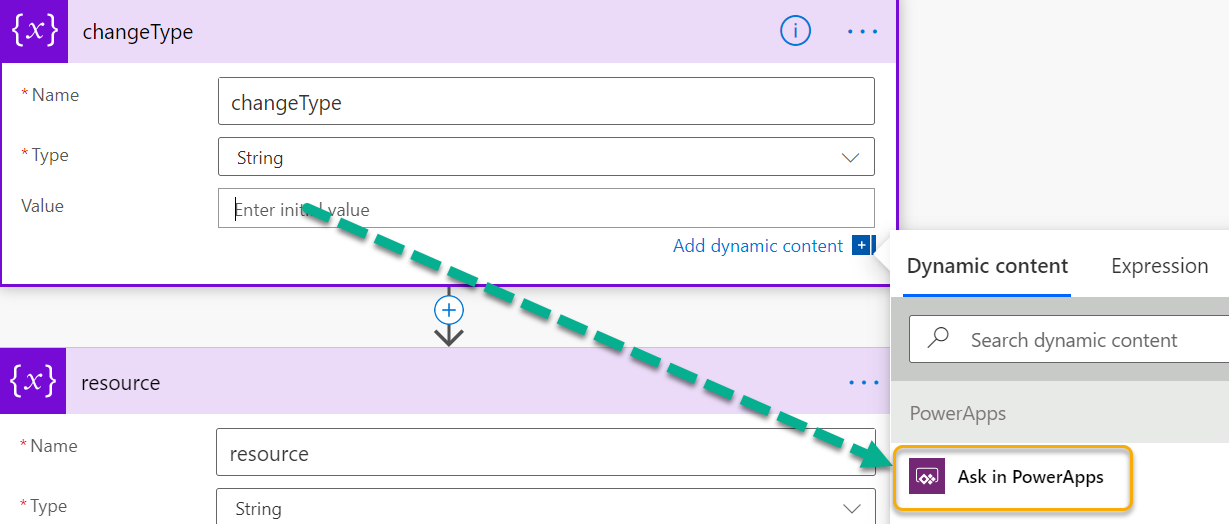
The input parameters will now be named nice and recognizable, which will make it easier when calling it from PowerApps:
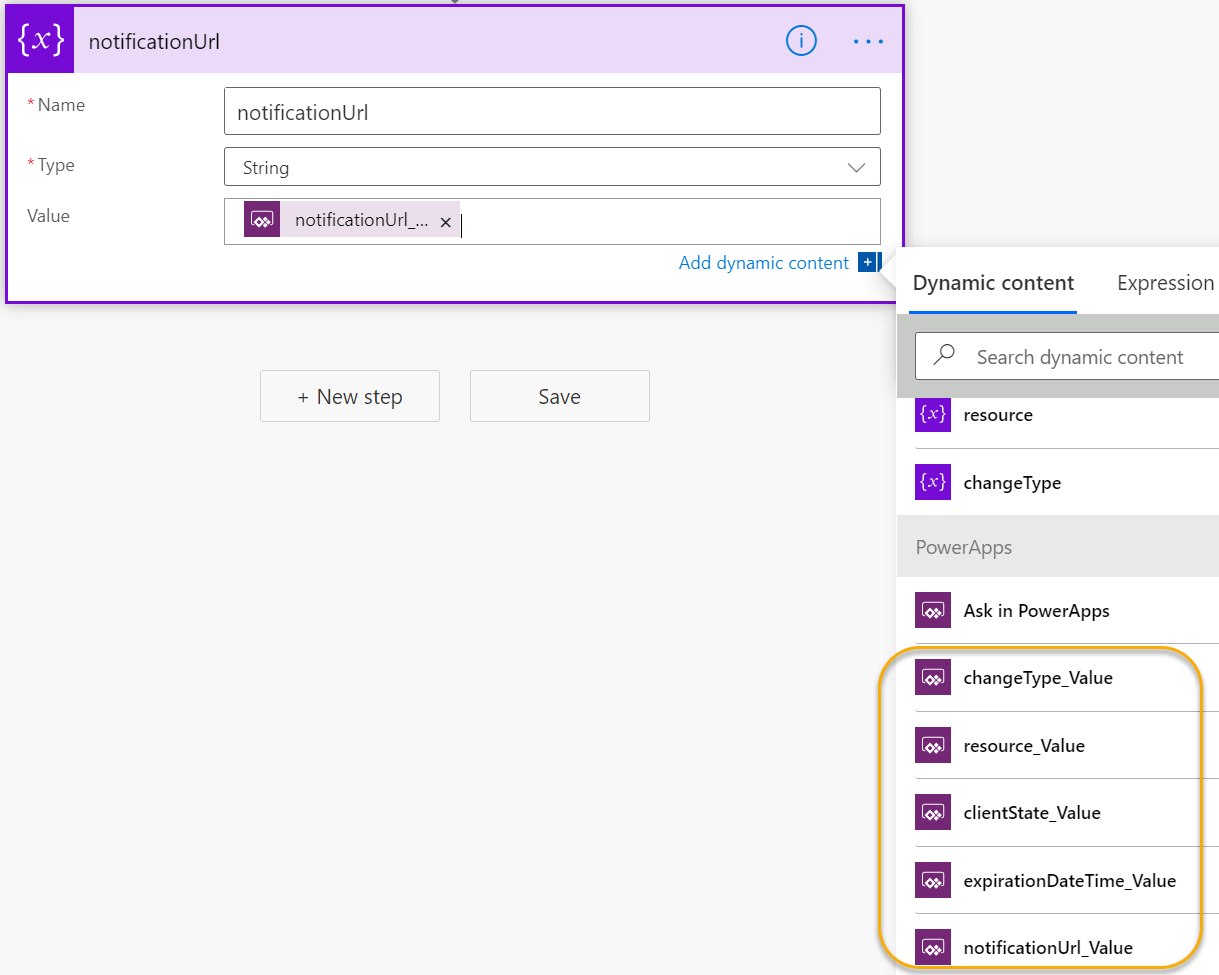
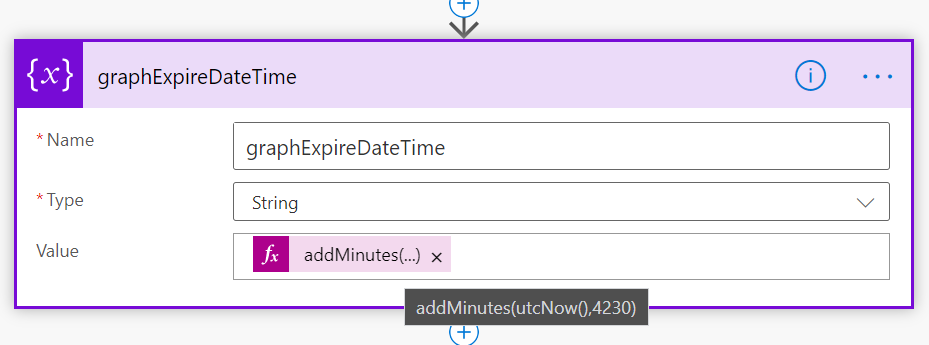
Before we proceed, we need to convert the date time input from PowerApps to ISO8601 format and UTC timezone, which is expected by Graph API. Additionally subscription expiration can only be 4230 minutes in the future from creation. The thinking behind my PowerApp for adding new graph subscriptions is that the expire date time is sometime in the future including any renewals. So for now I need to create a new variable that can take todays date, add maximum of 4230 minutes, and convert it to ISO8601 UTC format.
Add a new initialize variable action. Give it the following name, set type to string and use the following expression for using now as time and adding 4230 minutes in UTC format: addMinutes(utcNow(),4230), like this:
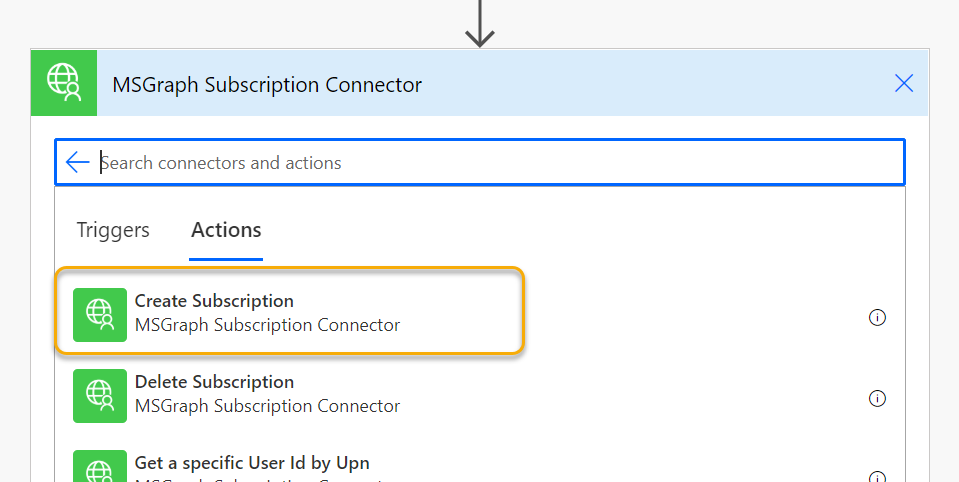
For the next action, select the MSGraph Subscription Connector, and the Create Subscription action:
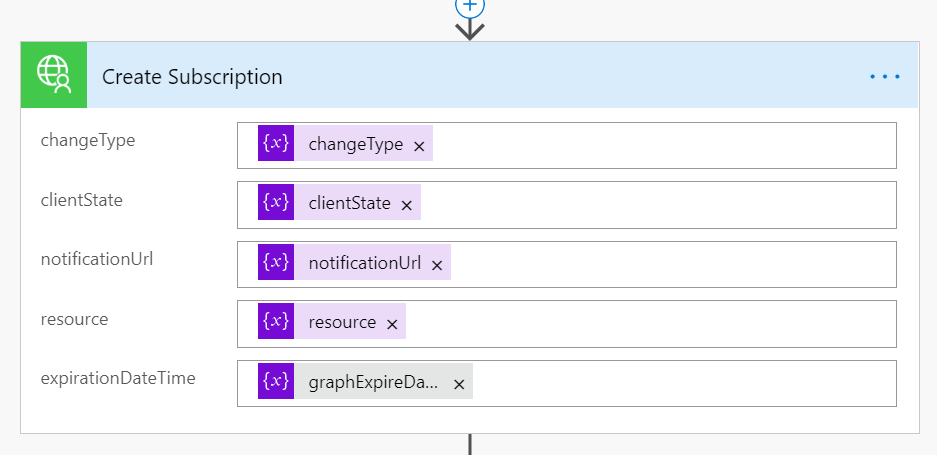
You can now add the variables as input parameters to the create subscription action, remember to use the calculated variable for graph expire date time as shown above:
The next step will be to save this configuration to the SharePoint list. Add an action called “Create item” from the SharePoint connector like below. Select the SharePoint site address and the list name for the configuration source created earlier:
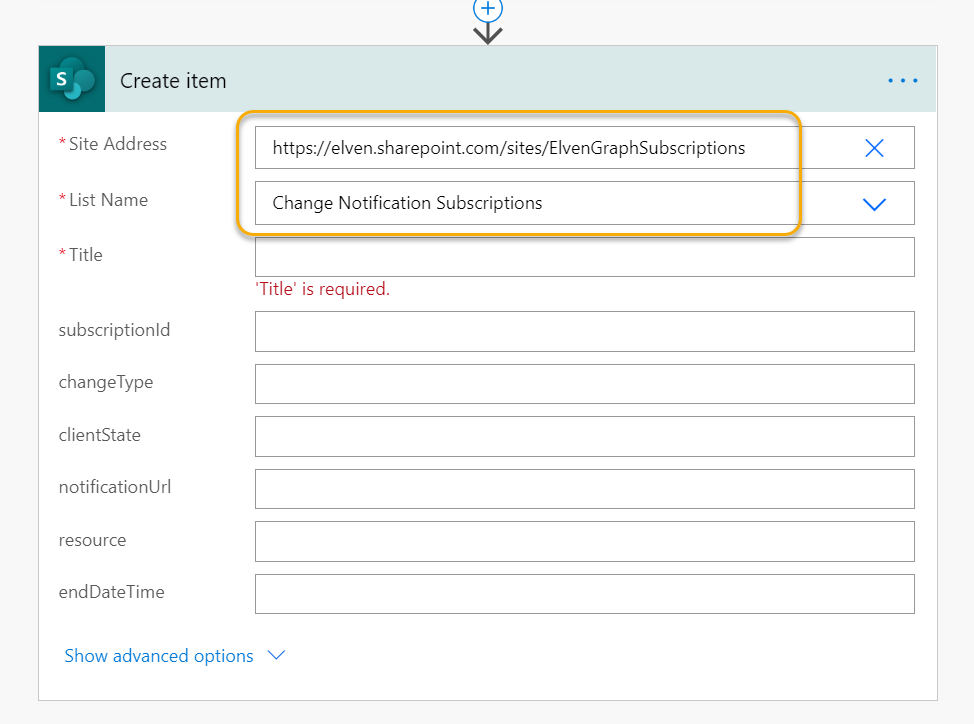
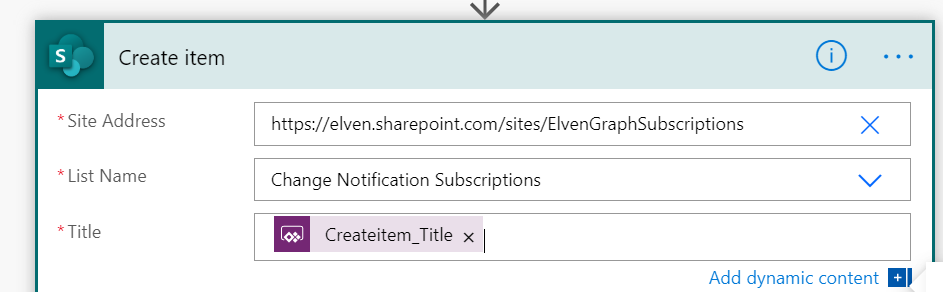
Title is required for adding a list item, let’s call the Ask in PowerApps for this one also:
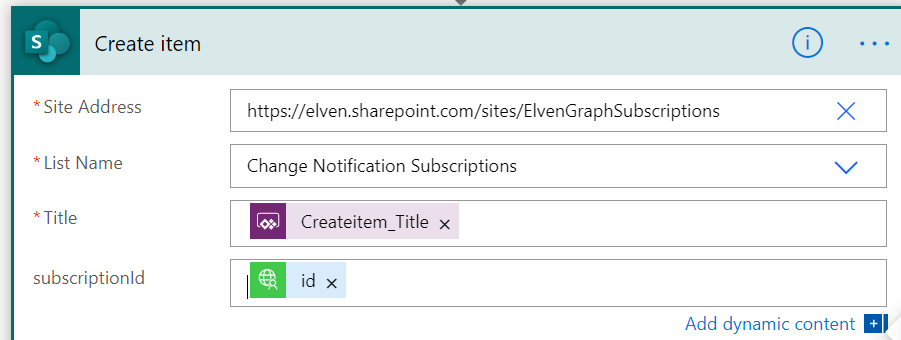
For subscriptionId, select the “id” output from the Create Subscription action:
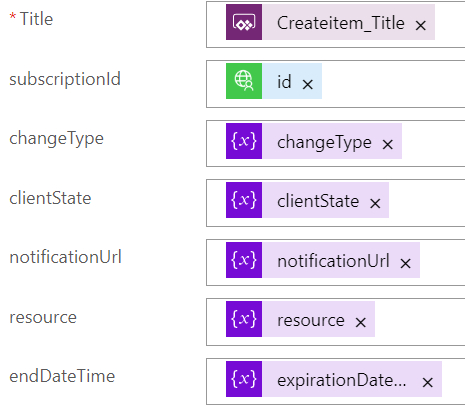
For the rest of the list values, select the initial variables:
The Flow is now ready to be called. I could have added more error handling and custom response if input data is missing, but I will proceed for now with this.
Calling the Flow from PowerApps
Back in the PowerApp, select the “Add Subscription” button, and on the Action menu select “Power Automate”:
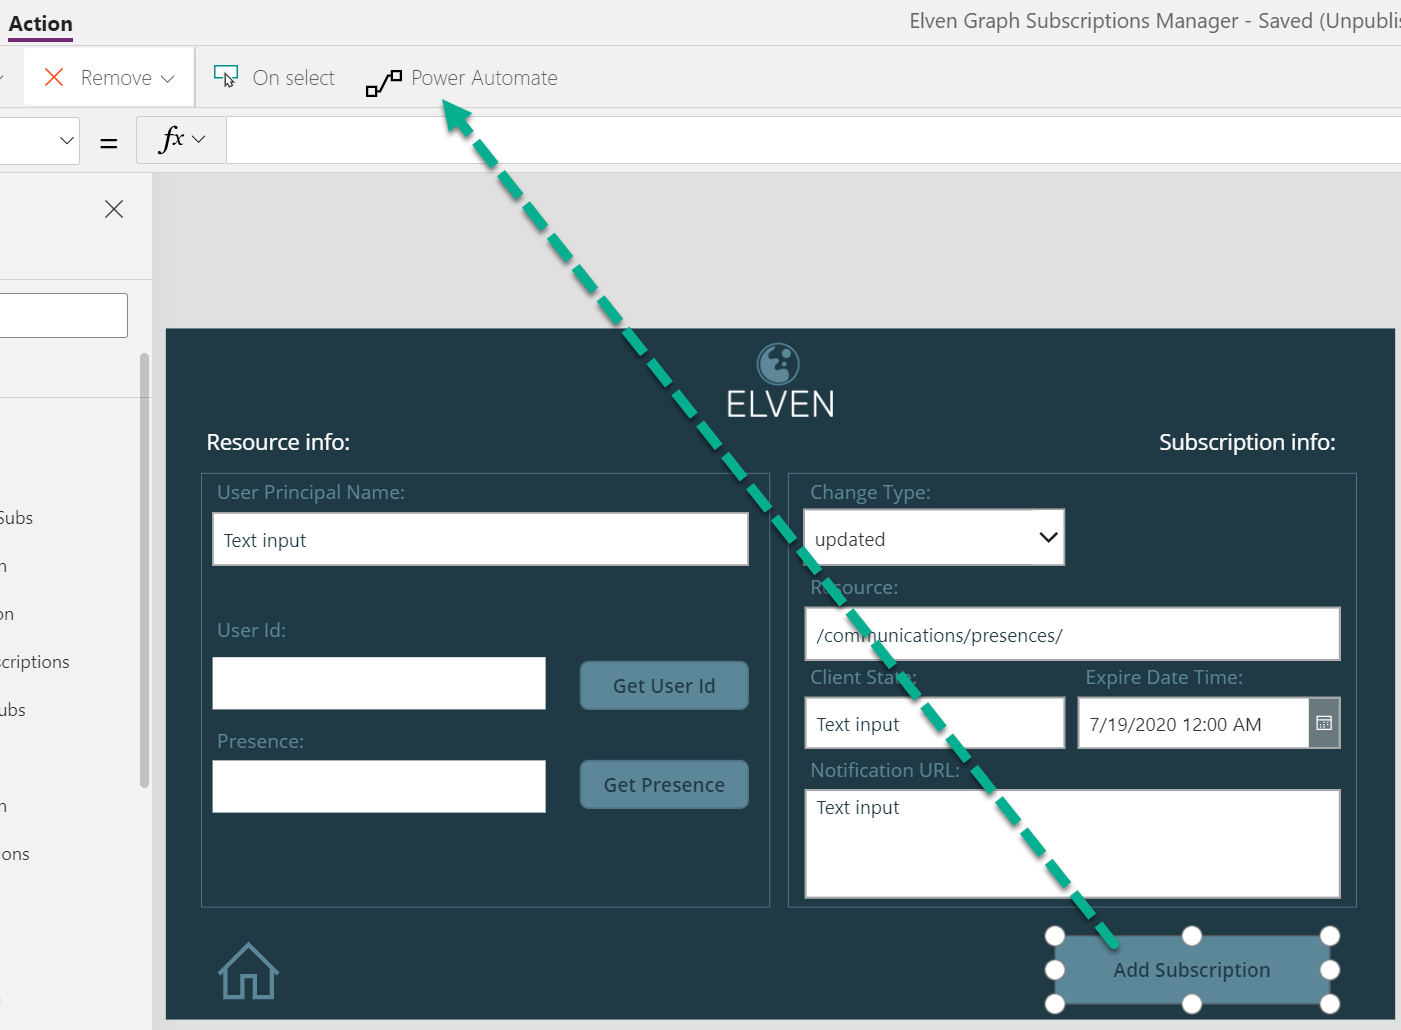
Select the “Create Graph Subscriptions” Flow, which then will be added to the PowerApp, and you are prompted to provide the parameters we defined as “Ask in PowerApps” in the Flow:

Fill in the parameters like below:

Now you can press F5 to preview the app. Type in a UPN, and click to get the User Id. On the right side, make sure that the change type is set to “updated” (if you want to subscribe to presence change) and that the resource is filled in with the correct user id. From the date picker, select any future date, we will later use this date for how long the subscription should be auto-renewed. Last, add the notification URL for the change notifications. Then click on “Add Subscription”, which now should trigger the Flow:
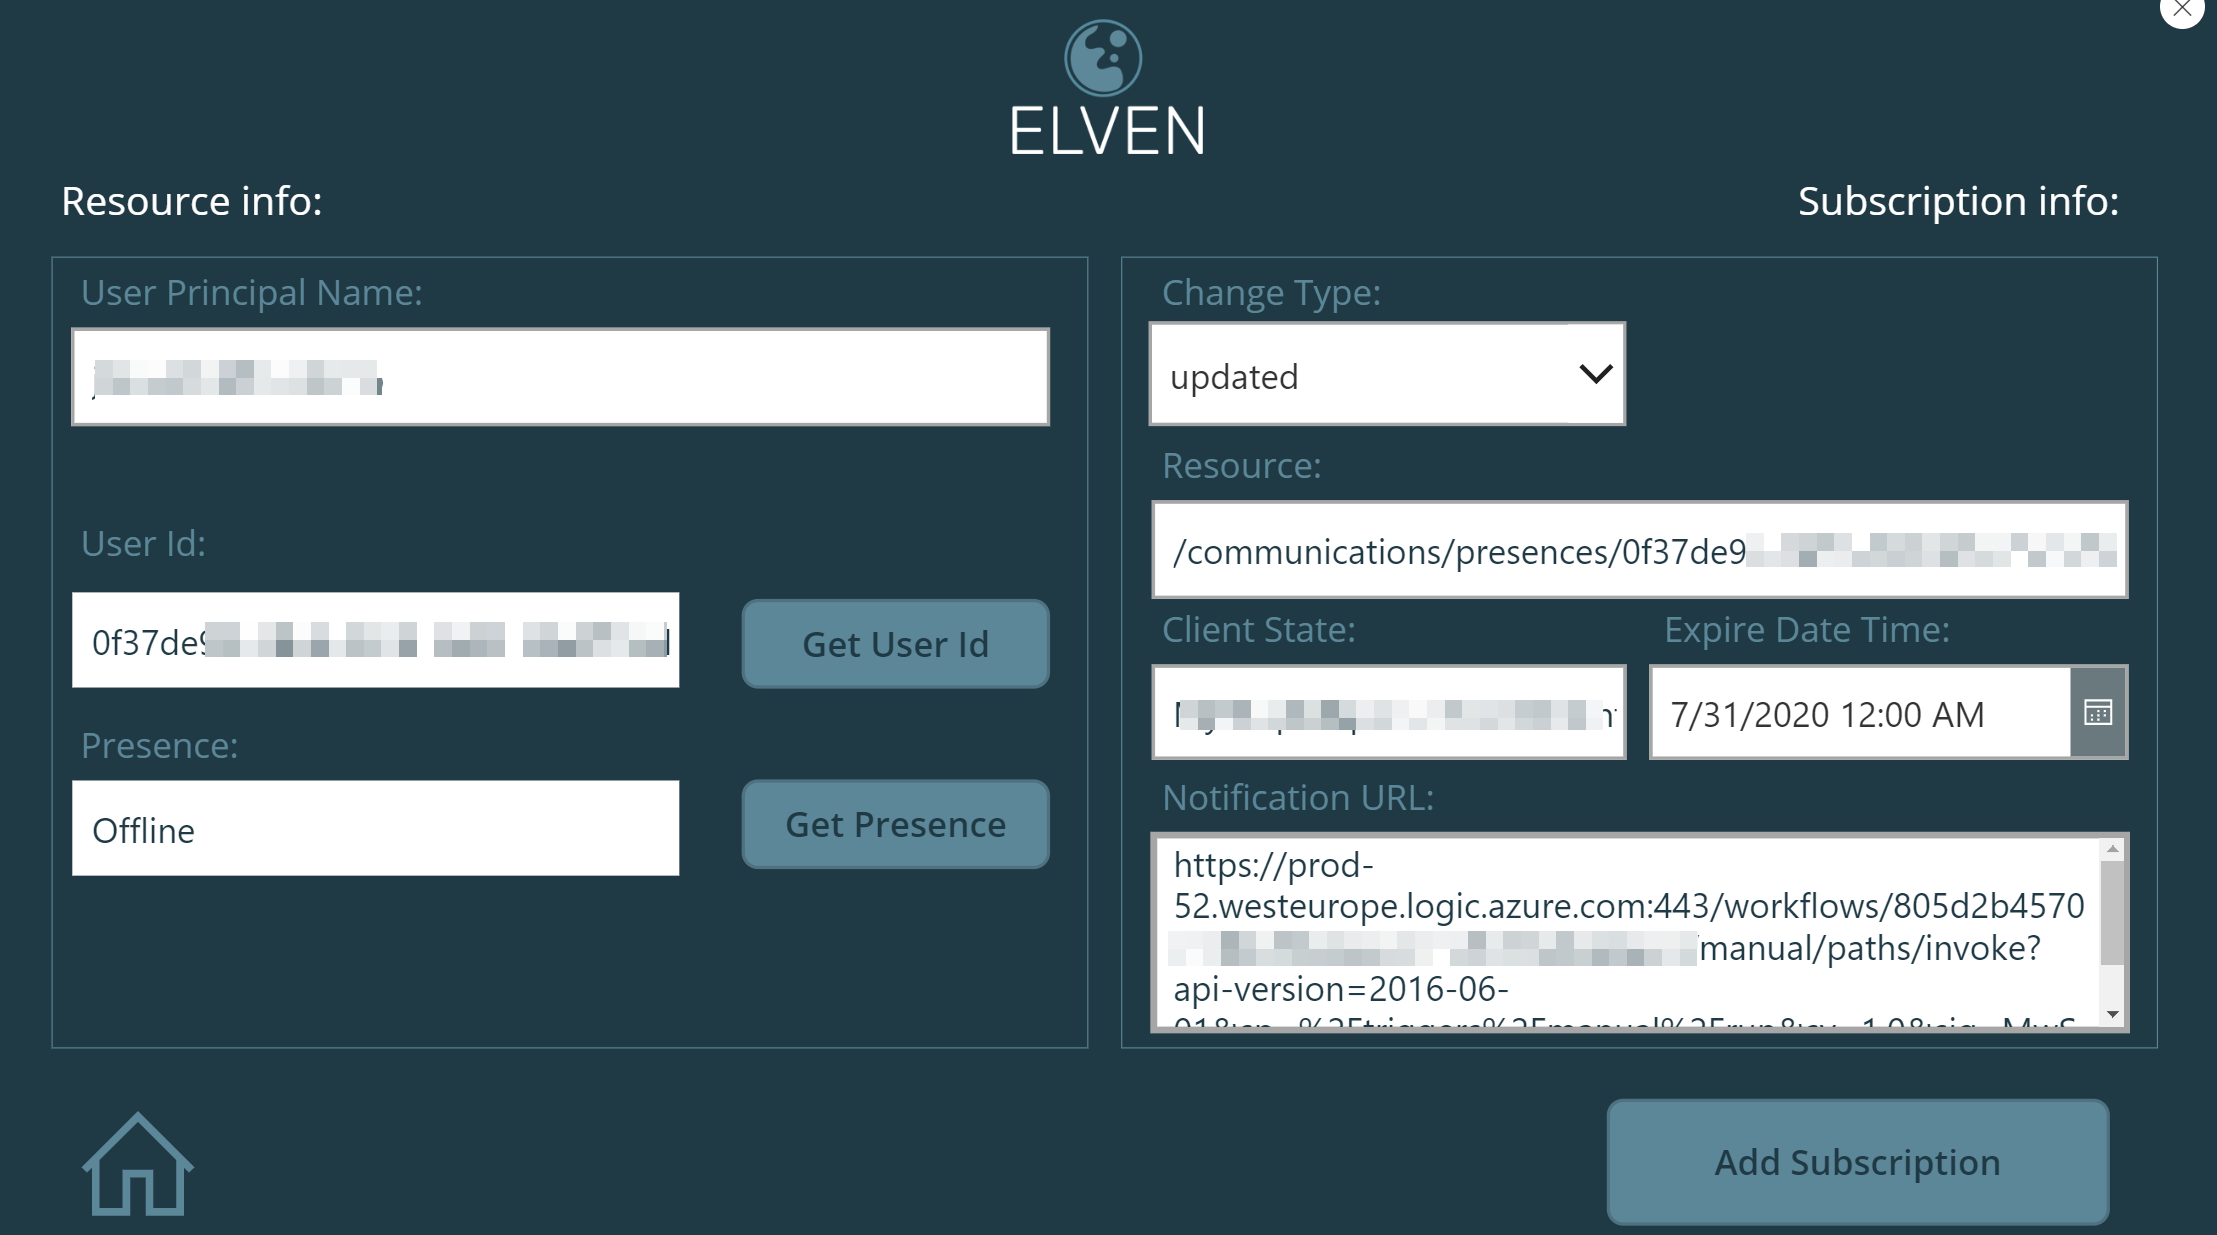
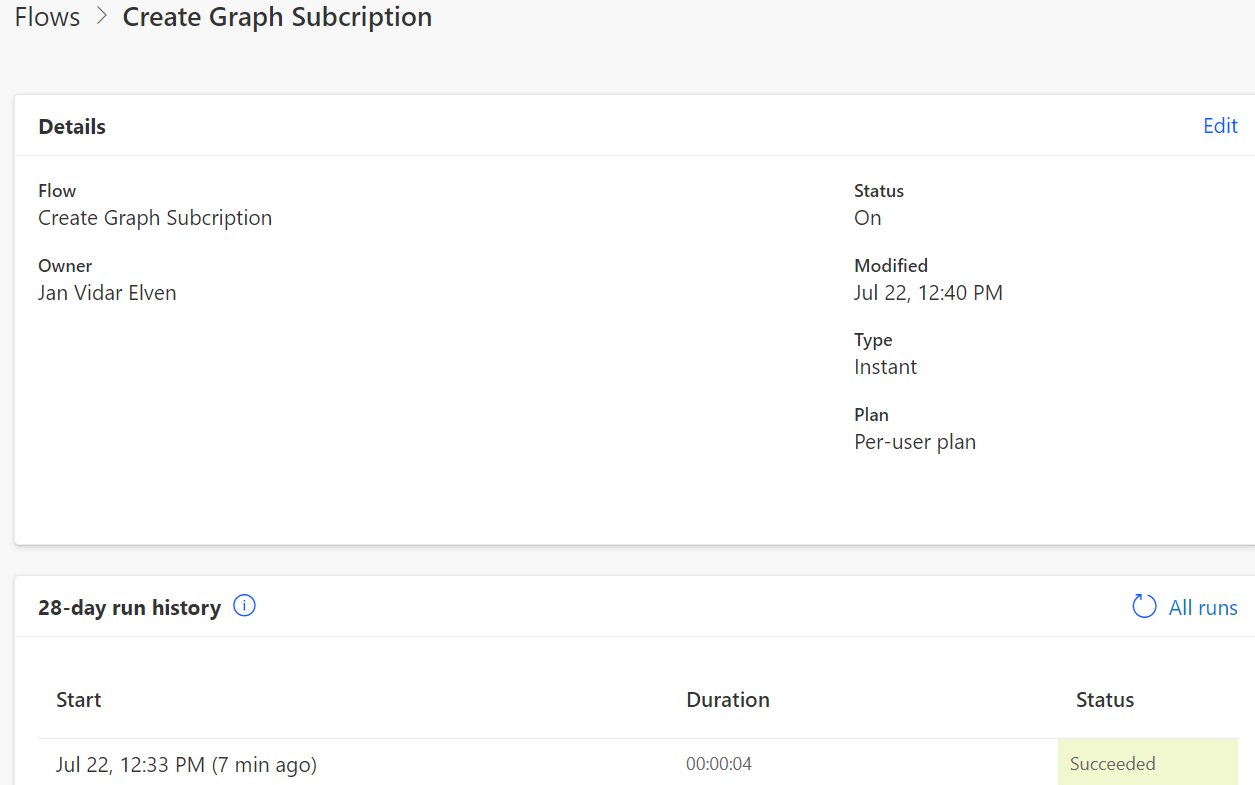
Visually, nothing changes in the PowerApp, so we need to look at the run history for the Flow to see if it ran successfully:
We can also look at the steps that indeed a Graph subscription was created and a list item was added to SharePoint:
While both the Graph subscription and the list has been updated, we need a way to refresh that into the PowerApp. We can use the Refresh(data source) method for the SharePoint list, but that won’t work for the Custom Connector. We will get to that later, let’s start with the SharePoint list. On the refresh icon I added for the main screen, on the OnSelect event, add the following: Refresh(‘Change Notification Subscriptions’);, like this:

If you now preview the app, and click on the refresh button, the right side of the data table should now show a SP list item that has been created (PS! if you have a dark background them, make sure that the data table control has a light background so you can see the text):
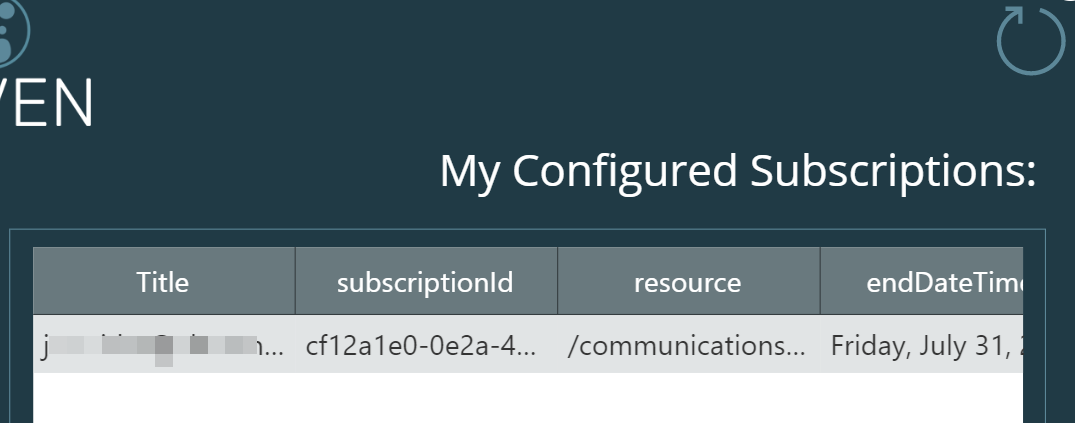
Next, for refreshing the Graph subscriptions via the connector, I will change to use a Collection and the ClearCollect method. On the refresh icon, add a new line like this: ClearCollect(GraphSubscriptions,(MSGraphSubscriptionConnector.GetSubscriptions()).value), as shown below:

Next, change the Items property for the left data table for Graph subscriptions to use this Collection:
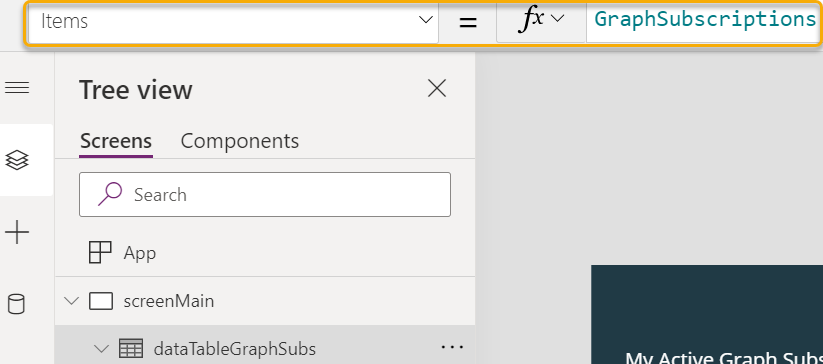
This should now show the active Graph subscriptions like below:

Now that we have a way to manually refresh these two data tables, using the refresh icon, we can add the same logic to the “Add Subscriptions” button:

The above here in clear text, the set(wait, ..) is a nice way to add busy status to PowerApps when potential long running tasks:
Set(wait,true); CreateGraphSubcription.Run(dropDownChangeType.SelectedText.Value,txtResource.Text,txtClientState.Text,dateExpireDateTime.SelectedDate,txtNotificationUrl.Text,(txtUserUpn.Text & " Presence")); Refresh('Change Notification Subscriptions'); ClearCollect(GraphSubscriptions,(MSGraphSubscriptionConnector.GetSubscriptions()).value); Set(wait,!true)
At this point we have the solution ready for creating Graph Subscriptions and refreshing that in the data tables. Next we need to create Flows for updating and deleting subscriptions.